Using The VaultThe Vault is a unique part of the API Fortress platform. Not in terms of the idea, but in the flexibility offered by ours. It allows you to save, edit, and reuse almost anything. This can mean variables, code snippets (think reused authentication flows), or even data!The Vault has two levels, project and global, the project vault will allow use of stored values across any test within that project. Similarly the global vault will allow use of stored values across any test within any project.Using Variables and EnvironmentsIf properly setup any API Fortress test can be run against any environment. You’ll notice that is what we did in our functional test by turning the API URL into three separate parts – protocol, domain, and endpoint. This allows you to set the default location under Data Sets (in the left pane), but also you can override those amounts with the Environments tab (shown below).The Environments panel lets you change anything, not just environments. You can run the test against a certain environment, using a different API key, and datasource. This effectively allows you to have pre-set runtime variable overrides.
To learn more about The Vault and Environments see below links: Learn the Basics, Advanced Use Cases, Environments Basics, Environments Advanced
Now let’s take our existing functional test above and use it as the first step in an integration test. Not only that, but that first API call actually contains an array of product IDs. What if we use it as a datasource, and then iterate on each of them individually?
First, we have the original test:
Now, to do this work requires the use of two new components. The For Each component helps you iterate through a series of data (product IDs in this case), and the Setwhich creates a temporary variable to reference. This should seem fairly straight forward if you have taken some introduction computer science and programming classes.
If you look at the above GUI view of this test, you see that we have our original test. It makes the first API call, and then tests each object in that response. Then, and this is where this becomes an integration test that is using an API to be data-driven, we have that For Each component. You’ll notice that it is referencing the variable that we stored the entire response, then the array, and finally the object we want to use – productsPayload.content.products.pick(2). You’ll notice the .pick(2) we added at the end. This is entirely optional, and what it does is randomly select X number of items from the list we are iterating through. This is useful if the dataset is far too large. Ours is small so we would remove that and allow every product ID to be tested. We will leave it for training purposes.
Next we have the Set component, which is creating a new variable called id. The value of that variable depends on the location the For Each is at in the iteration. Here we set the value as ${_1}. This is saying “using the current location in the array”. Traversing an array is a bit of a larger topic, so we’ll get into that later.
Finally, you see the next GET component. You’ll notice we are using the id that we stored from the first GET call to populate into the second GET call. Each iteration of the For Each will call the current id in the subsequent GET call.
That’s it! What we’ve done here is made an API call to the products list API, then tested that API thoroughly, and then used that API as the datasource for the subsequent GET which dives into each of those product IDs individually. You then want to test that entire API response as well. So here is what that entire test looks like complete in the GUI.
To see the code itself, go to the Examples directory and open the test Retail: Integration – Products.
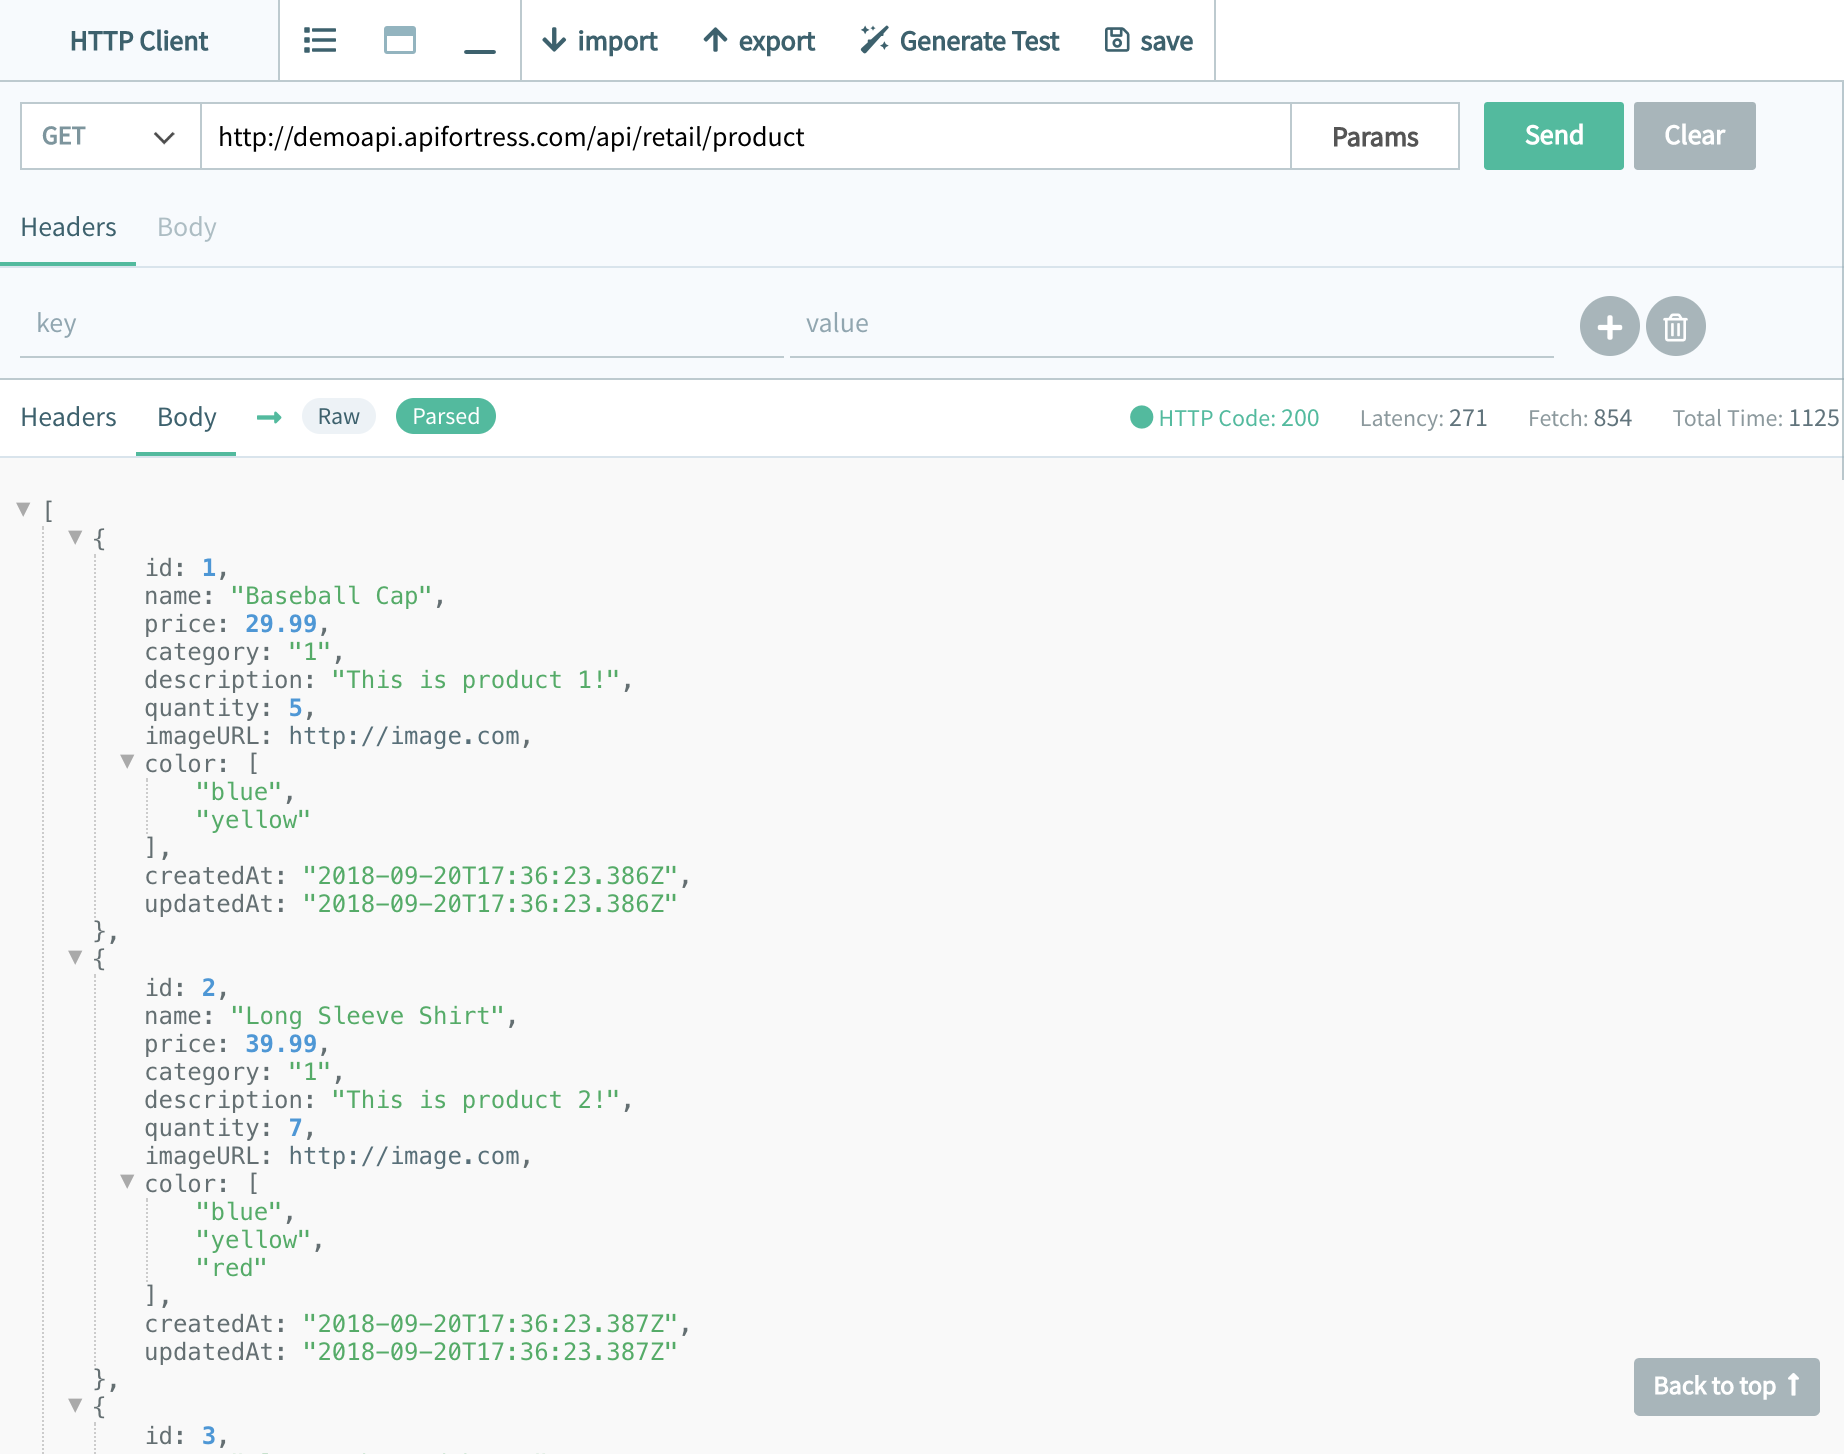
By clicking that link, or using the HTTP composer to make the call, you get this response.
As you can see there are 5 objects, so at minimum we want to make sure they ‘exist.’ What API Fortress allows you to do is validate the objects exist and the data is as expected. This is done using our XML markup language, or our GUI composer.
*Side Bar* API Fortress was specifically built to bridge the gap between testers and engineers, allowing you to write detailed API tests in whatever format you are most comfortable with. Our composer has a drag-and-drop interface that writes the XML code for you, and it also makes it easier to visually understand the nature of the test. With that said, our GUI composer also has a Code View which exposes the underlying XML. This XML can be written or edited in the GUI, or using your own IDE. Meaning that how you want to write and/or edit a test is completely unlocked, so you can work how you are most comfortable.
In the GUI composer view that test looks like this:
If you clicked on Code, or were looking at the test in your own IDE, this is what you’d see:
Now if we look at the code itself carefully, it’s pretty clear what we’re seeing.
The unit section is referencing our markup Namespace file (useful when using your own IDE).
Requirements and Sequence are more advanced feature we can discuss later.
GET is where we make the API call. Within this call it contains the necessary information to make the call (can include more if we’re dealing with oAuth for example). Some important things to note is how we have variablized protocol, domain, and then the chosen endpoint. You’ll also notice the Data Sets section on the left contains those same variables and the data associated. This is hugely important to allow the test to be easily run against any environment. We will go into more detail on that later, but think of it as futureproofing the test from location specificity. Then there is also var=”productsPayload”. What this does is call an API, gets a response, and then stores that entire payload into a variable called productsPayload. This is then referenced in the next assertions.
Note: Performance can be an assertion within the test itself. See this page for more information.
Now we get to the assertions! There are over 70 assertions, so we won’t get into too much detail here, but you can see the next four lines are assertions for each object. Looking at the first we see: <assert-equals expression=”productsPayload.status” value=”200″ comment=””/> This line calls the assert-equals assertion, which validates an object exists and is equal to a chosen amount. Expression references the specific object we are talking about. You’ll notice that it has productsPayload.status. So it’s referencing the status object within the productsPayload variable. Remember, the GET call gets an API response and stores it in that variable. This is useful for when you are dealing with multiple payloads (variables) in an integration test. It’s important to note that with the Generate Test feature you can have this entire structure generated for you in seconds. This frees you to focus on the more important and tricky aspects of writing detailed tests.
Before we dive into this, we suggest watching this quick video on how to login and generate a test in under a minute. Then read the below to get a better understanding of the nuances of the tests themselves.
The above video shows you the method using Generate Test from a payload, and to generate a test from a spec file you can review this page. This includes Postman Collections.