Before we start:
- This tutorial assumes that the reader is familiar with some standard procedures in Kubernetes (creating secrets, creating config-maps etc.) If you are not familiar with these processes, please refer to the Kubernetes documentation.
- The memory settings configured for each container are to be intended as the minimum for a production environment. Wherever applicable, this document will provide settings for a minimum for a test drive environment and optimal for a larger scale production environment
- If your cluster is not allowed to communicate with DockerHub or is incapable of logging in, you will need to manually pull (from DockerHub) and push (to your private repository) images.
- This guide, and the provided starter configuration files will assume the deployment will occur in the apifortress project/namespace. If this is not the case for your setup, please update all current hostname references to apifortress, as in postgres.apifortress.svc or tools.apifortress.svc
- The whole guide and annexed configuration files have been built upon hands-on experience with the Google GCloud Kubernetes service. Some tweaking may be required if using a different provider.
Starting the Main Services
Step 1 – Accessing a private Repository:
Create a secret in Kubernetes that contains the DockerHub user credentials for the account shared with API Fortress. As the repositories on the APIF-side are private, you must submit the same account that was submitted with the configuration survey. You can find further information here
https://kubernetes.io/docs/tasks/configure-pod-container/pull-image-private-registry/
Step 2 – Configure apifortress.yml:
- Ensure that the cluster is capable of supporting the default image memory limits. The apifortress container is set for 8GB of memory. The optimal memory setting is 16GB, the minimum memory setting is 4GB;
- memorySettings (optional parameter) describe the minimum and maxium heap memory the process can use. Xmx should be set to 1/2 of the available memory of the process. You don’t need to tweak these values if you don’t change the overall available memory.
This is an example of the setting to be placed among the environment variables:
        #- name: memorySettings
        #  value: '-Xms1024m -Xmx4098m'
3.
Ensure that any critical key/value pairs have been defined. The configuration files should be populated with the values submitted with the pre-configuration survey, but for safeties sake a user should ensure that
grailsServerUrl has been passed the URL that the instance will be reached through, that
license has been passed a license key and that
adminEmail,
adminFullName and
companyName have been defined. These values are all found in the
env section of the apifortress.yml file. While it is not critical to deployment, it is
strongly recommended that the user configures the mailer service as well. This section in
env:
 - name: apifortressMailEnabled
          value: 'true'
        - name: apifortressMailFrom
          value: info@example.com
        - name: apifortressMailSmtpHost
          value: ''
        - name: apifortressMailSmtpPassword
          value: ''
        - name: apifortressMailSmtpPort
          value: '25'
        - name: apifortressMailStartTLS
          value: 'true'
        - name: apifortressMailSmtpUsername
          value: info@example.com
        - name: apifortressMailUseSES
          value: 'false'
as well as the settings in the
AFMAILER Microservice should be completed to allow the platform to generate emails.
4.
The Load Balancer is the mechanism for communicating with the platform. This can be replaced with a NodePort or Ingress if required, according to the configuration of your system.
# >>> APIFORTRESS loadBalancer service >>>
apiVersion: v1
kind: Service
metadata:
 name: apifortress
spec:
 type: LoadBalancer
 selector:
 app: apifortress
 ports:
 - port: 8080
 loadBalancerIP: '[cluster-ip-change-it]'
 sessionAffinity: ClientIP
---
5.
Ensure that all the ports exposed in the descriptor match your expectations. As a default, the dashboard will run on port 8080 and the liveness probe will test that to determine the service availability.
Step 3 – Configure dependencies.yml
Each of the database services in dependencies.yml has a preconfigured definition for the amount of disk space allocated to the service. These values can be edited to match the available disk space that you wish to provide for said services.
For
MongoDB the proposed memory setting is 8Gi. The minimum is 1Gi, the optimal is 16Gi. However, for the inner workings of MongoDB, any increase in memory will result in better performance.
For
PostgreSQL the proposed memory setting is 1Gi which is considered also an optimal setting. The minimum is 512Mi.
NOTE: volume claims may need to be tweaked based on your service provider.
NOTE: MongoDB will store most of the data produced by the platform, so make sure the disk size is reasonable for your use case
  volumeClaimTemplates:
  - metadata:
      name: mongovol
    spec:
      accessModes:
        - ReadWriteOnce
      resources:
        requests:
          storage: 50Gi
  volumeClaimTemplates:
  - metadata:
      name: psqlvol
    spec:
      accessModes:
        - ReadWriteOnce
      resources:
        requests:
          storage: 1Gi
Step 4 – Start the main services
Start the dependency services by typing:
kubectl create -f dependencies.yml
Once these services have spun up, you can start the main API Fortress platform with:
kubectl create -f apifortress.yml
Step 5 : verify
Access the platform with the URL provided in the apifortress.xml file. Login using the default admin username and the default password (“foobar” – change it ASAP). You should now be able to access the API Fortress Dashboard.
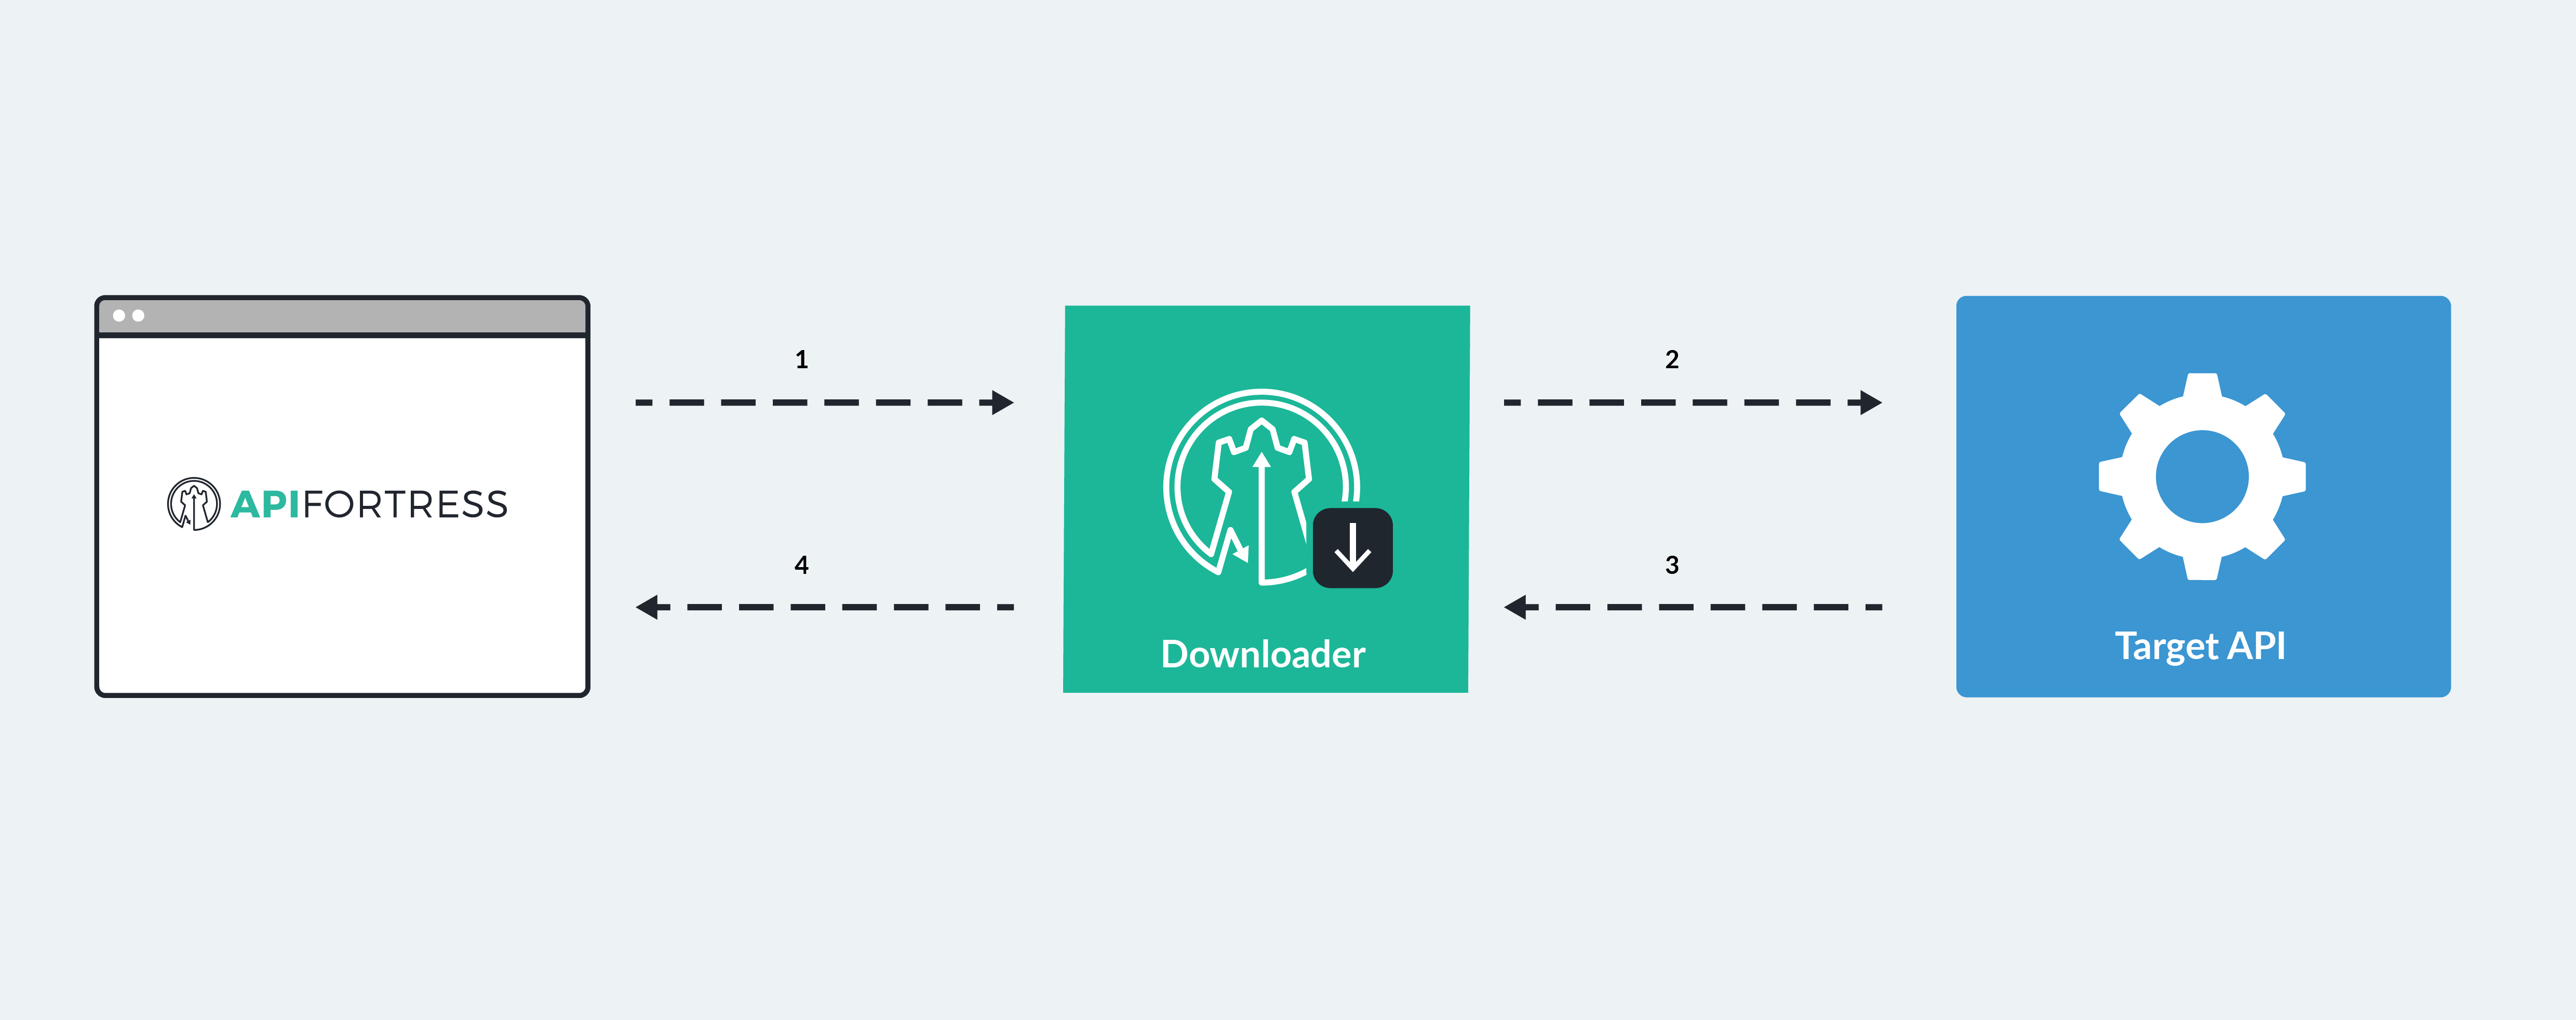
Configure the Downloader
The API Fortress downloader is the agent that retrieves the resources to be tested. Downloaders can be installed in various locations, so factors such as latency and download time can be measured by remote consumers.
Click here to learn more about the Downloaders.
Step 1 – Create a Downloader in API Fortress
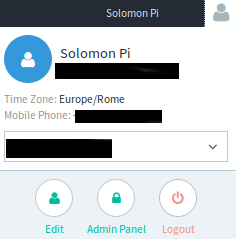
Login to API Fortress with the admin user, access the API Fortress admin panel by clicking the “user” icon in the top right, then click Admin Panel.
Choose “Downloaders” from the list of actions and click on the “Add Downloader” button.
Step 2 – Configure the Downloader
Fill in the following fields:
Name: Write a recognizable name.
Location: A representation of where the downloader is. ie. Chicago
Latitude / Longitude: The geographical position of the downloader.
Last Resort: Check this to make it the default downloader used.
URL: The address of the downloader, followed by port (default 8819) and path /api. In our Kubernetes deployment, our downloader address would be
https://downloader.apifortress.svc:8819/api
API Key, API Secret: Write these two values down for use later.
Step 3 – Move the key and secret values to downloader.yml
Edit the
downloader.yml file and enter the API Key and API Secret provided by the platform in the previous step.
Step 4 – Start the Downloader
Start the downloader with:
kubectl create -f downloader.yml
7. Open the HTTP client from the tools drop-down menu in API Fortress. Attempt to contact a site that is accessible from this server environment. API Fortress should now be able to successfully communicate with other websites.
Configure the Load Agent
Step 1 – Define the maximum users per Load Agent
Users per agent are the maximum number of virtual users that each Load Agent can provide.
It’s important to remember that large numbers of simulated users will require large amounts of hardware resources. Contact your DevOps team to develop a strategy for resource allocation.
- Locate and open the file named application.conf. It is located in the core-server-etc directory.
- Line 14 of this file (fixed-pool-size) should have its value adjusted to match the desired number of maximum users per agent.
- Line 48 of this file (nr-of-instances) should have its value adjusted to match the desired number of maximum users per agent. These two values should match.
Step 2 – Configure config.yml
- Locate and open config.yml. It is located in core-server-etc.
- First, we have to configure the baseURL
- baseURL is located on line 3.
- If the Load Agent and the API Fortress Dashboard are located on the same cluster, then you can replace the baseURL with the internal address and port of the Dashboard on the server.
- If the Load Agent and the API Fortress Dashboard are located on different clusters, you can replace the baseURL with the actual URL of the Dashboard. That is to say, the URL you would use to access it via web browser.
- Next, we need to provide the API Key and Secret.
- Open the main API Fortress dashboard and click the gear icon in the upper right corner to access the settings menu
- Click the “API Keys” option in the left sidebar.
- Click “+API Key”

- Copy the API Key to line 5 of config.yml.
- Copy the Secret to line 6 of config.yml.
Step 3 – Adding the Engine
- The next step is to add the new Engine to API Fortress itself.
- Log into API Fortress as an administrator.
- Click the user icon in the upper right corner, and then click “Admin Panel”
- Click “Engines” on the left side of the screen.
- Click “+Engine”
- Enter the name and location of the Engine.
- The CRN value defaults to a random string. It is very recommended that you change it to something human-readable, but unique in the list. This is the internal name of the engine.
- After modifying the CRN, copy the value to line 11 of config.yml
- Copy the secret to line 12 of config.yml
- Select the Owning Company of the Engine. An Engine must be owned by a single company. The default value (Public Engine) should not be chosen.
- Select “Yes” for “Dedicated to Load Testing“
- Click the green check to save the Engine settings.
Step 4 – Creating the Config-Map
Create a config-map called ‘core-0’ from the
core-server-etc directory.
Step 5 – Tweak the memory settings if necessary
The memory settings may vary a lot based on the number of virtual users the load agent is meant to support. The default 2Gi is generally OK for up to 50 virtual users. It is to be noted that as the process is memory, CPU and network intensive, better results are achieved by introducing more load agents versus increasing the size of each one.
For the very same reason, it’s generally pointless to run multiple load agents in the server.
Step 6 – Start the Load Agent service
Start the load agent service with:
kubectl create -f core-server.yml
Step 7 – Verify the deployment
Access the Load Testing tool by clicking on the Tools dropdown at the top of the view in API Fortress. The Load Agent that you just deployed should be visible on the right side of the screen.
General tweaks
HTTPS to HTTP
If you’re having the dashboard go through a gateway, it is likely that you will want to run the container in HTTP and the gateway in HTTPS.
Therefore the grailsURL in the configuration will need to be in HTTPS. At this point the API Fortress dashboard will perform a hard check on the protocol at each request which will always appear as in HTTP, causing an illegal redirect. This is done for security reasons.
To overcome this issue you will need to override one configuration file in the Tomcat configuration via a configMap. This is not the default in the API Fortress Dashboard image on purpose, again, for security reasons.
We will assume that the gateway will forward the x-forwarded-proto header.
The file to be added is located in the deployment files you have been provided:
/tomcat_conf/context.xml
- Tweak the file according to your needs
- Create a config map for the single file named tomcat-context
- Change the apifortress service in the apifortress.xml file as follows:
Add this fragment within the containers element:
volumeMounts:
 - name: tomcat-context
 mountPath: /usr/local/tomcat/conf/context.xml
 subPath: context.xml
- Add this fragment in the spec element:
volumes:
 - name: tomcat-context
 configMap:
 name: tomcat-context
By doing so, we will have API Fortress to accept the original protocol as the actual protocol being used.