
Step 0 (Not for all users) – Activate the Node Container
Open the docker-compose.yml in the main API Fortress directory. It can be located at /core/bin/docker-compose.yml- Paste the following code snippet in after the #RABBITMQ section and before the #APIFORTRESS DASHBOARD section:
#NODE
apifortress-node:
   image: theirish81/uitools
   hostname: node.apifortress
   networks:
      - apifortress
   domainname: node.apifortress
   labels:
      io.rancher.container.pull_image: always
- In the links section of the #APIFORTRESS DASHBOARD configuration, add the following line:
- apifortress-node:node.apifortress
- Save and close the docker-compose.yml.
- Open the start_all.sh file in a code editor. It is also located in /core/bin.
- Copy and paste the following and overwrite the entire contents of the file:
#!/bin/bash
sudo docker-compose up -d apifortress-postgres
sleep 5s
sudo docker-compose up -d apifortress-mongo
sleep 5s
sudo docker-compose up -d apifortress-rabbit
sudo docker-compose up -d apifortress-node
sleep 30s
sudo docker-compose up -d apifortress
sleep 1m
sudo docker-compose up -d apifortress-mailer
sudo docker-compose up -d apifortress-scheduler
sudo docker-compose up -d apifortress-connector
- Your API Fortress instance can now utilize the API Fortress Node Container which powers Load Testing.
Step 1 – Unzip the provided file (core-server.tgz)
First, unzip the provided file.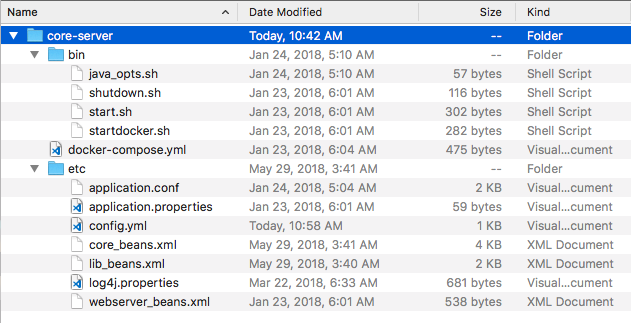
Step 2 – Define the maximum users per Load Agent
Users per agent are the maximum number of virtual users that each Load Agent can provide. It’s important to remember that large numbers of simulated users will require large amounts of hardware resources. Contact your DevOps team to develop a strategy for resource allocation.- Locate and open the file named application.conf. It is located in core-server/etc.
- Line 14 of this file (fixed-pool-size) should have it’s value adjusted to match the desired number of maximum users per agent.
- Line 48 of this file (nr-of-instances) should have it’s value adjusted to match the desired number of maximum users per agent. These two values should match.
Step 3 – Configure Config.yaml
- Locate and open config.yaml. It is located at core-server/etc.
- First, we have to configure the baseURL
- baseURL is located on line 3.
- If the Load Agent and the API Fortress Dashboard are located on the same server, then you can replace the baseURL with the internal address and port of the Dashboard on the server.
- If the Load Agent and the API Fortress Dashboard are located on different servers, you can replace the baseURL with the actual URL of the Dashboard. That is to say, the URL you would use to access it via web browser.
- Next, we need to provide the API Key and Secret.
- Open the main API Fortress dashboard and click the gear icon in the upper right corner to access the settings menu
- Click the “API Keys” option in the left sidebar.
- Click “+API Key”

(Click image for GIF of procedure)
- Copy the API Key to line 5 of config.yml.
- Copy the Secret to line 6 of config.yml.
Step 4 – Adding the Engine
- The next step is to add the new Engine to API Fortress itself.
- Log into API Fortress as an administrator.
- Click the user icon in the upper right corner, and then click “Admin Panel”
- Click “Engines” on the left side of the screen.
- Click “+Engine”
- Enter the name and location of the Engine.
- The CRN value defaults to a random string. You must change it to something human-readable. This is the internal name of the engine.
- After modifying the CRN, copy the value to line 11 of config.yml
- Copy the secret to line 12 of config.yml
- Select the Owning Company of the Engine. An Engine must be owned by a single company. The default value (Public Engine) should not be chosen.
- Select “Yes” for “Dedicated to Load Testing“
- Click the green check to save the Engine settings.
(Click image for GIF of procedure)