01. Create a Test Quickly

Introduction

You should have received an email with your login credentials from the platform. If you haven’t, please email us at support@apifortress.com.

If you’d like to trial mocking or load testing, please contact support or your API Fortress representative.

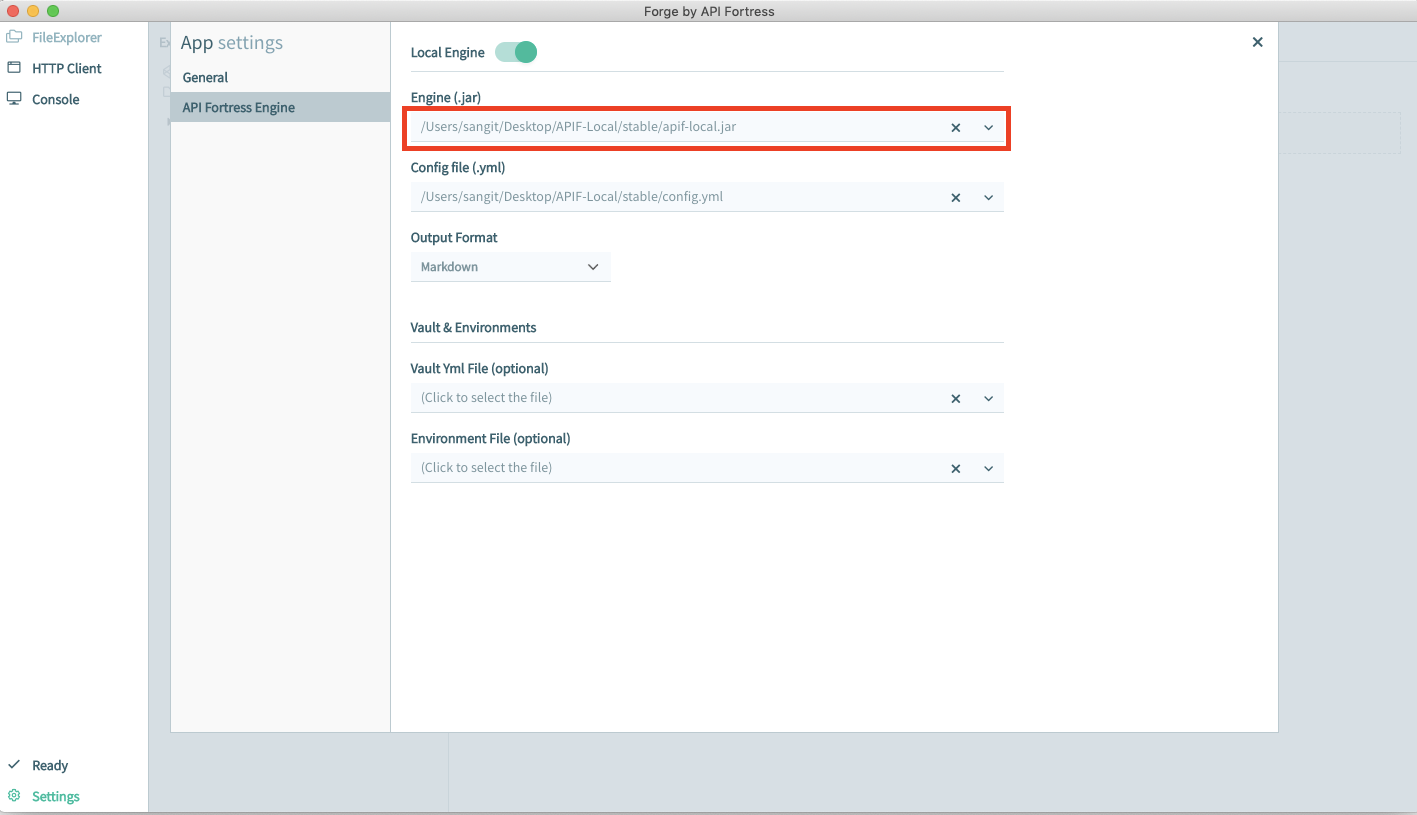
NOTE: API Fortress may be deployed in our hosted cloud or self-hosted/on-premises via a container behind your firewall. Maintain complete test data ownership. Learn more about the differences between the two types of deployments. 

Below, we will show you how to quickly create a test using an e-commerce API.

Let’s get started!

Step 1: Create a Project

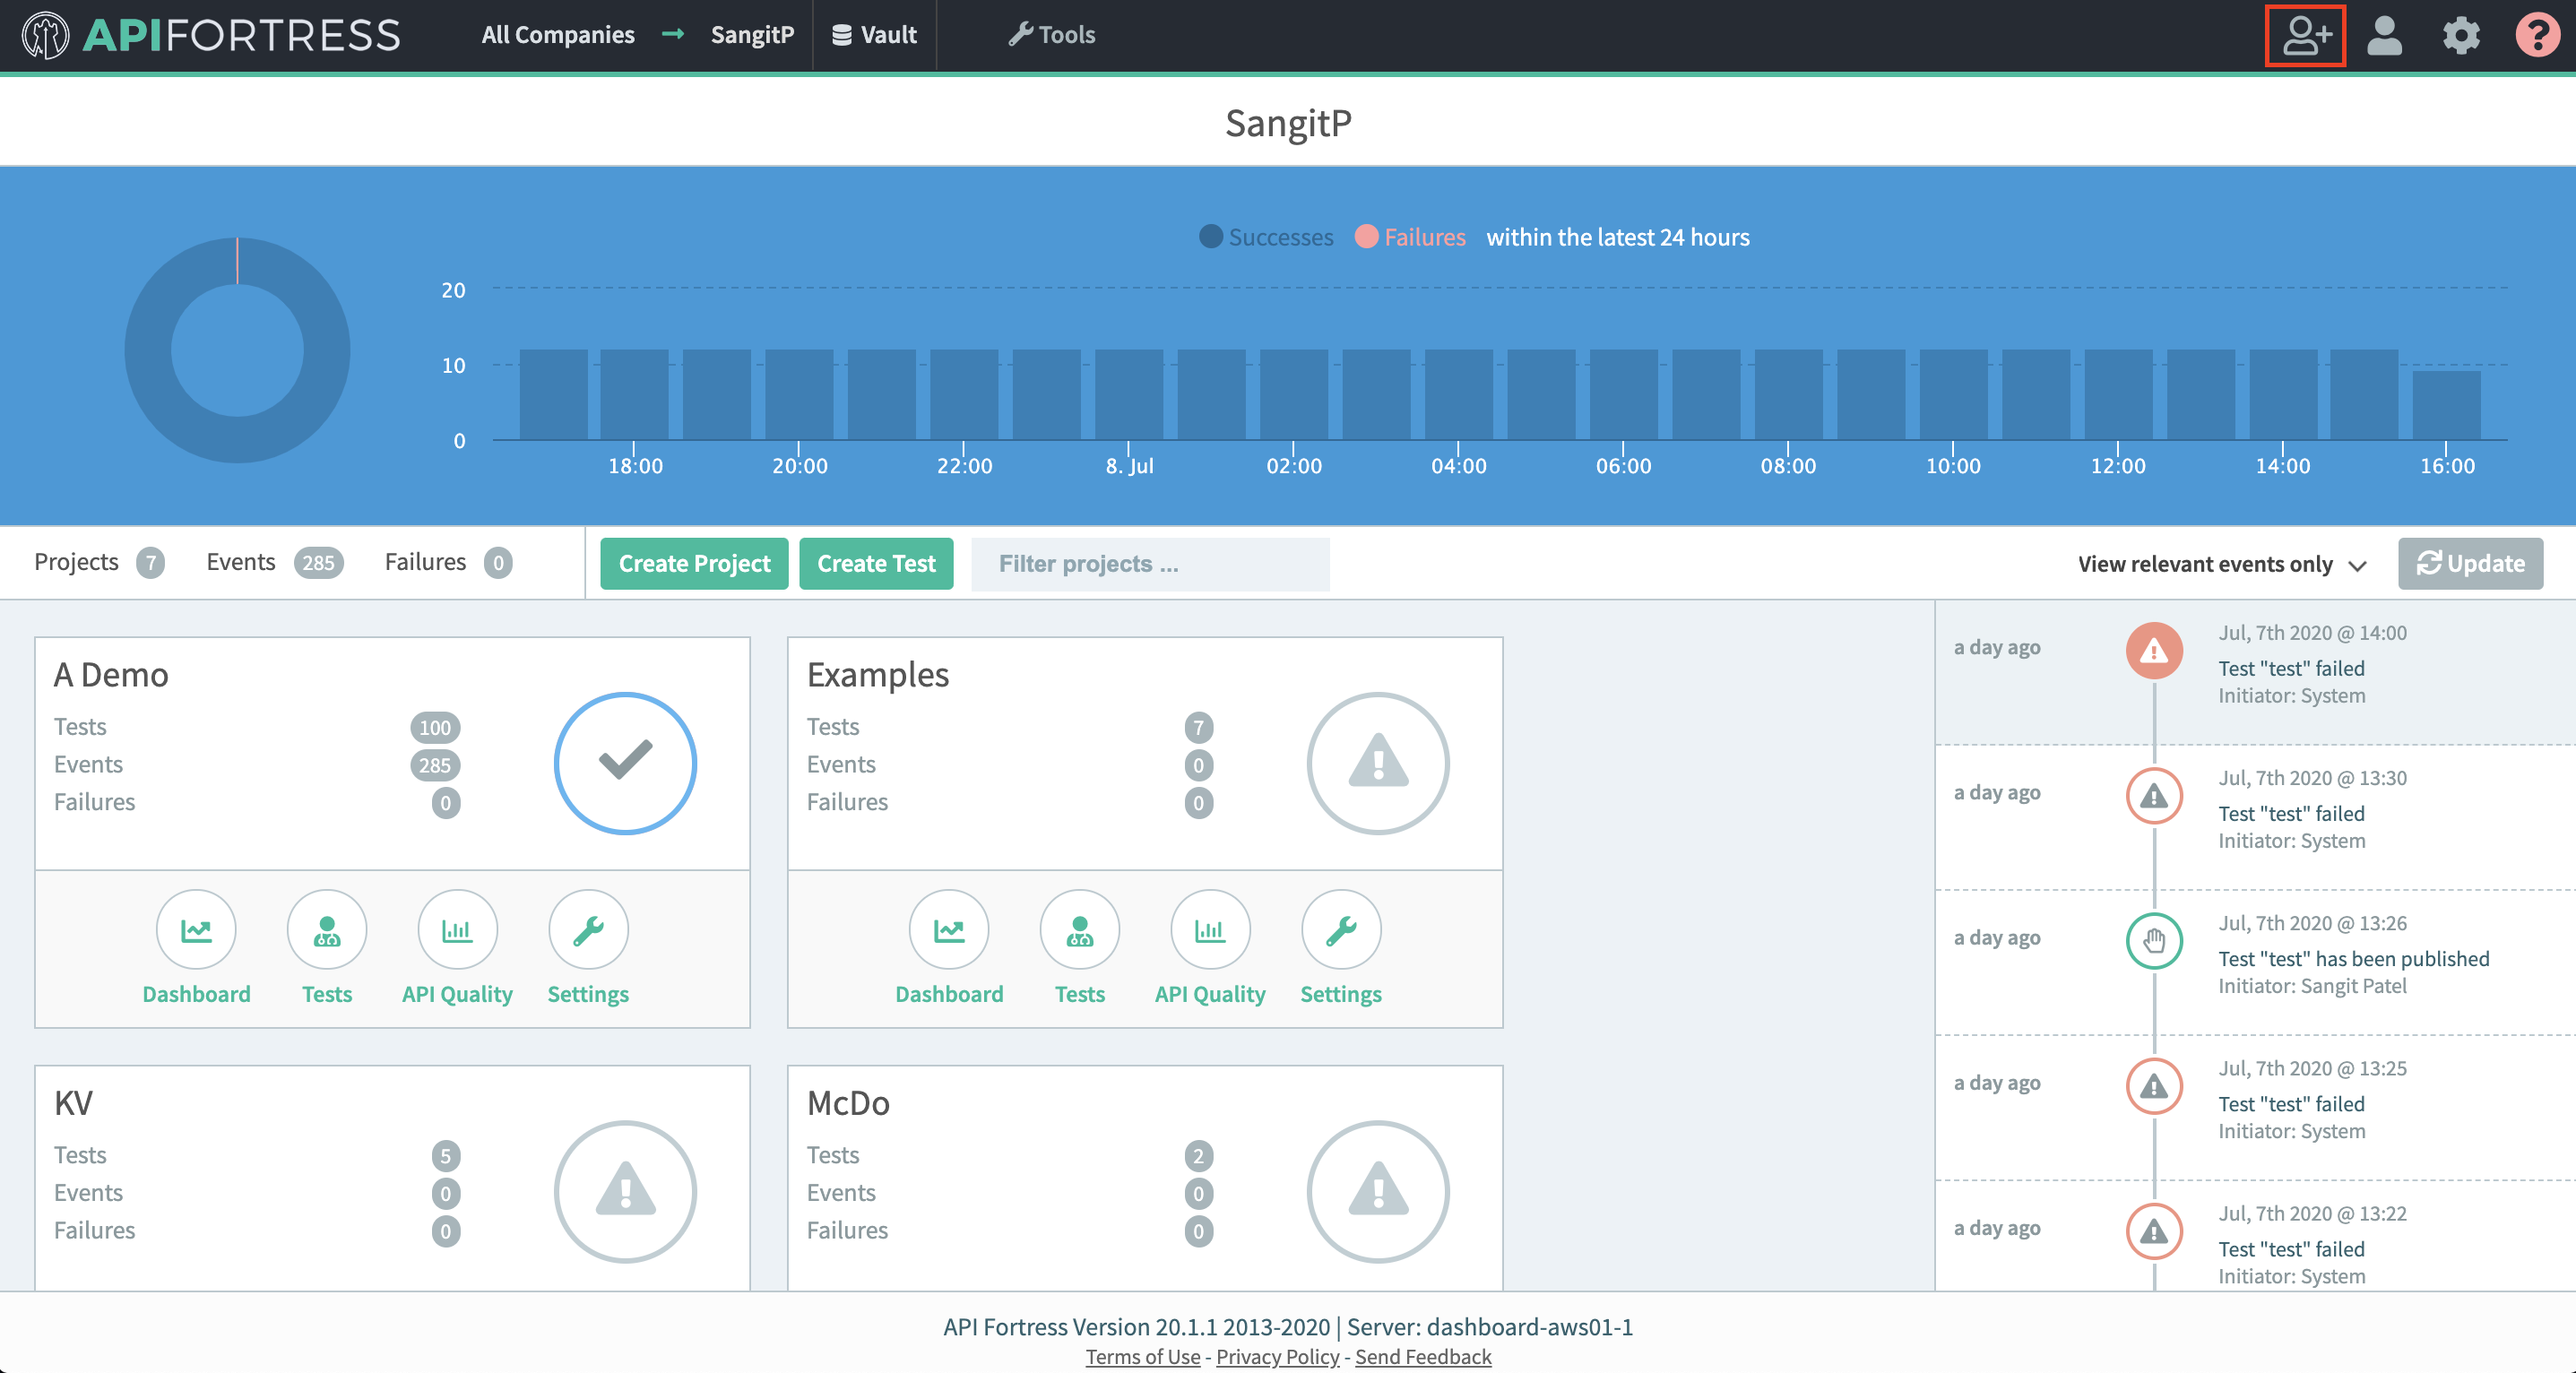
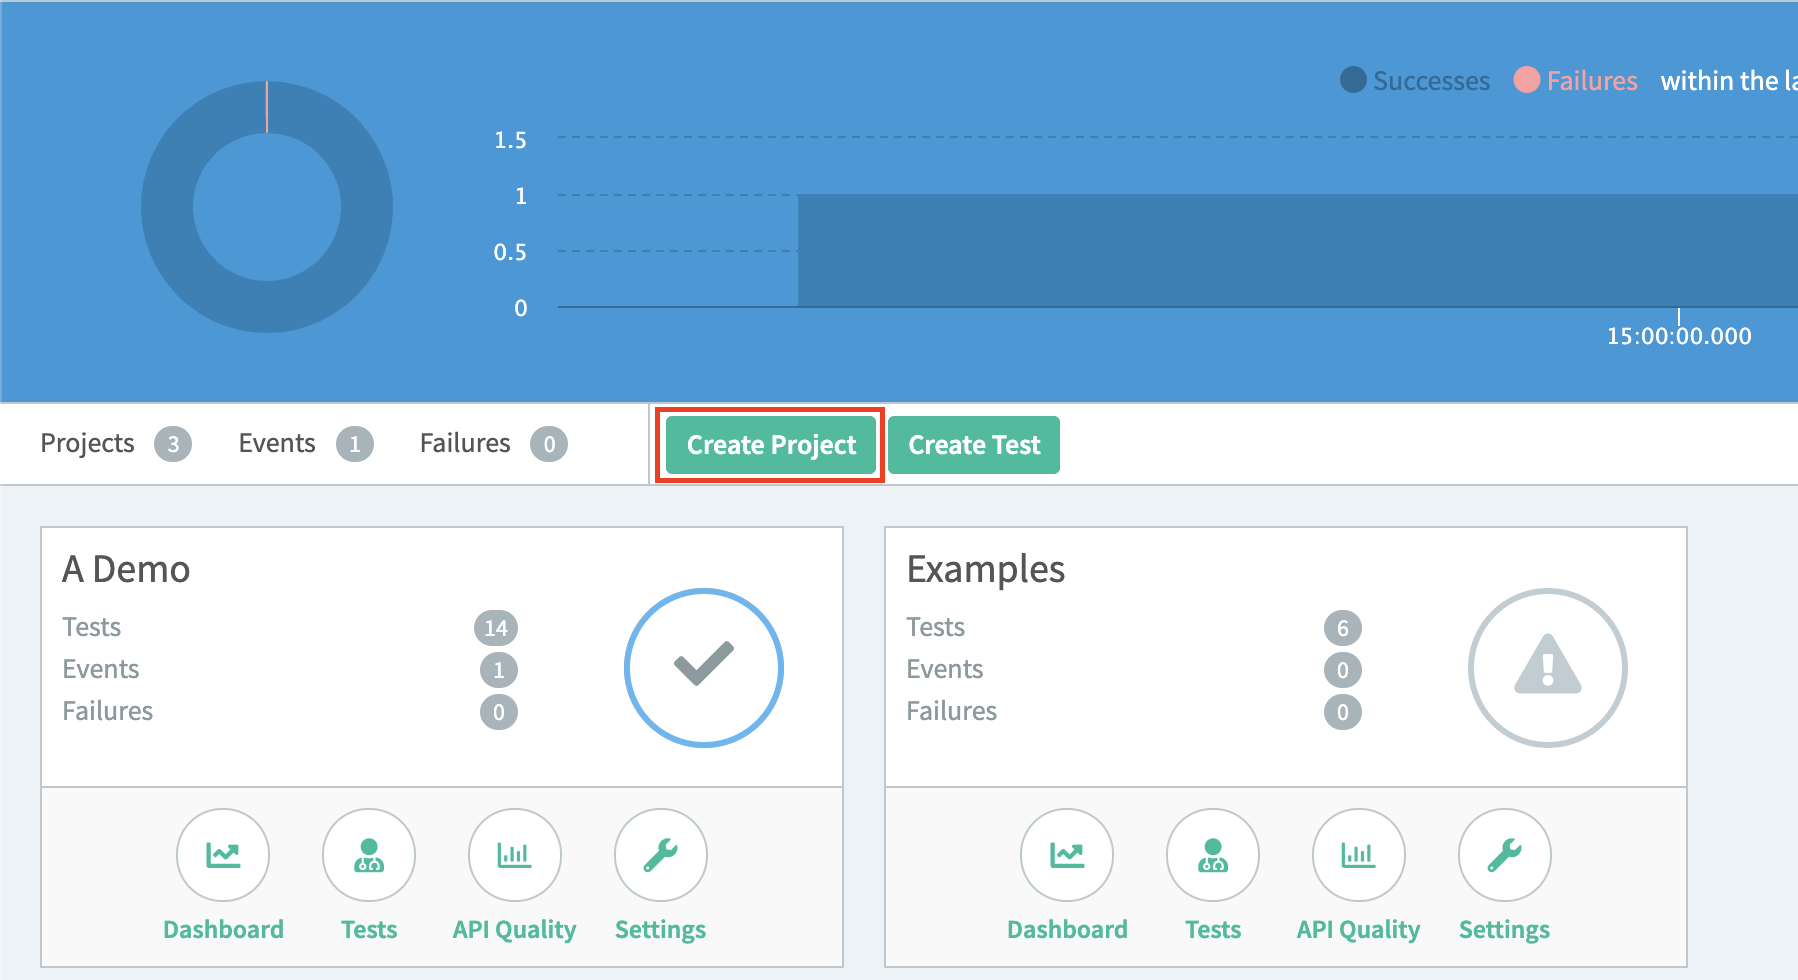
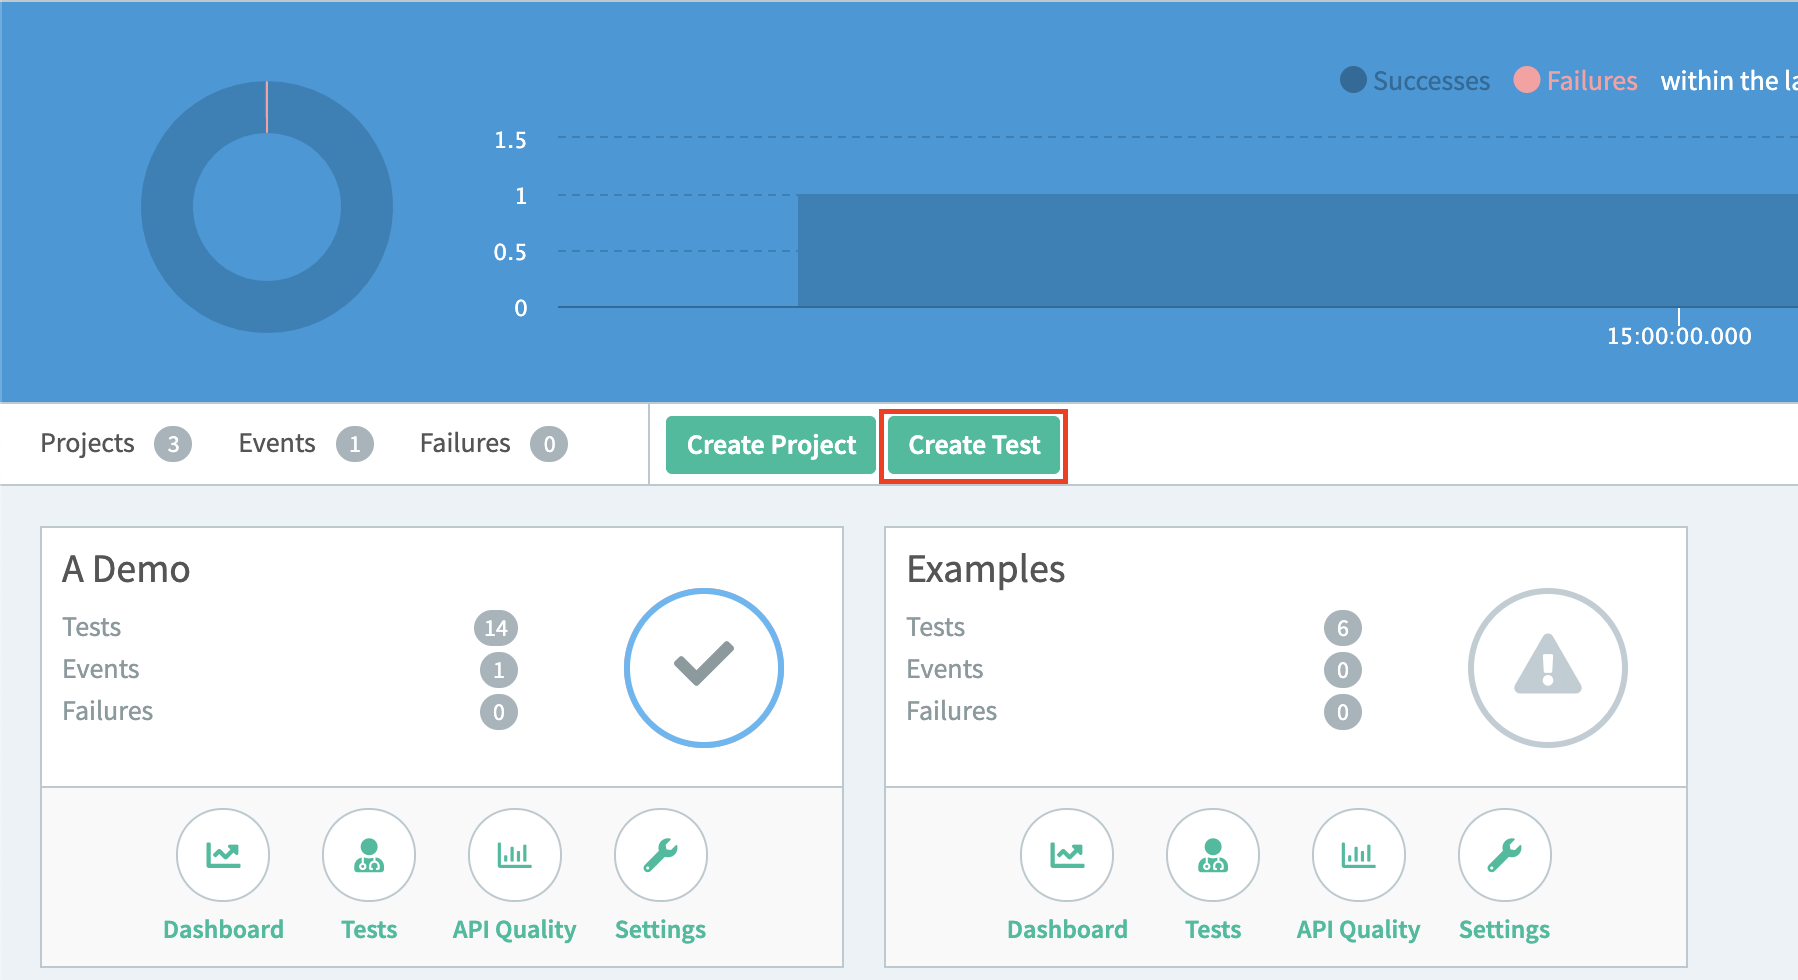
When you first log in, you are introduced to the Company Dashboard. The company already contains a project called Examples with some example tests. Click “Create Project”.

Step 2: Create a Test

Step 3: Choose Your Test Creation Method

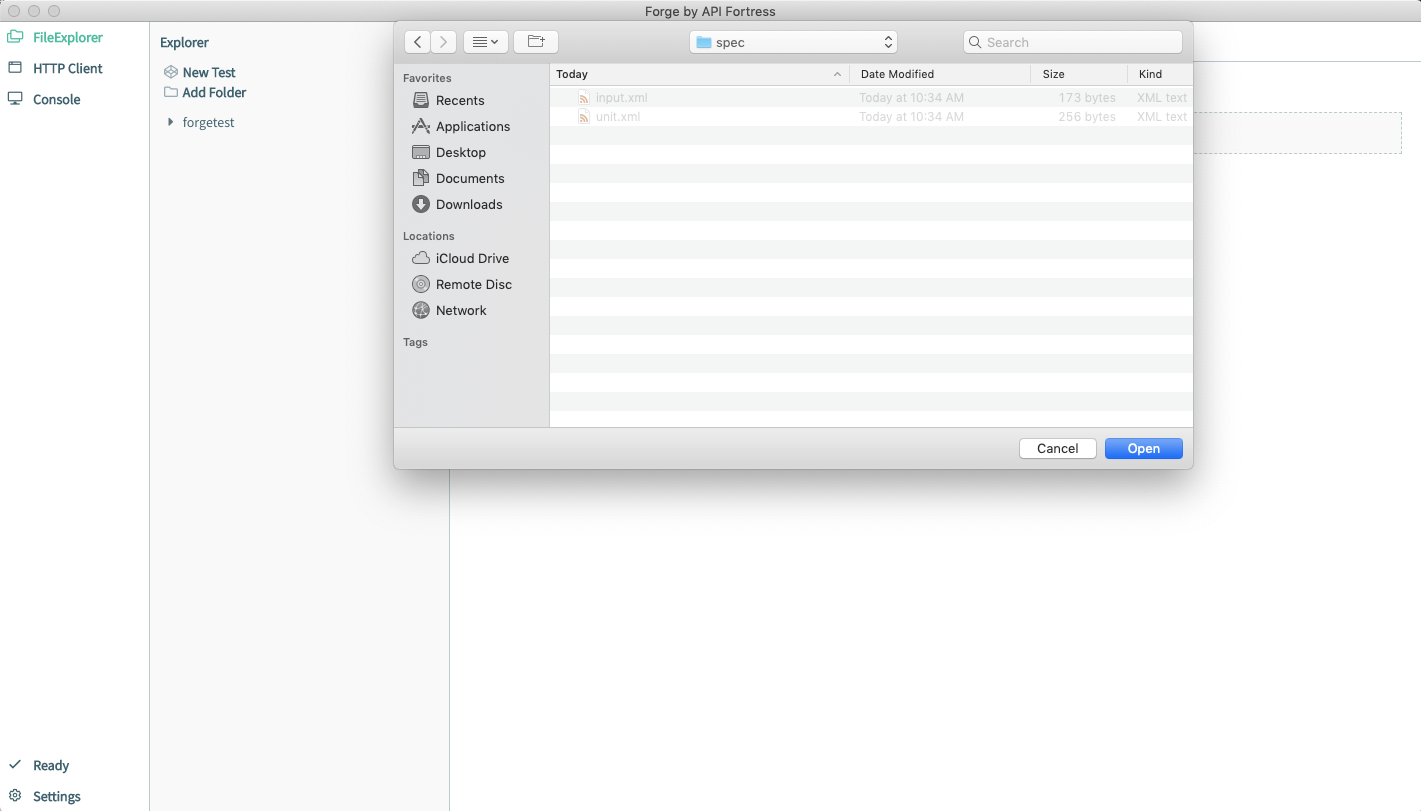
Once you have named your test you will be redirected to the Interstitial page. There are two avenues that you may take in building a test from here. First, you must decide if you want to build a test manually, API Fortress is very capable of building a test draft for you. This can be done from a Spec File, an Apiary account, or using the “Generate Test” button. Since this is a quick start guide, we will show you how to use the “Generate Test” button. To build using a Spec file see https://apifortress.com/doc/build-from-spec/, or from an Apiary account see https://apifortress.com/doc/build-from-apiary/.

Step 4: Create a Test Using the Generate Test button
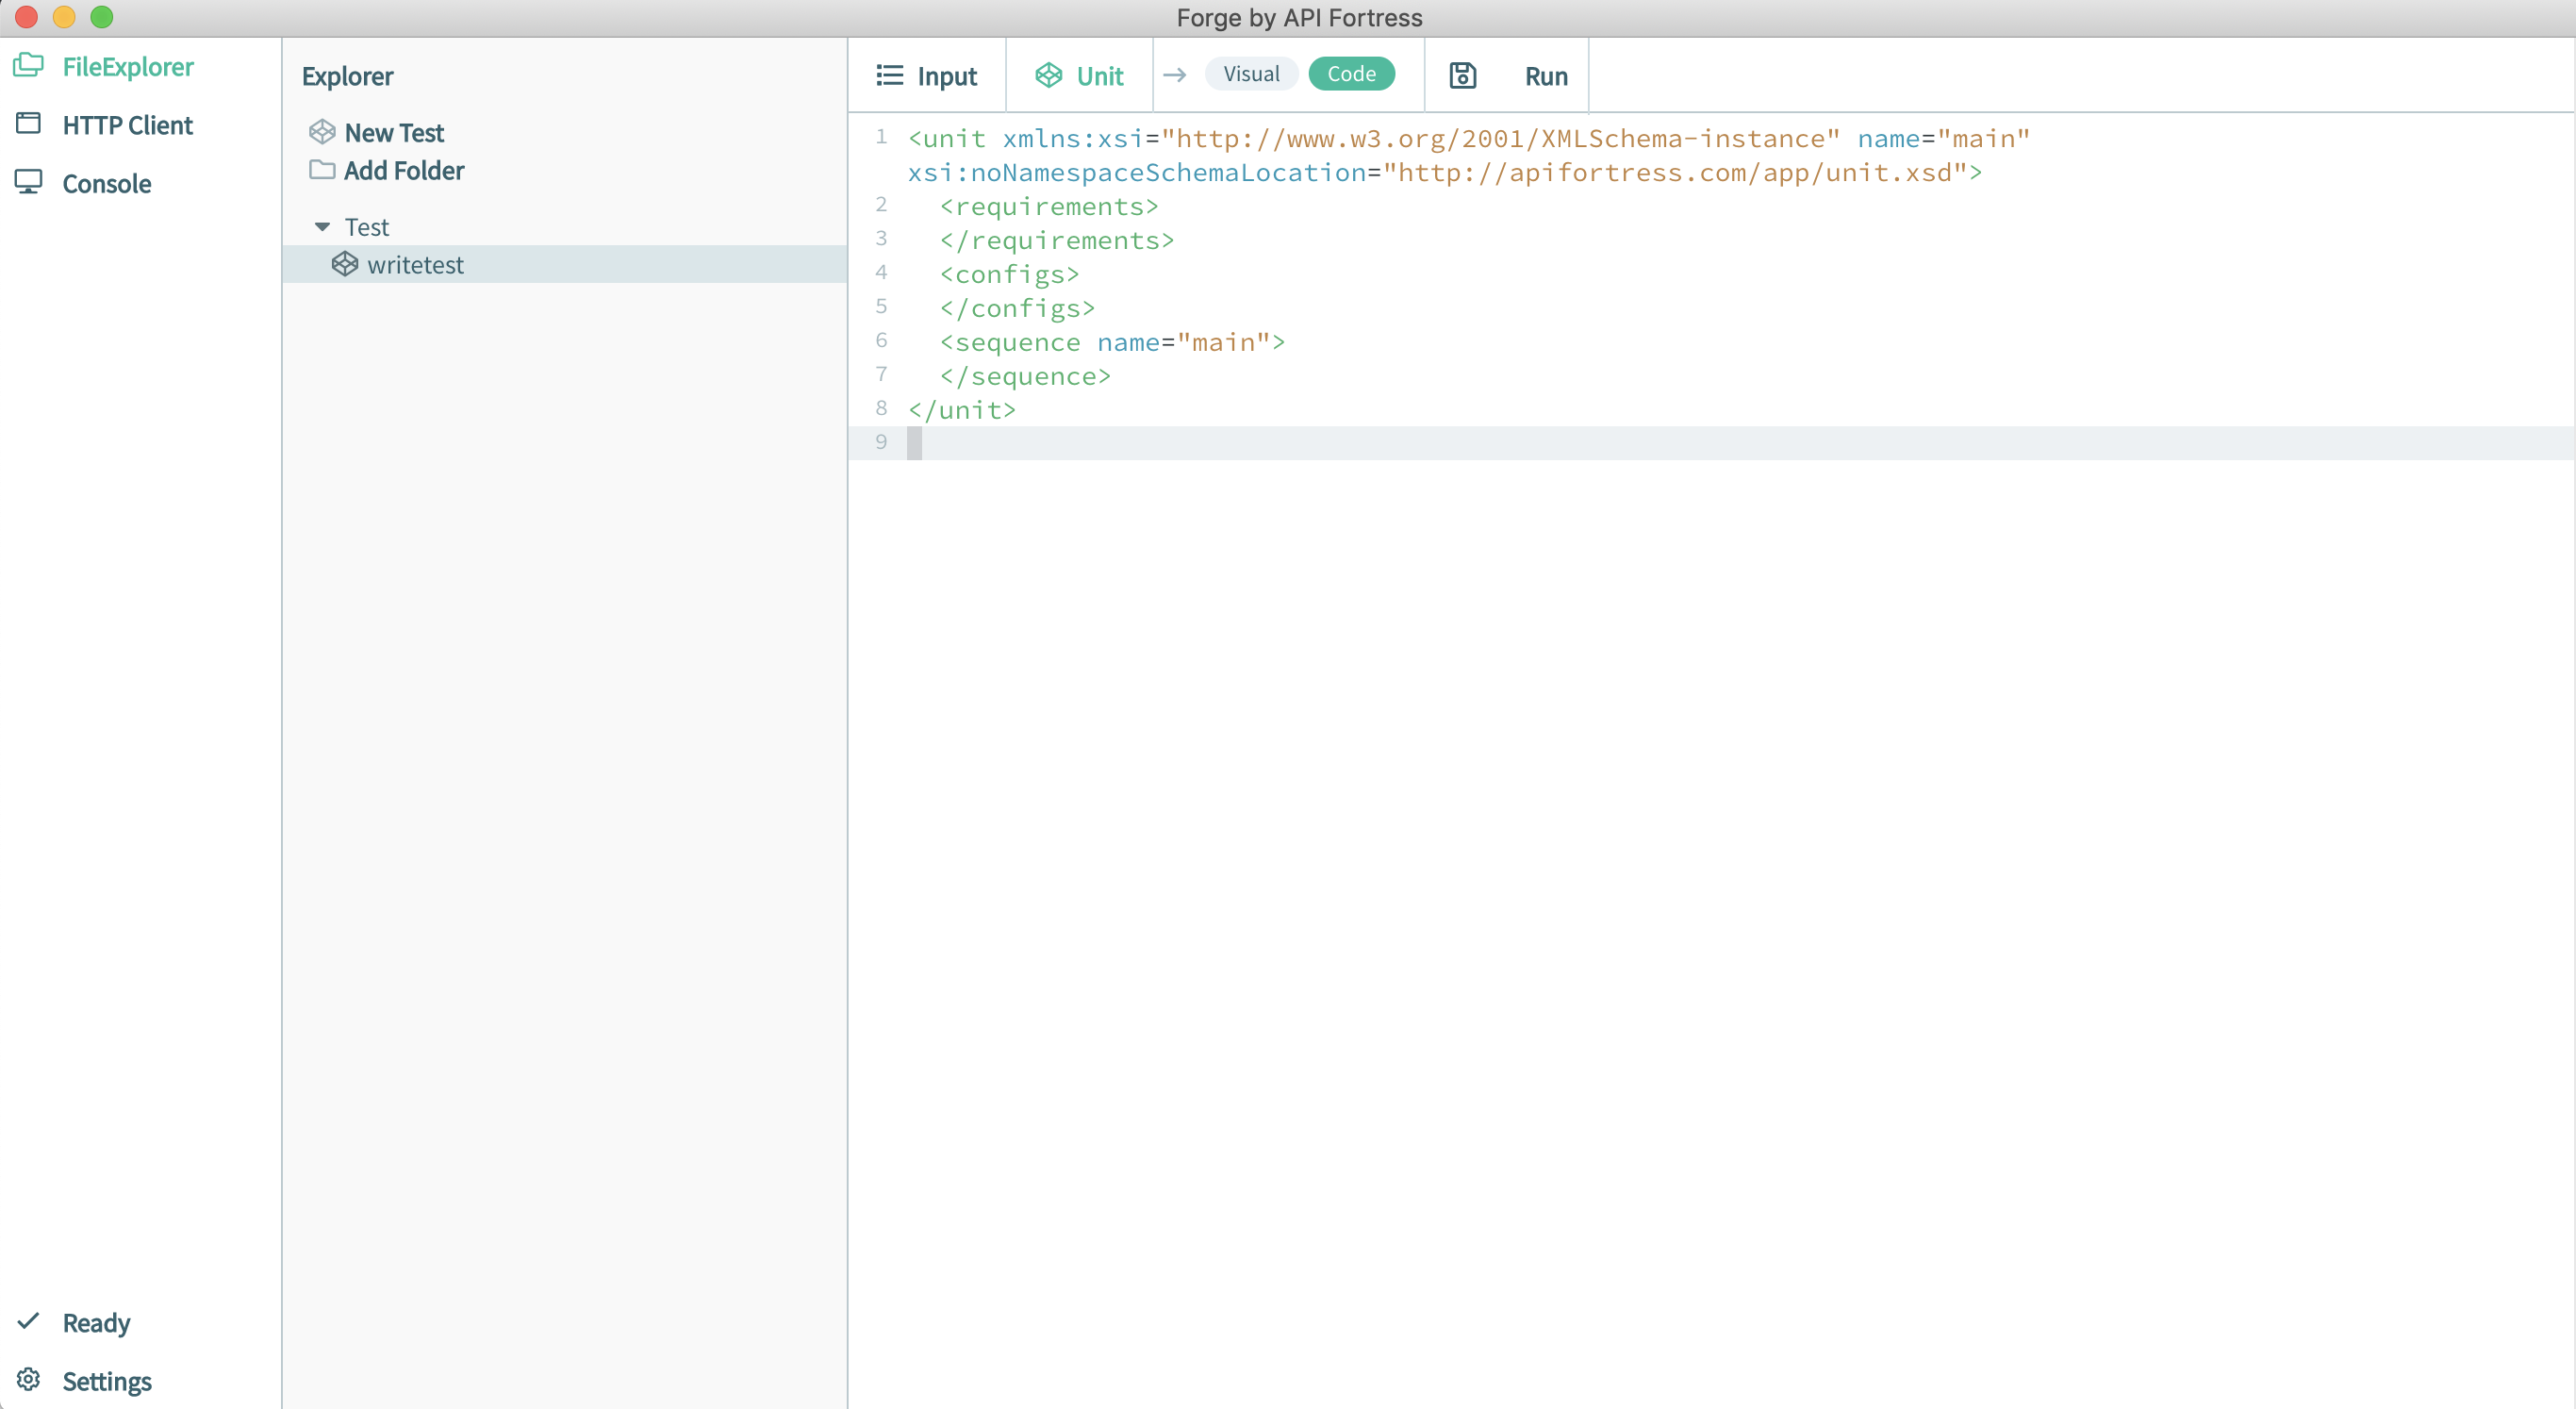
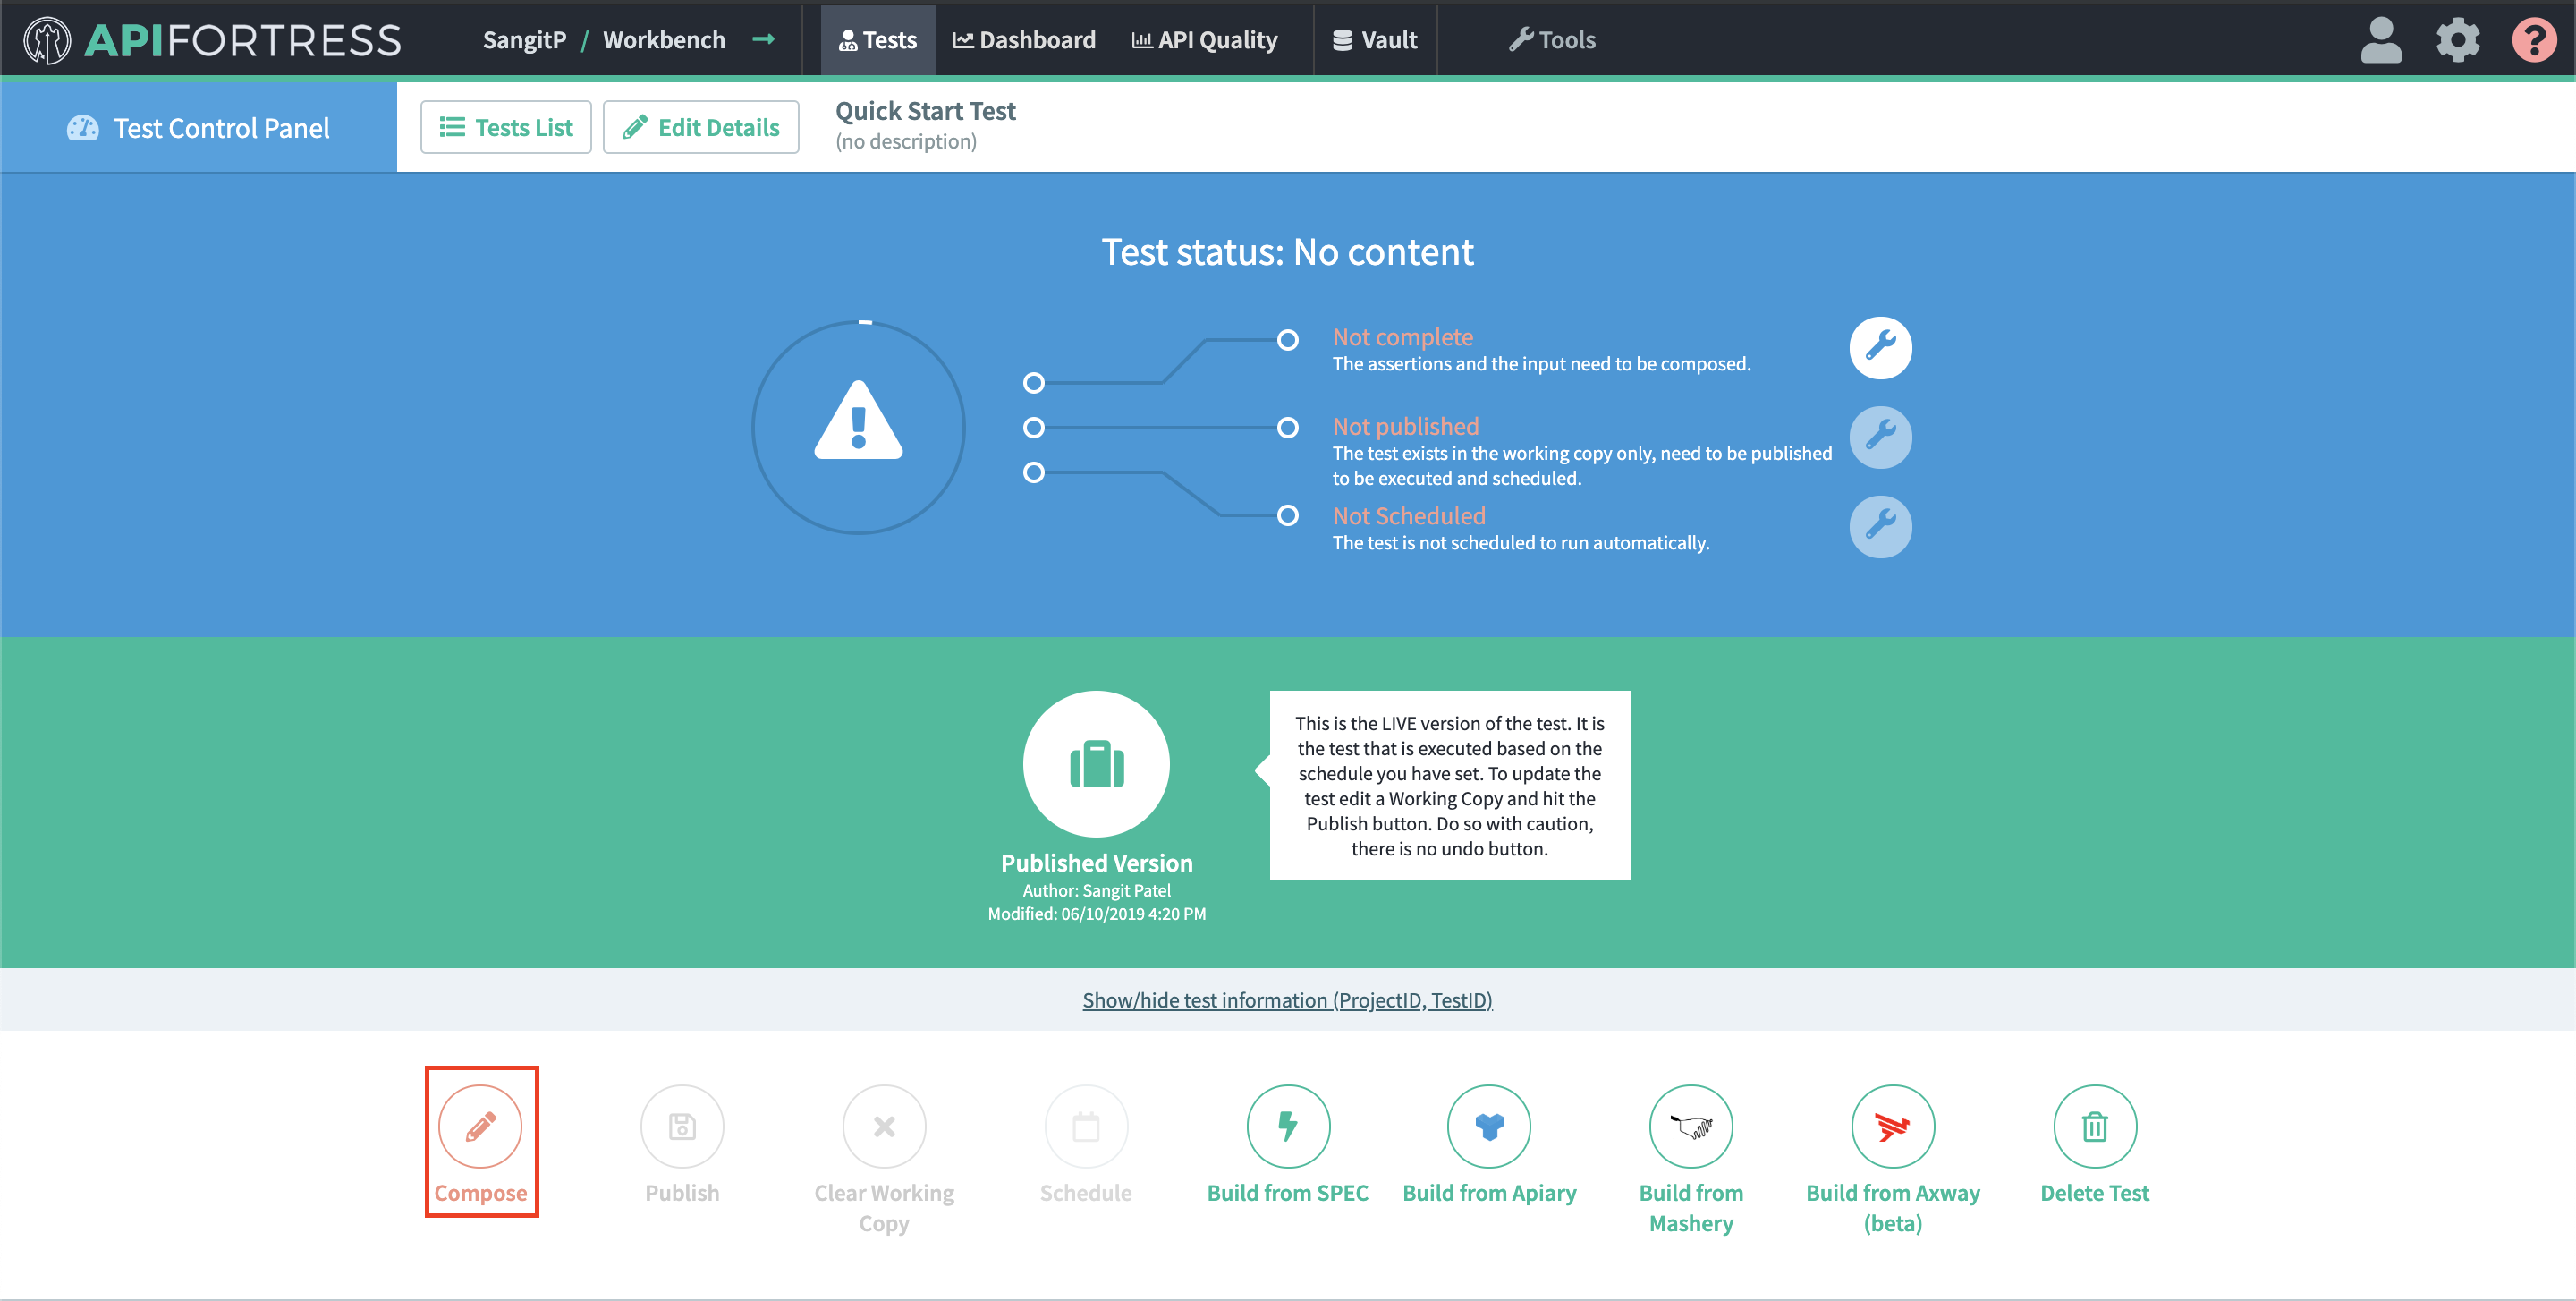
Click on Compose.

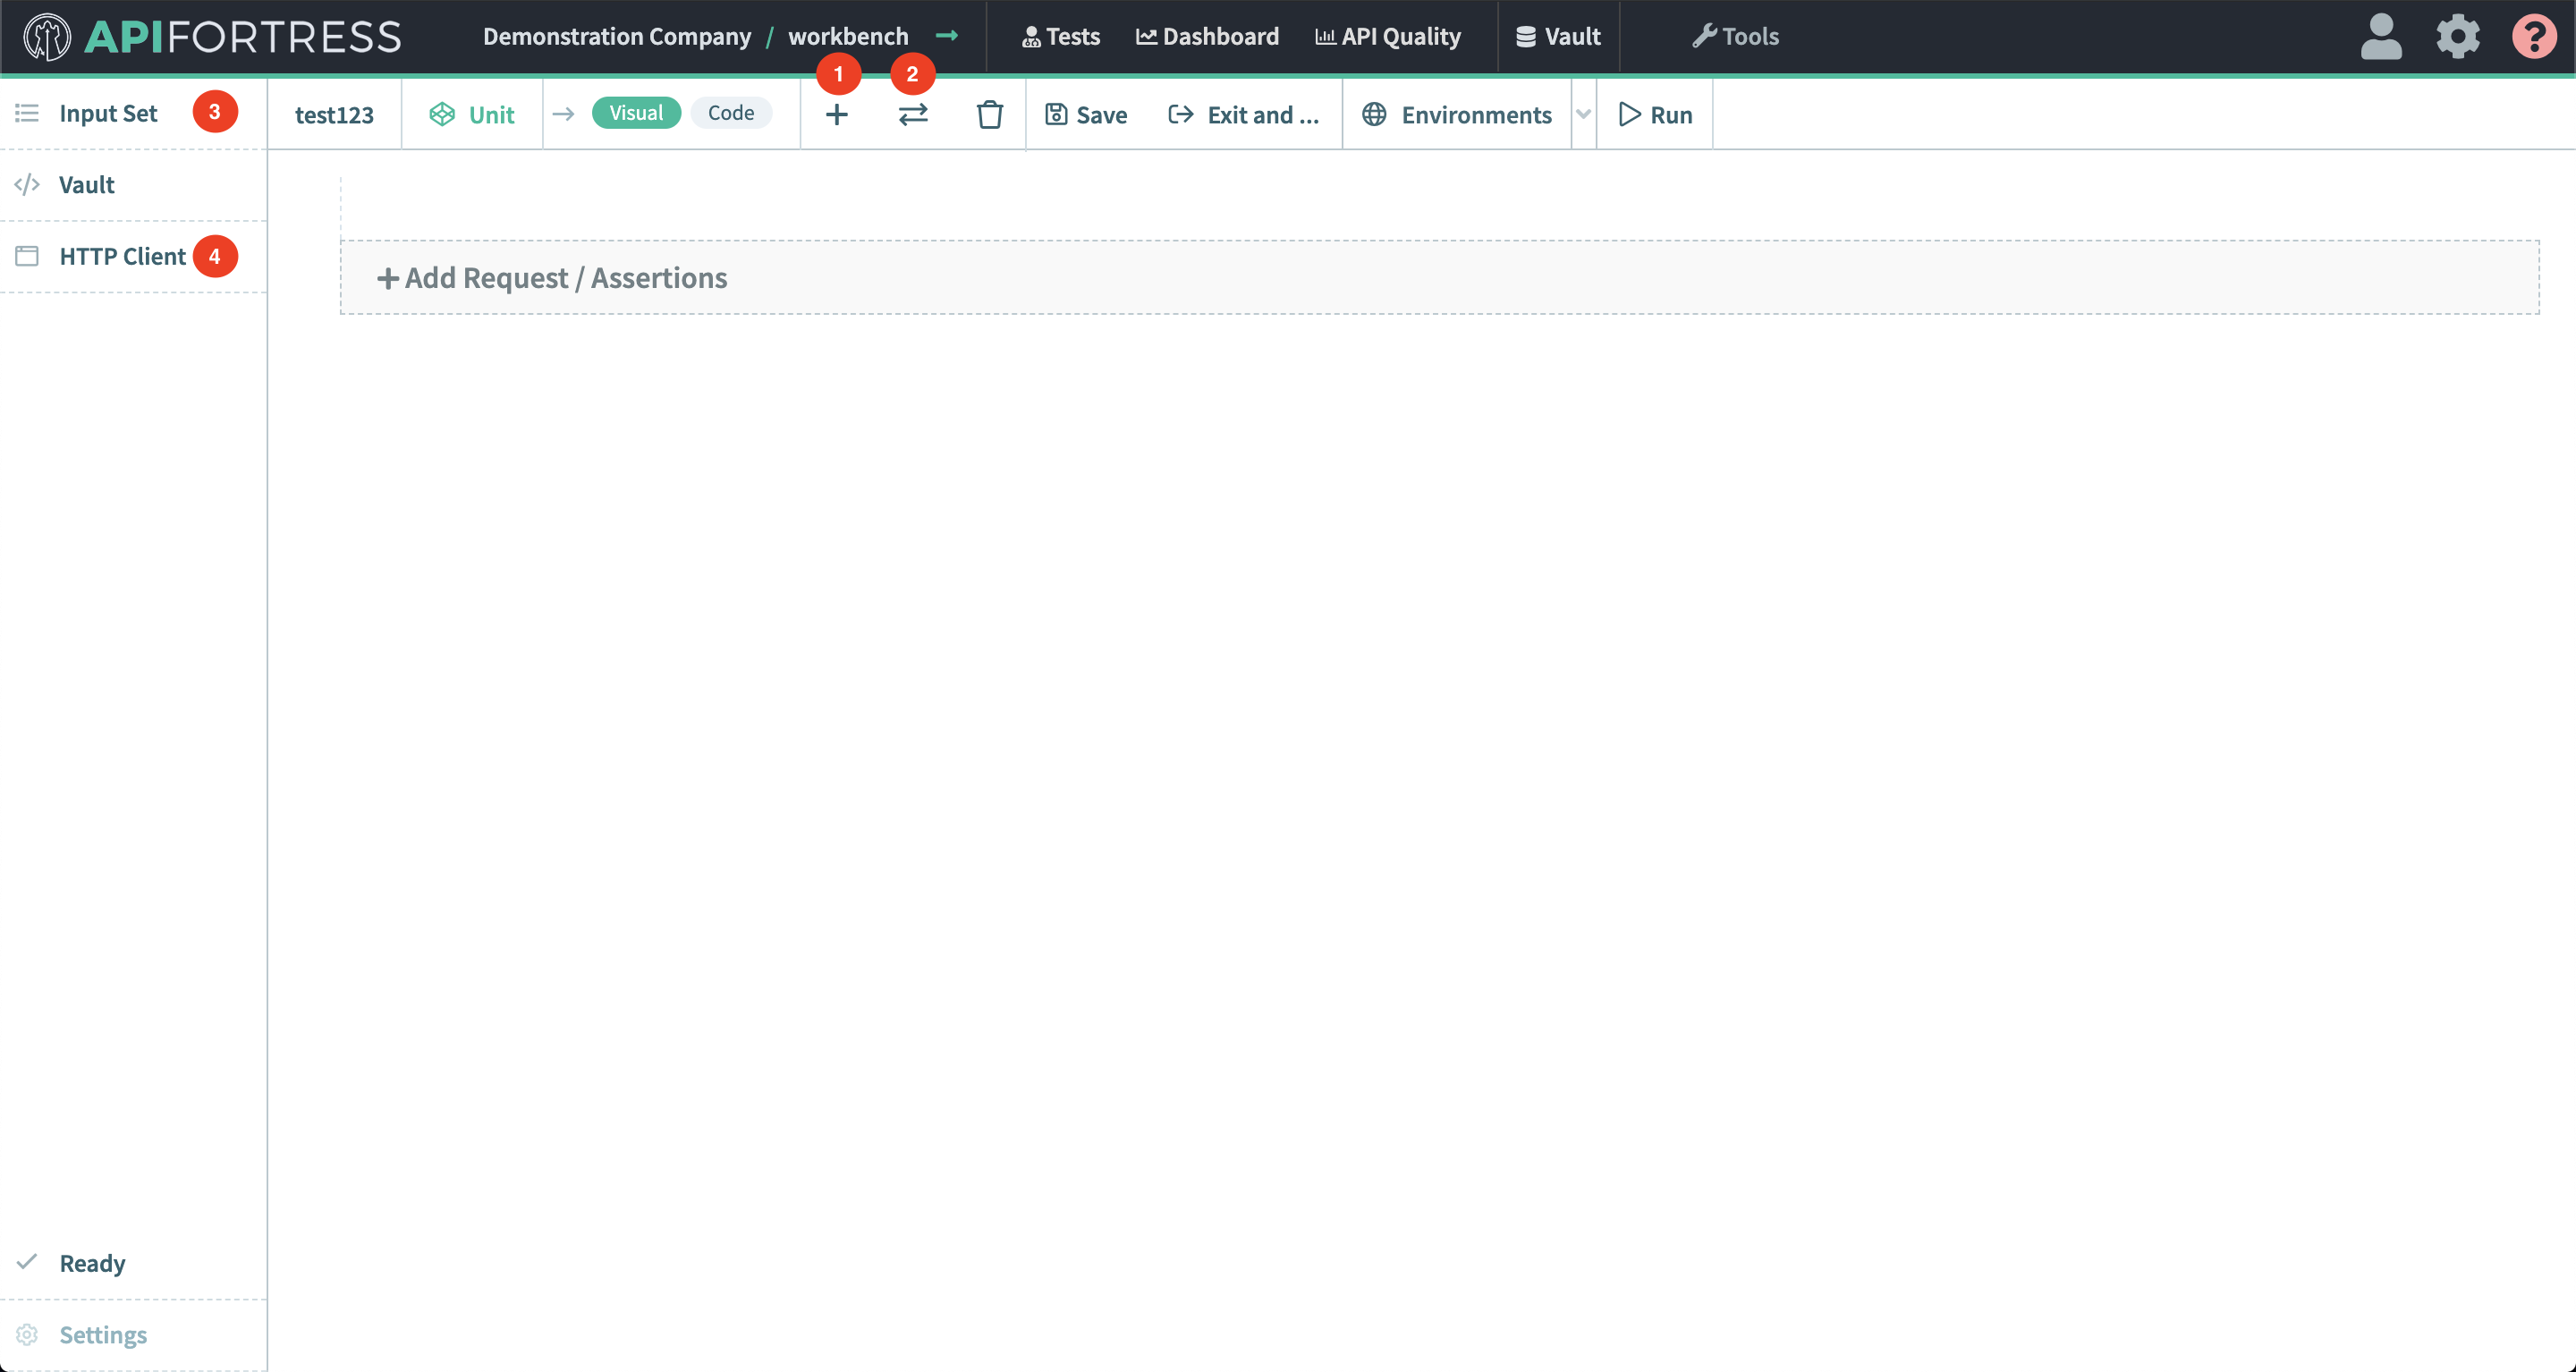
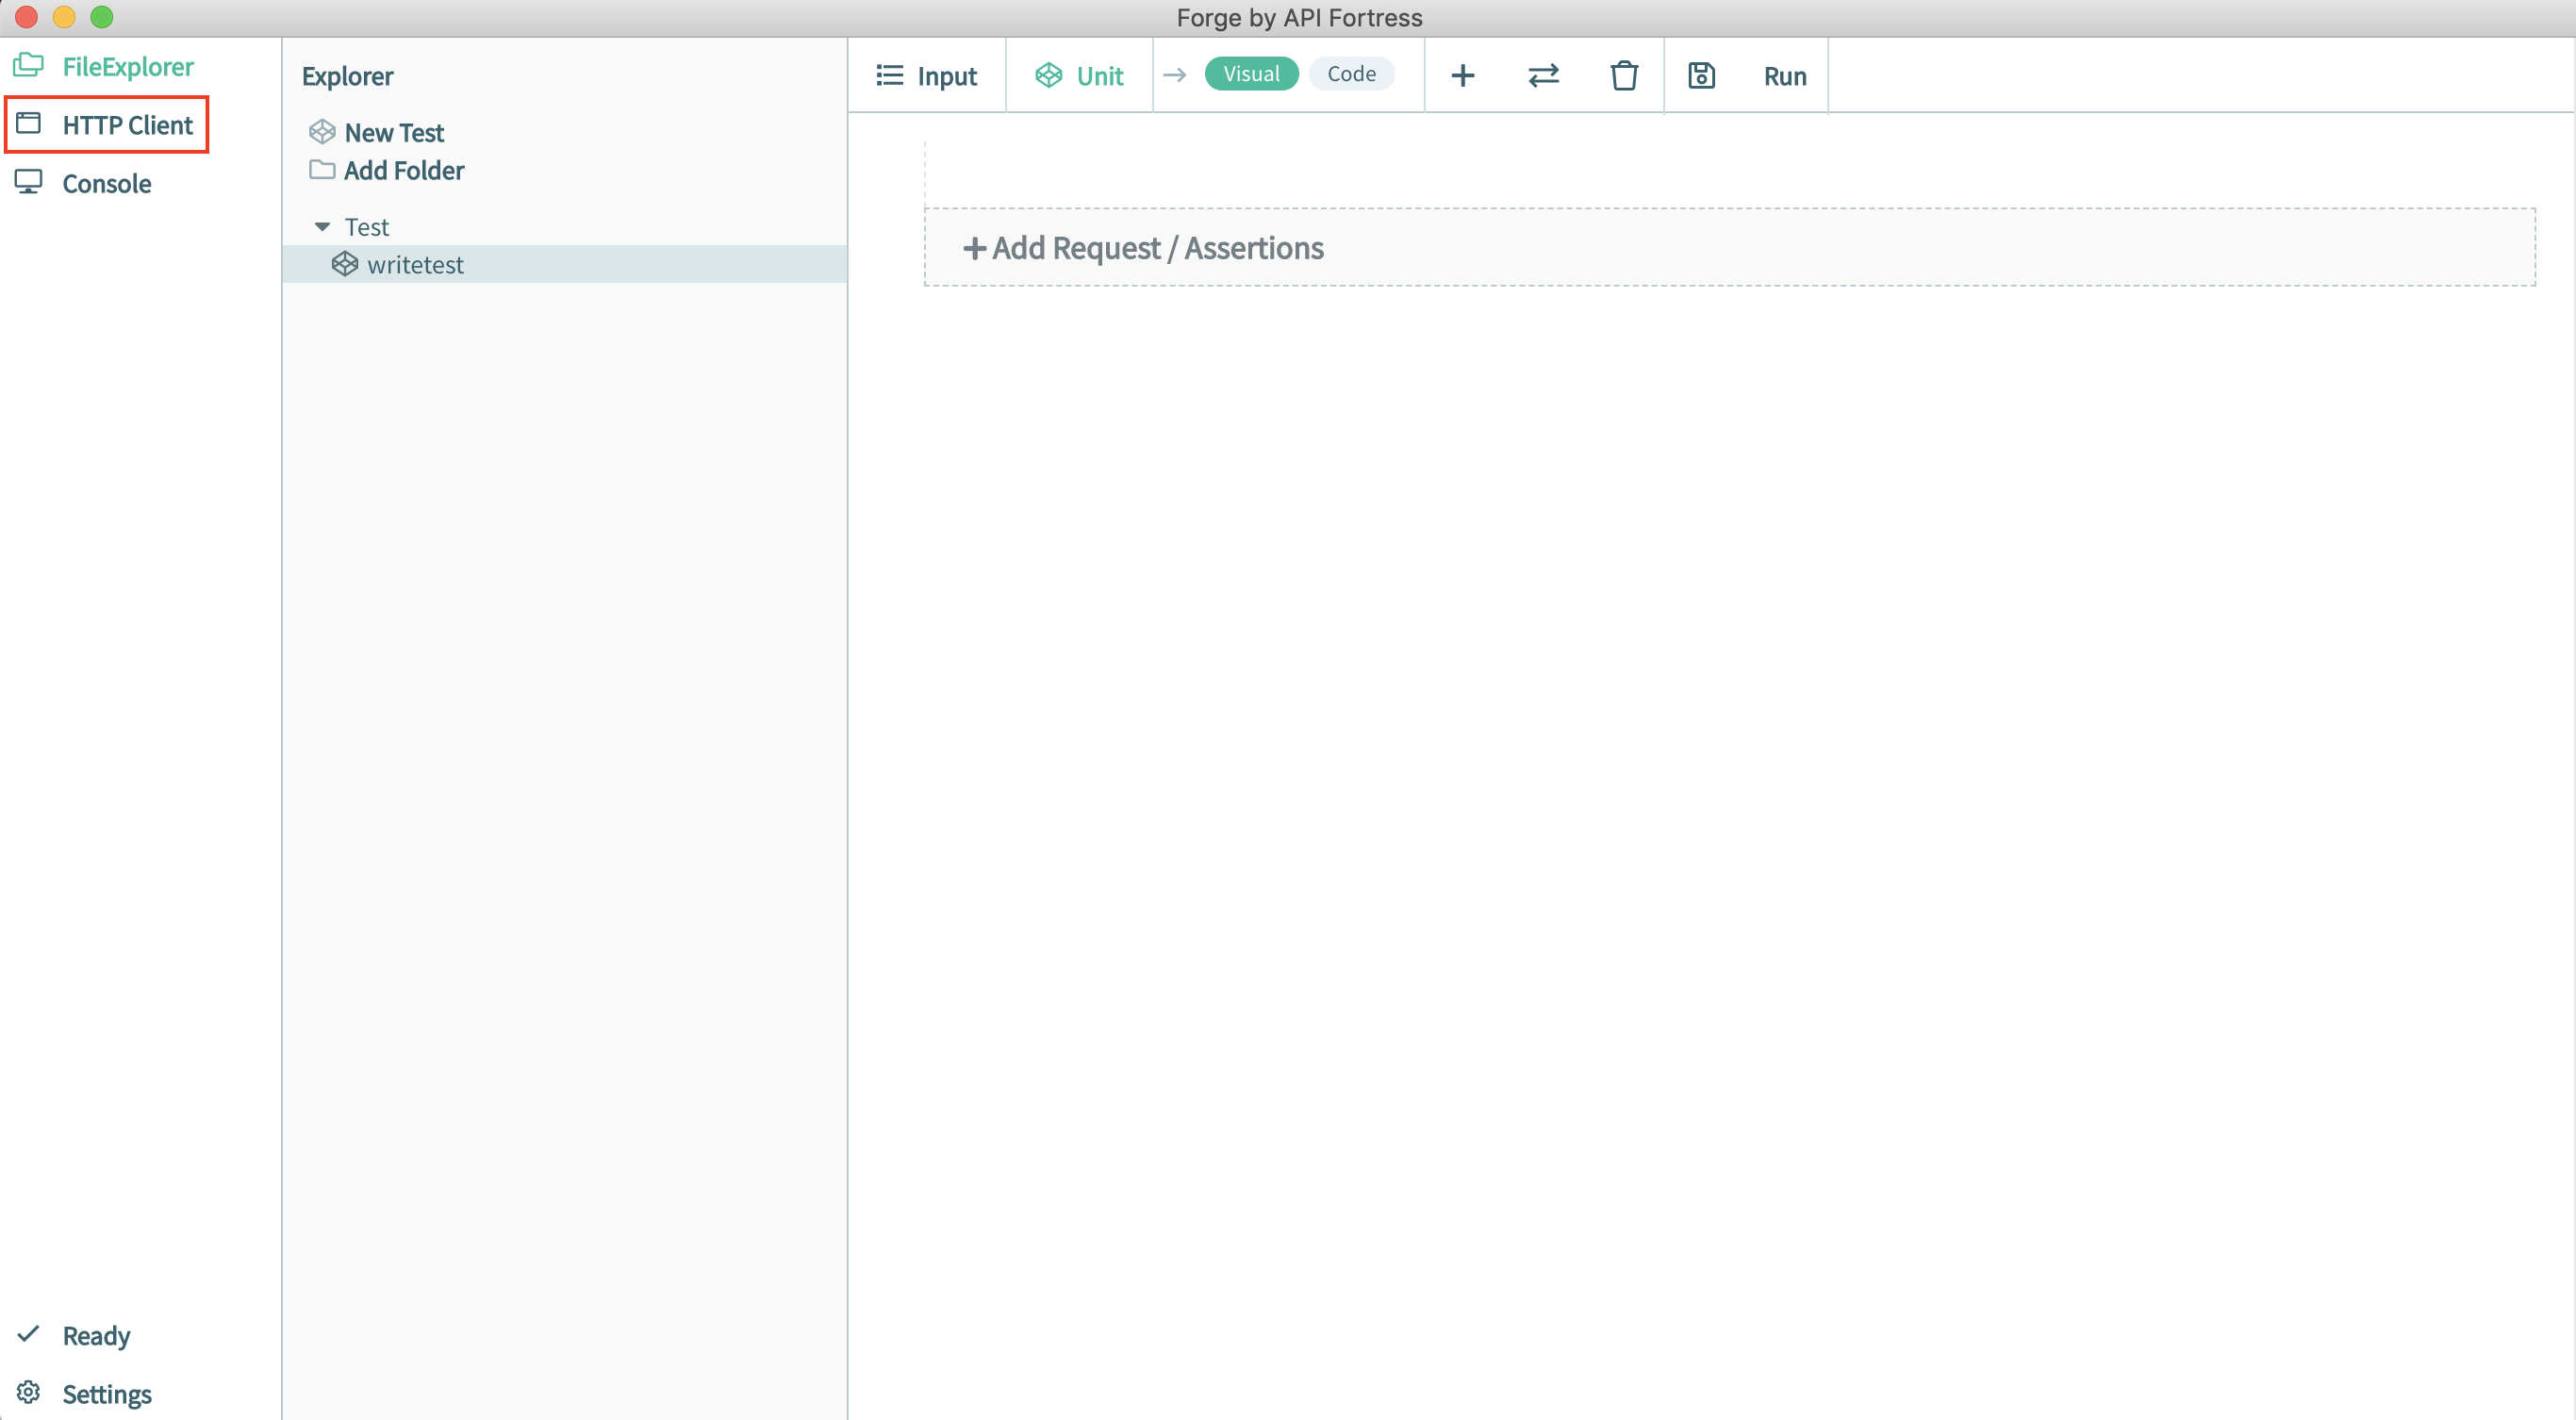
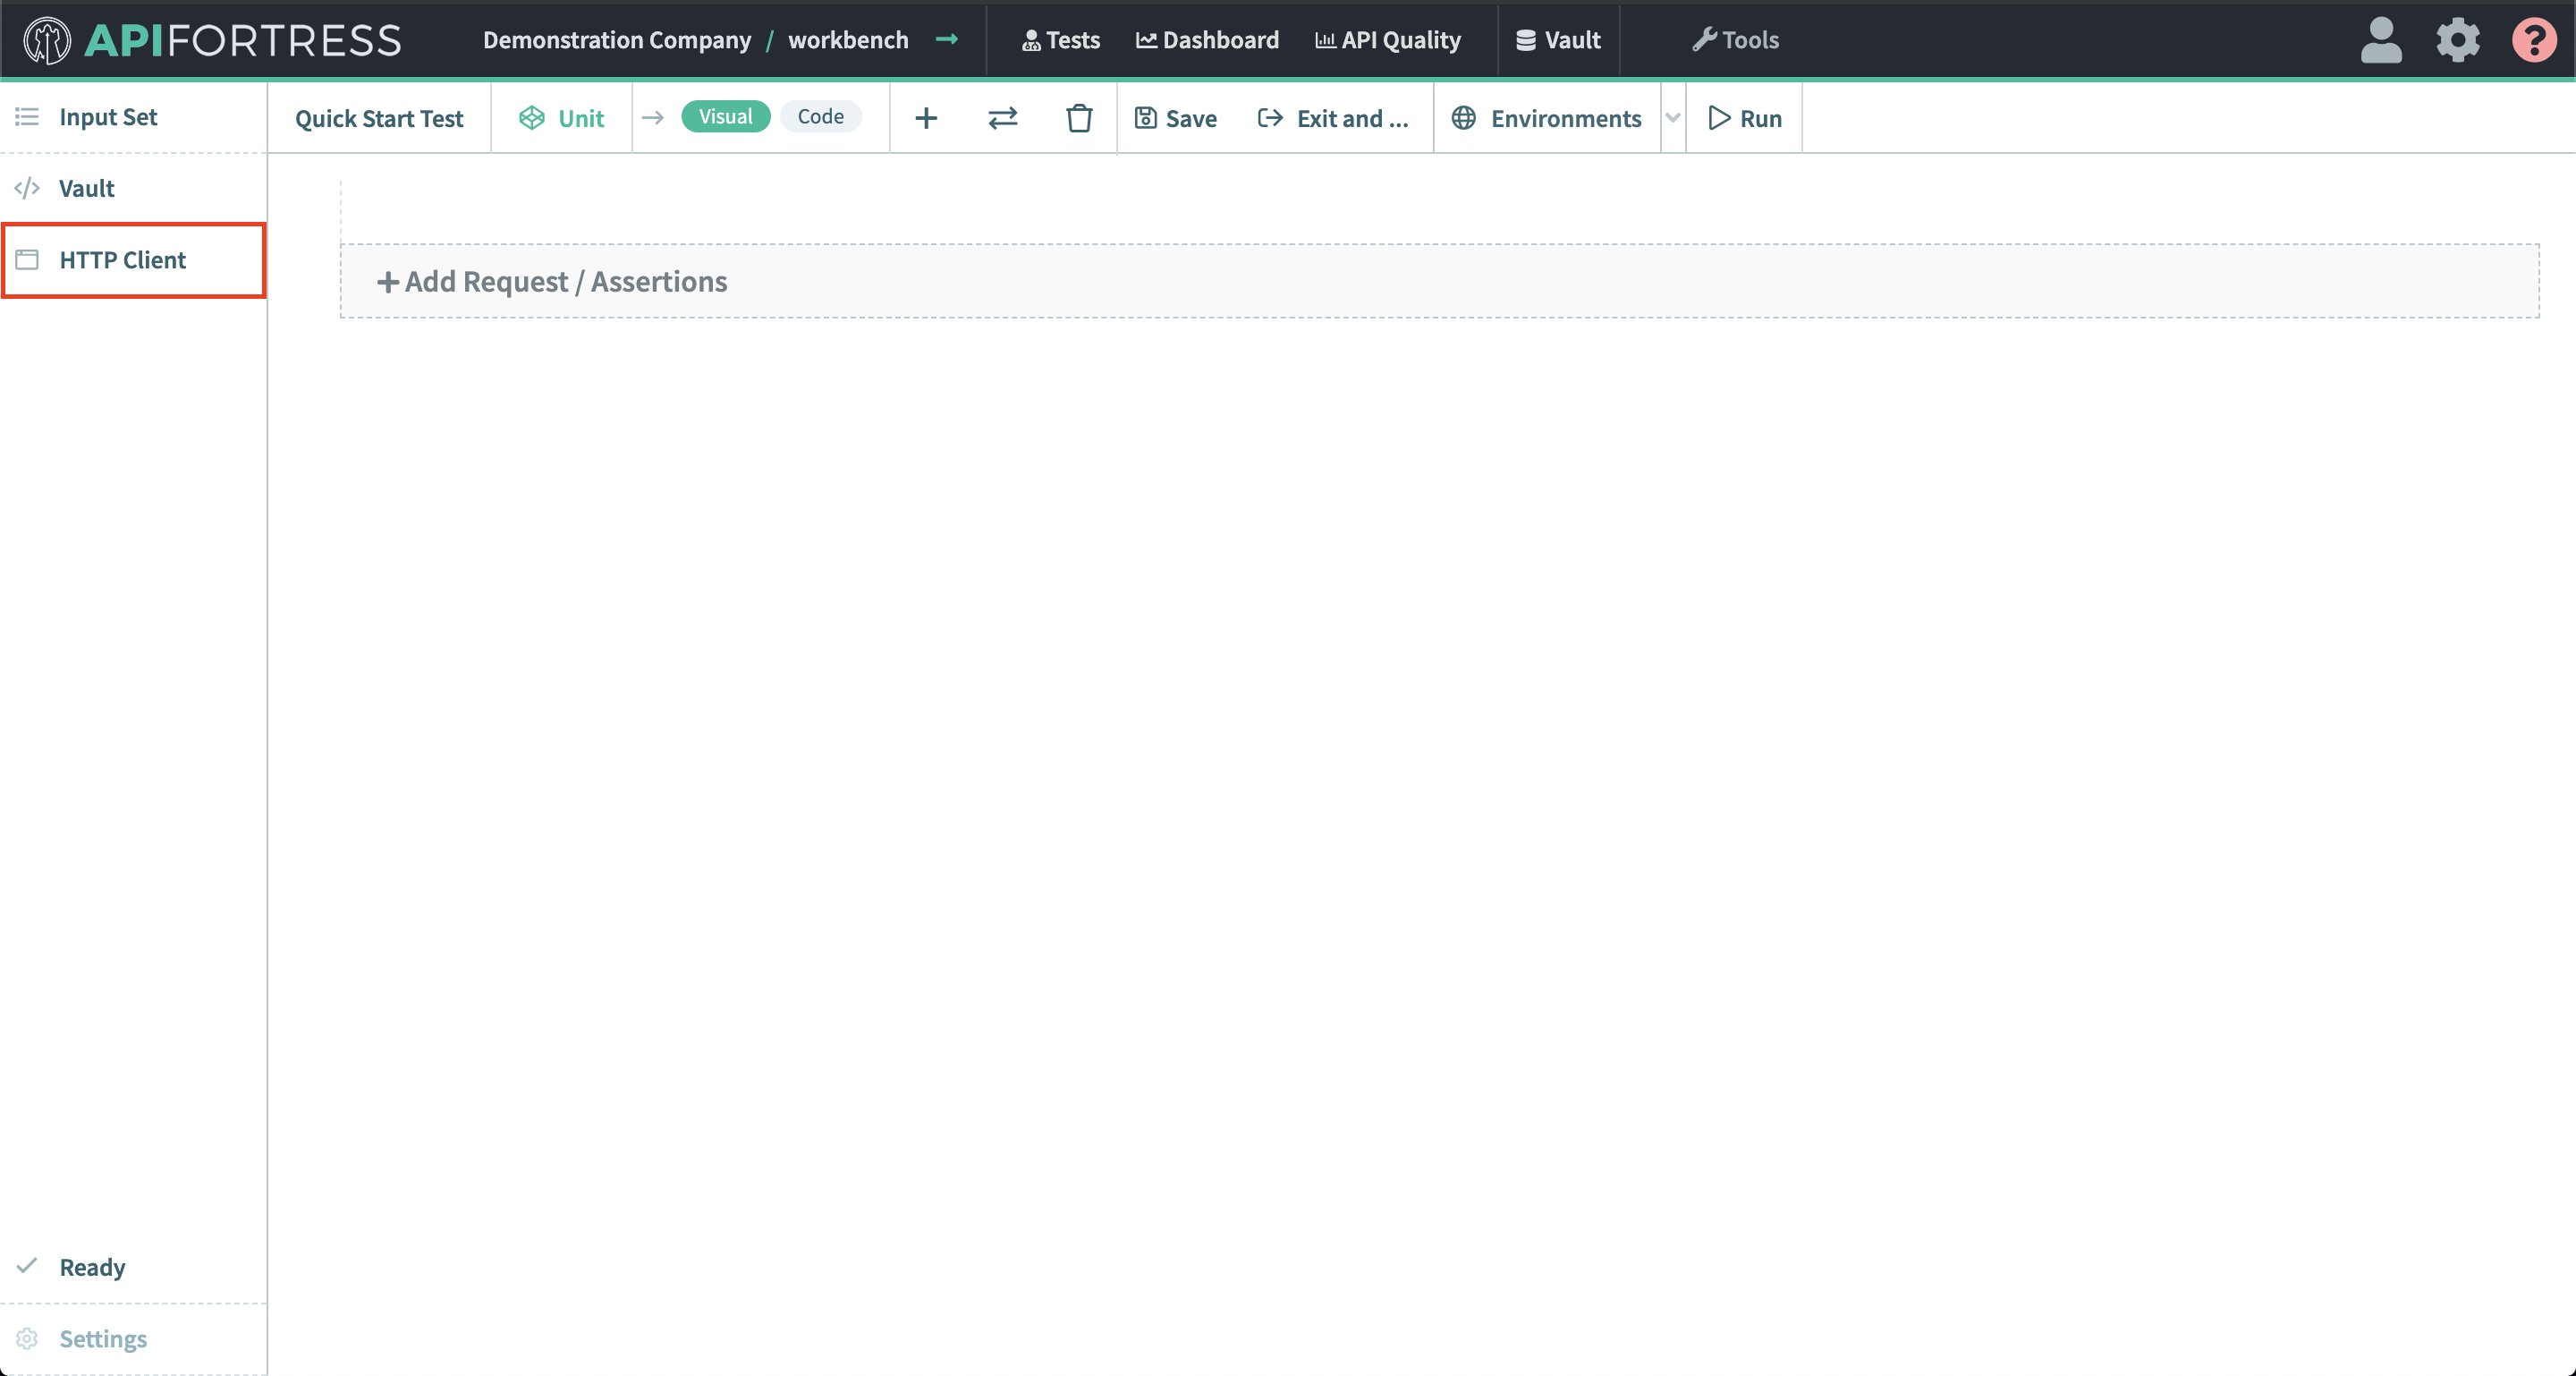
Next, you will be presented with a tutorial on the Visual Composer. The final screen of the tutorial provides you with more instructions on how to create a test. Close the tutorial and open the Console by clicking on HTTP Client button in the left panel.

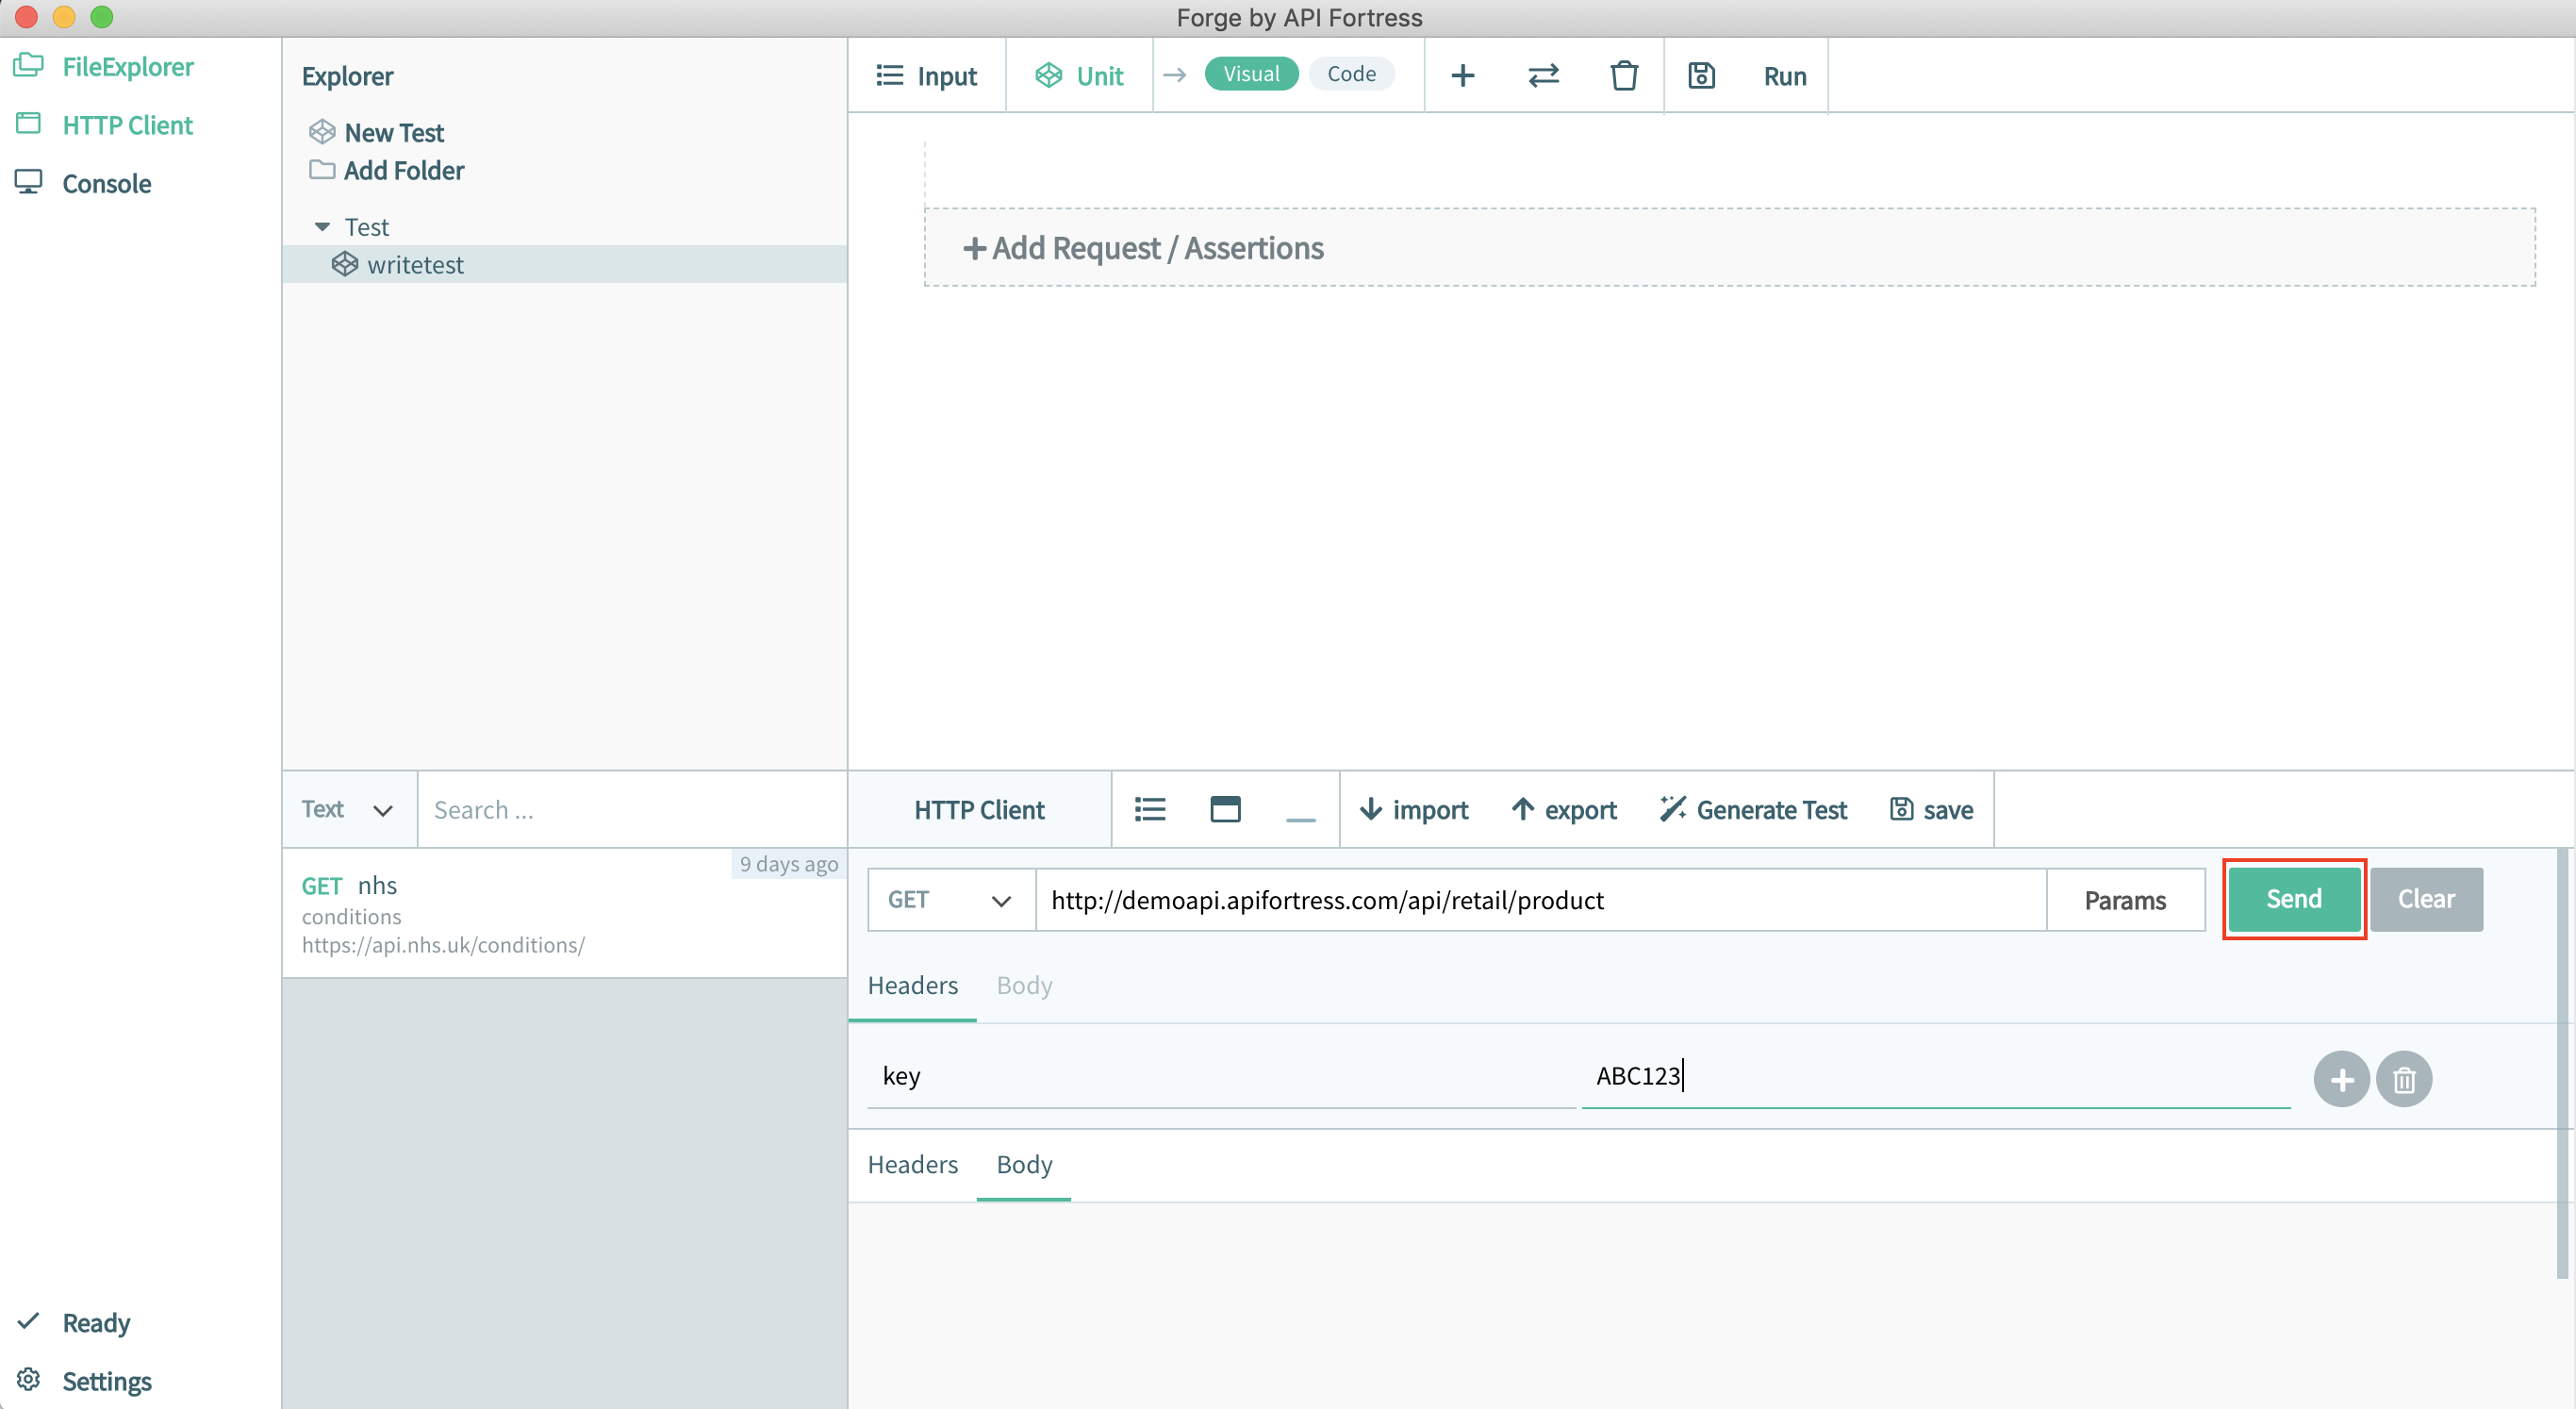
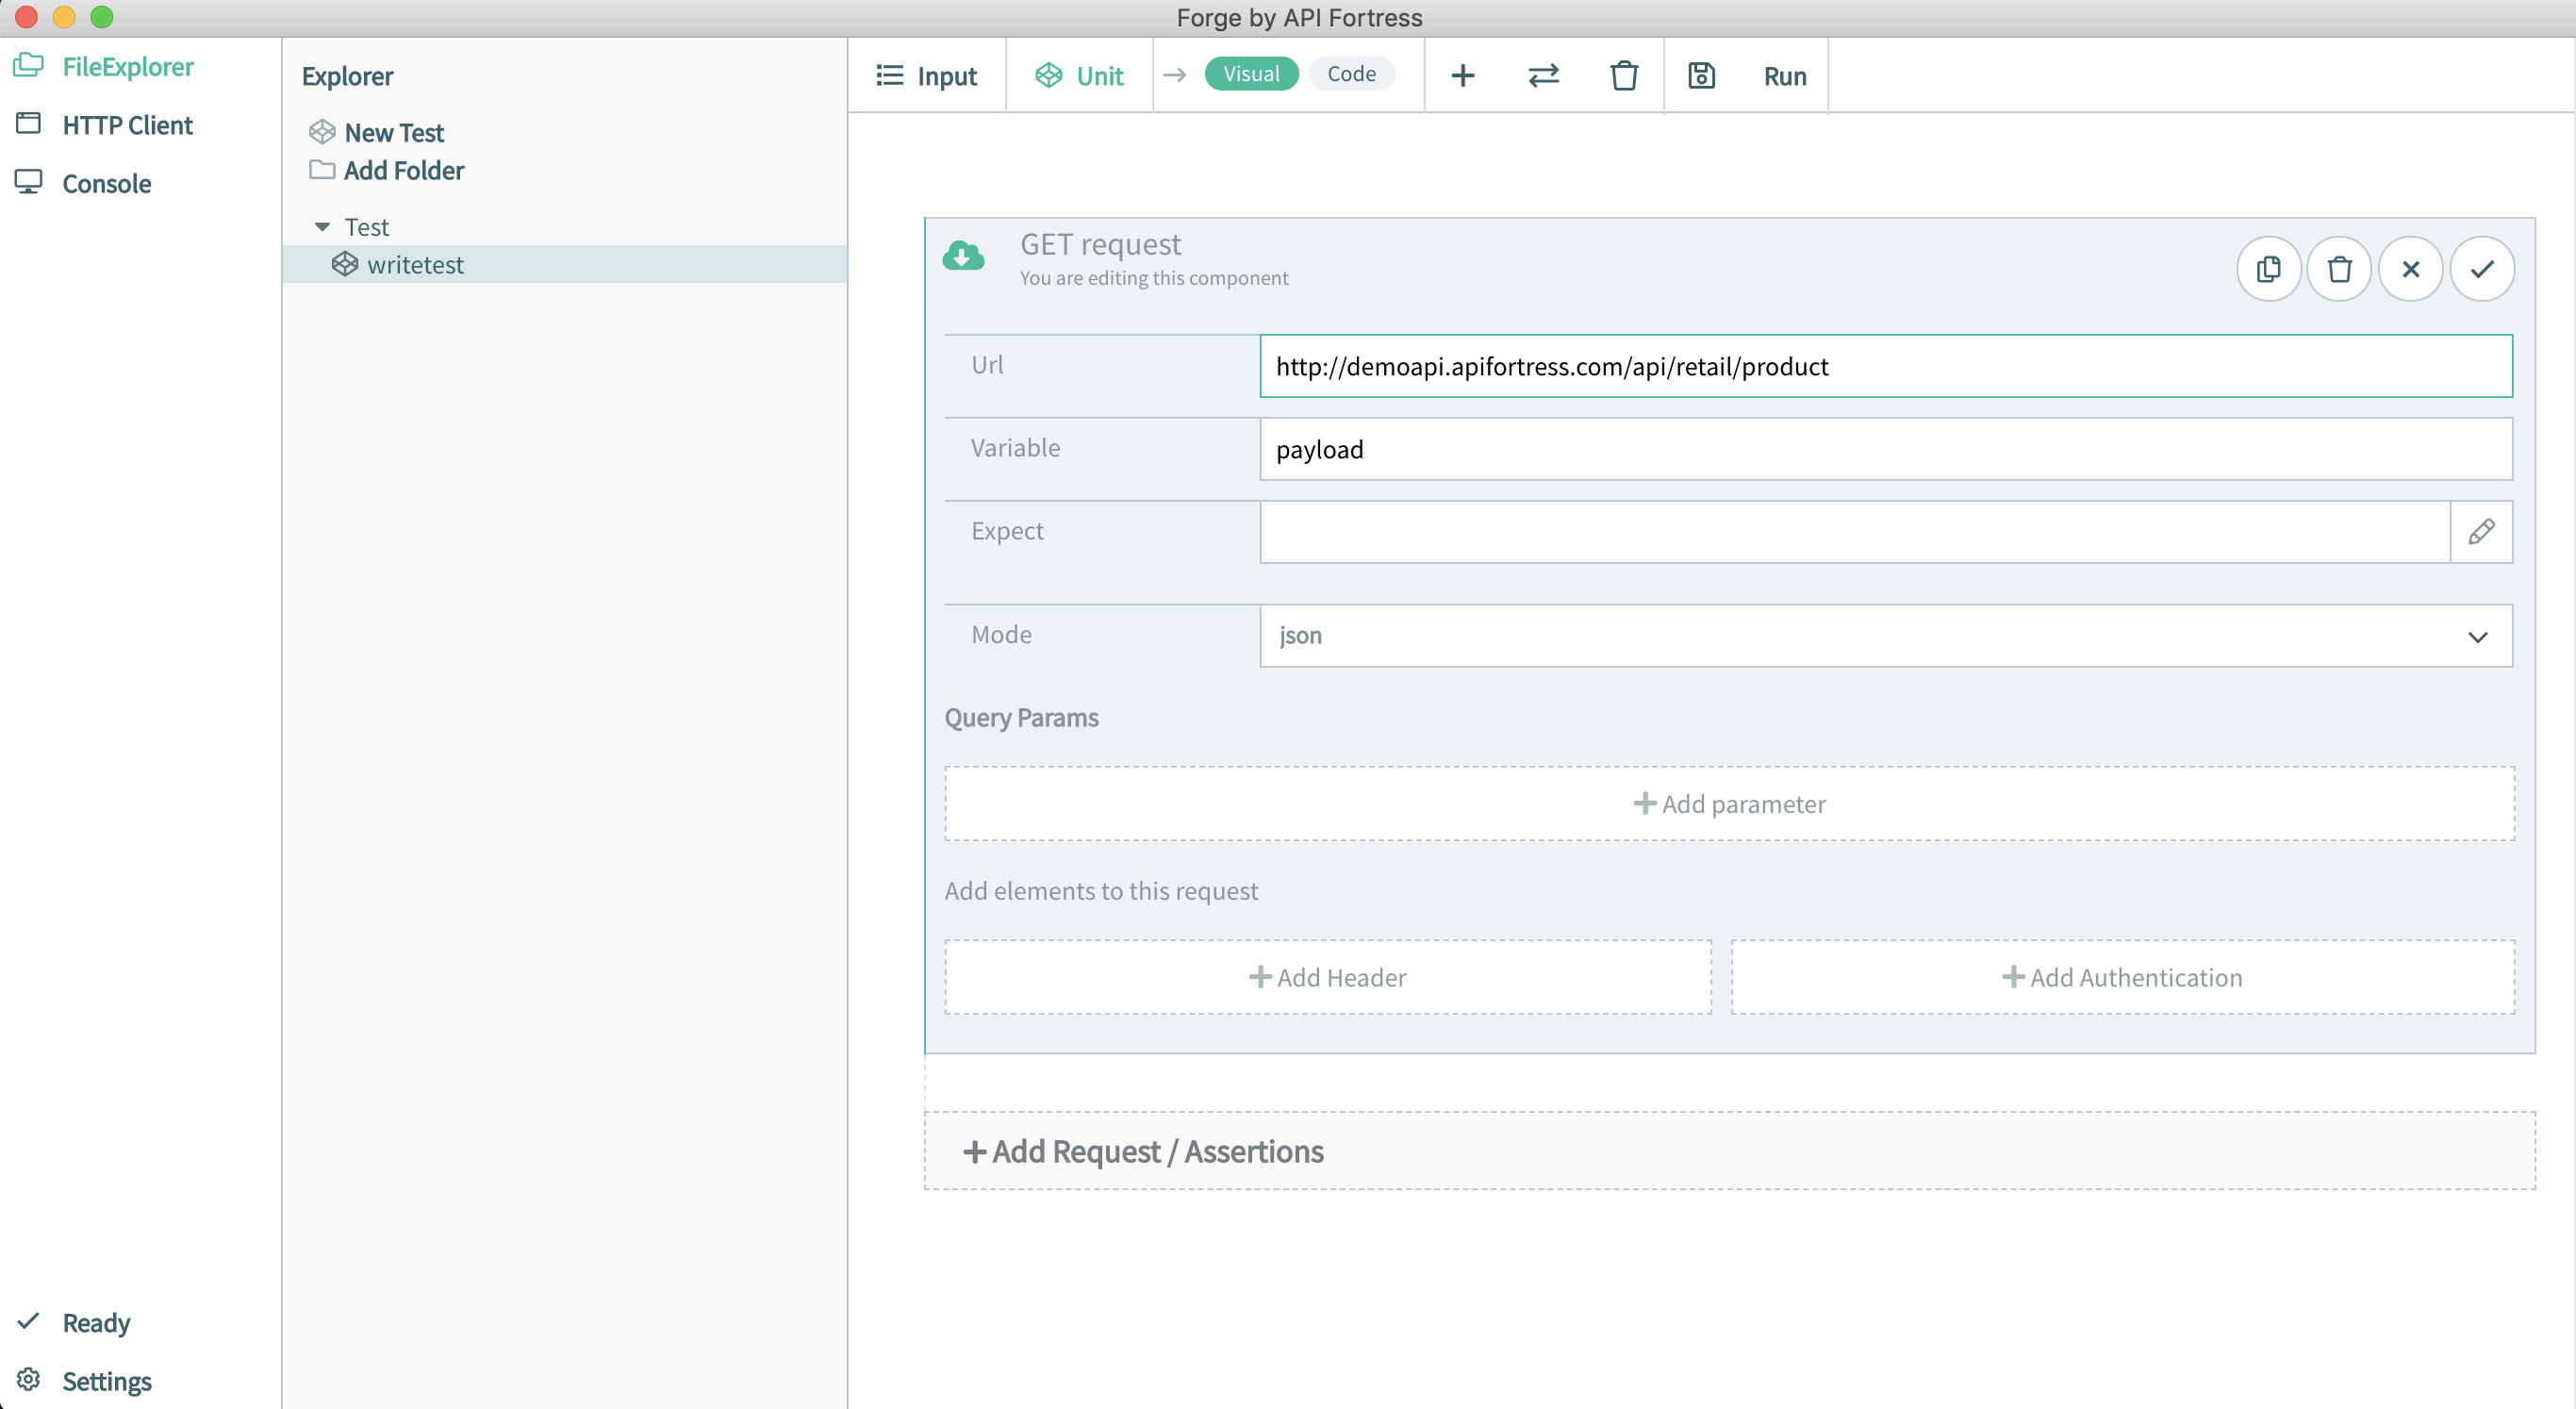
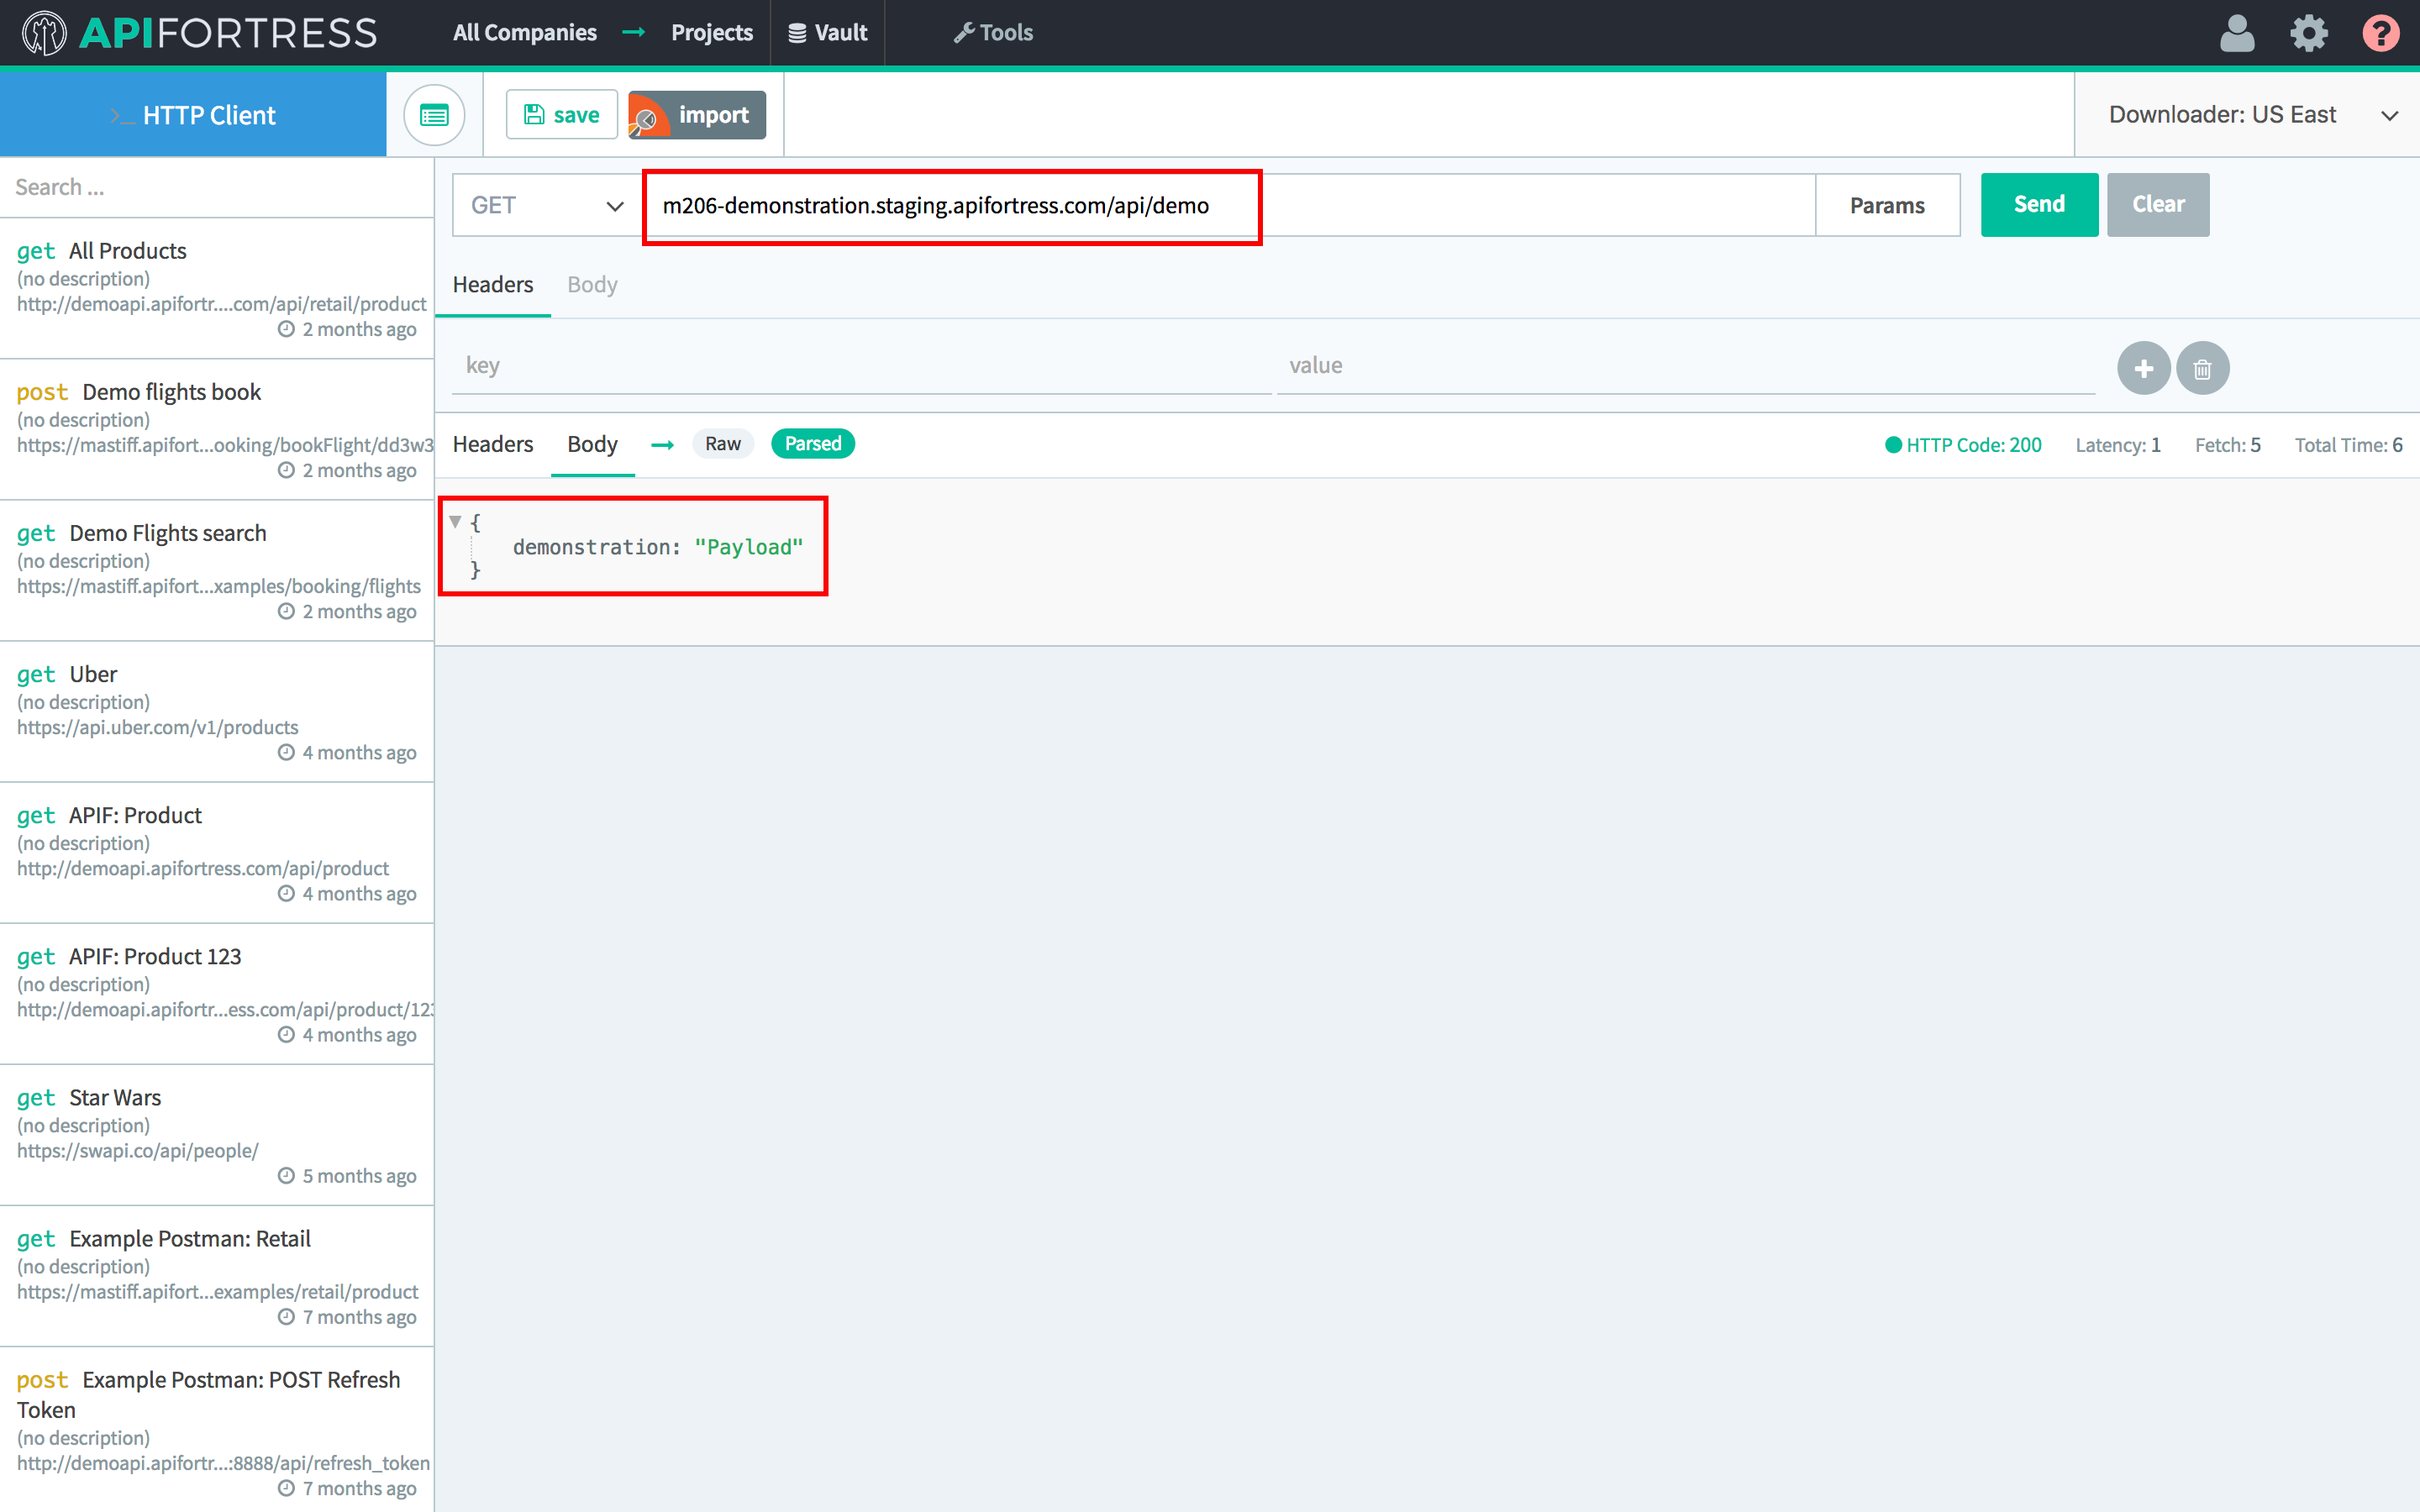
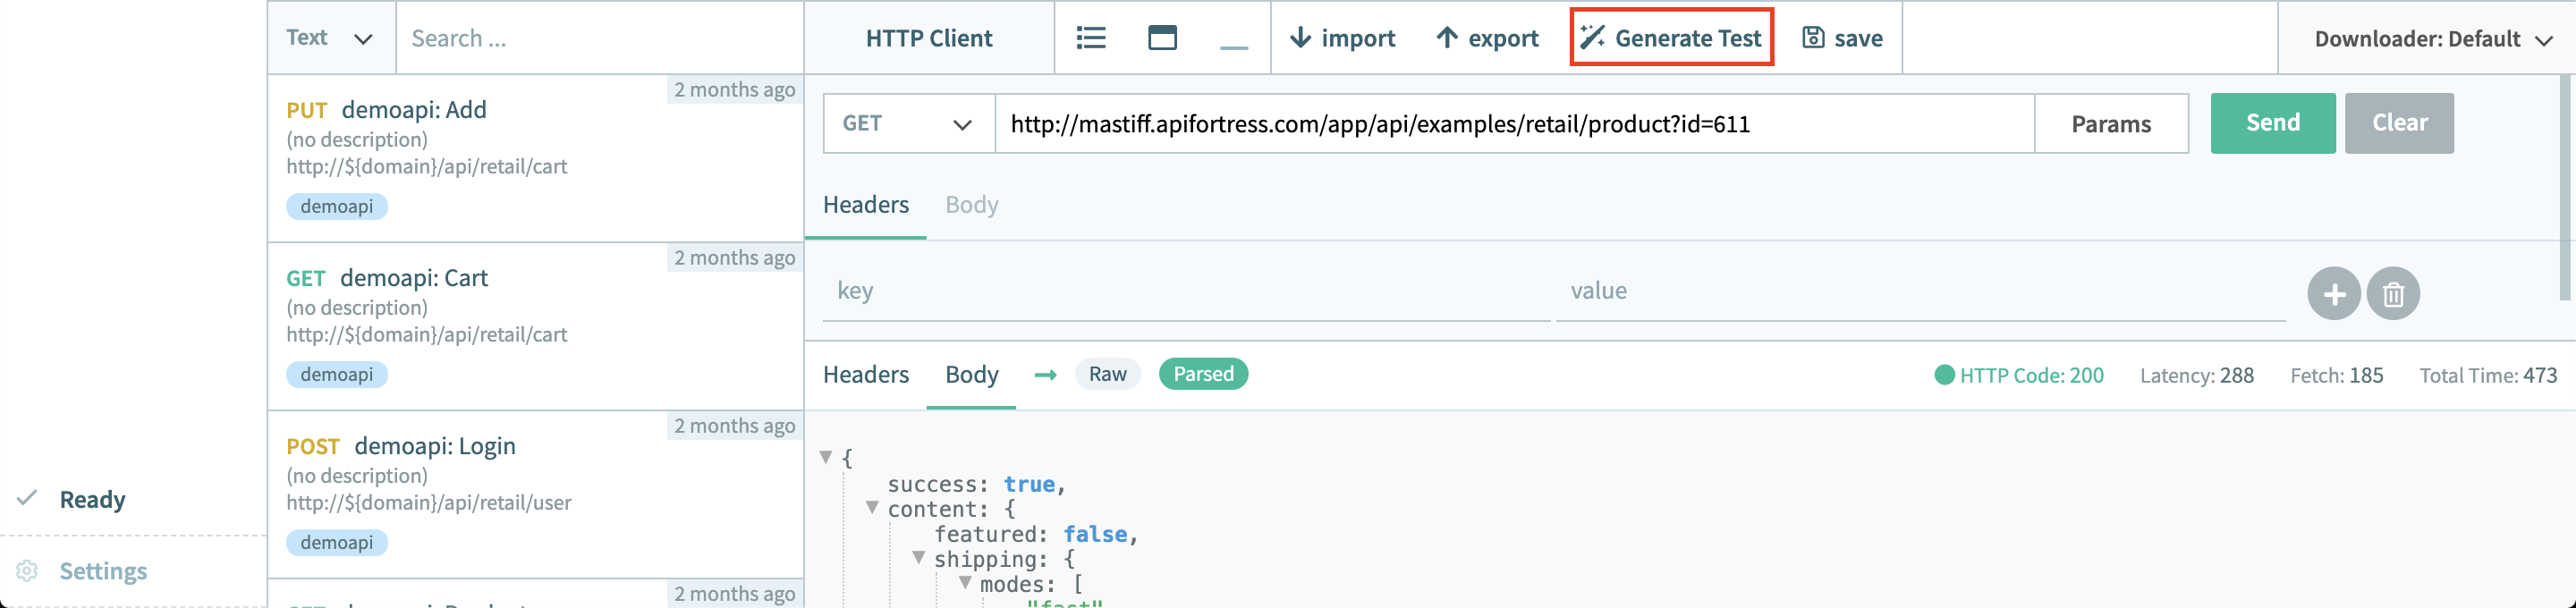
For this example we will use our own test API. It’s a simple GET request, so you can leave the dropdown as it is and enter the following url:
https://mastiff.apifortress.com/app/api/examples/retail/product?id=611

Once done, click the Send button and the response payload will appear.

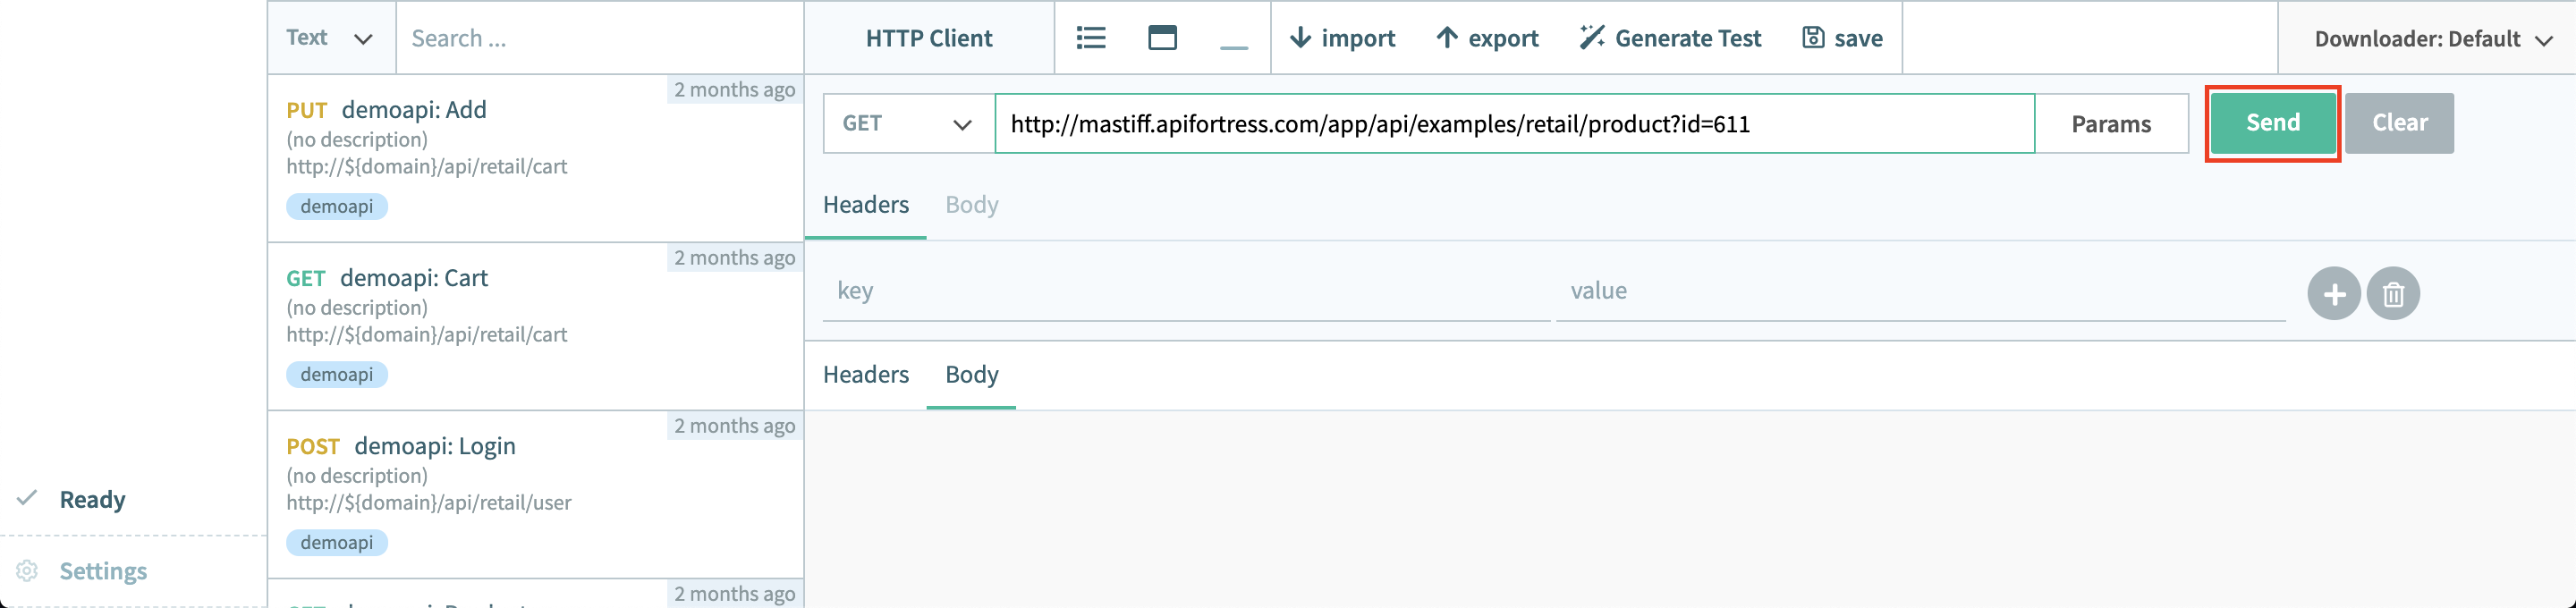
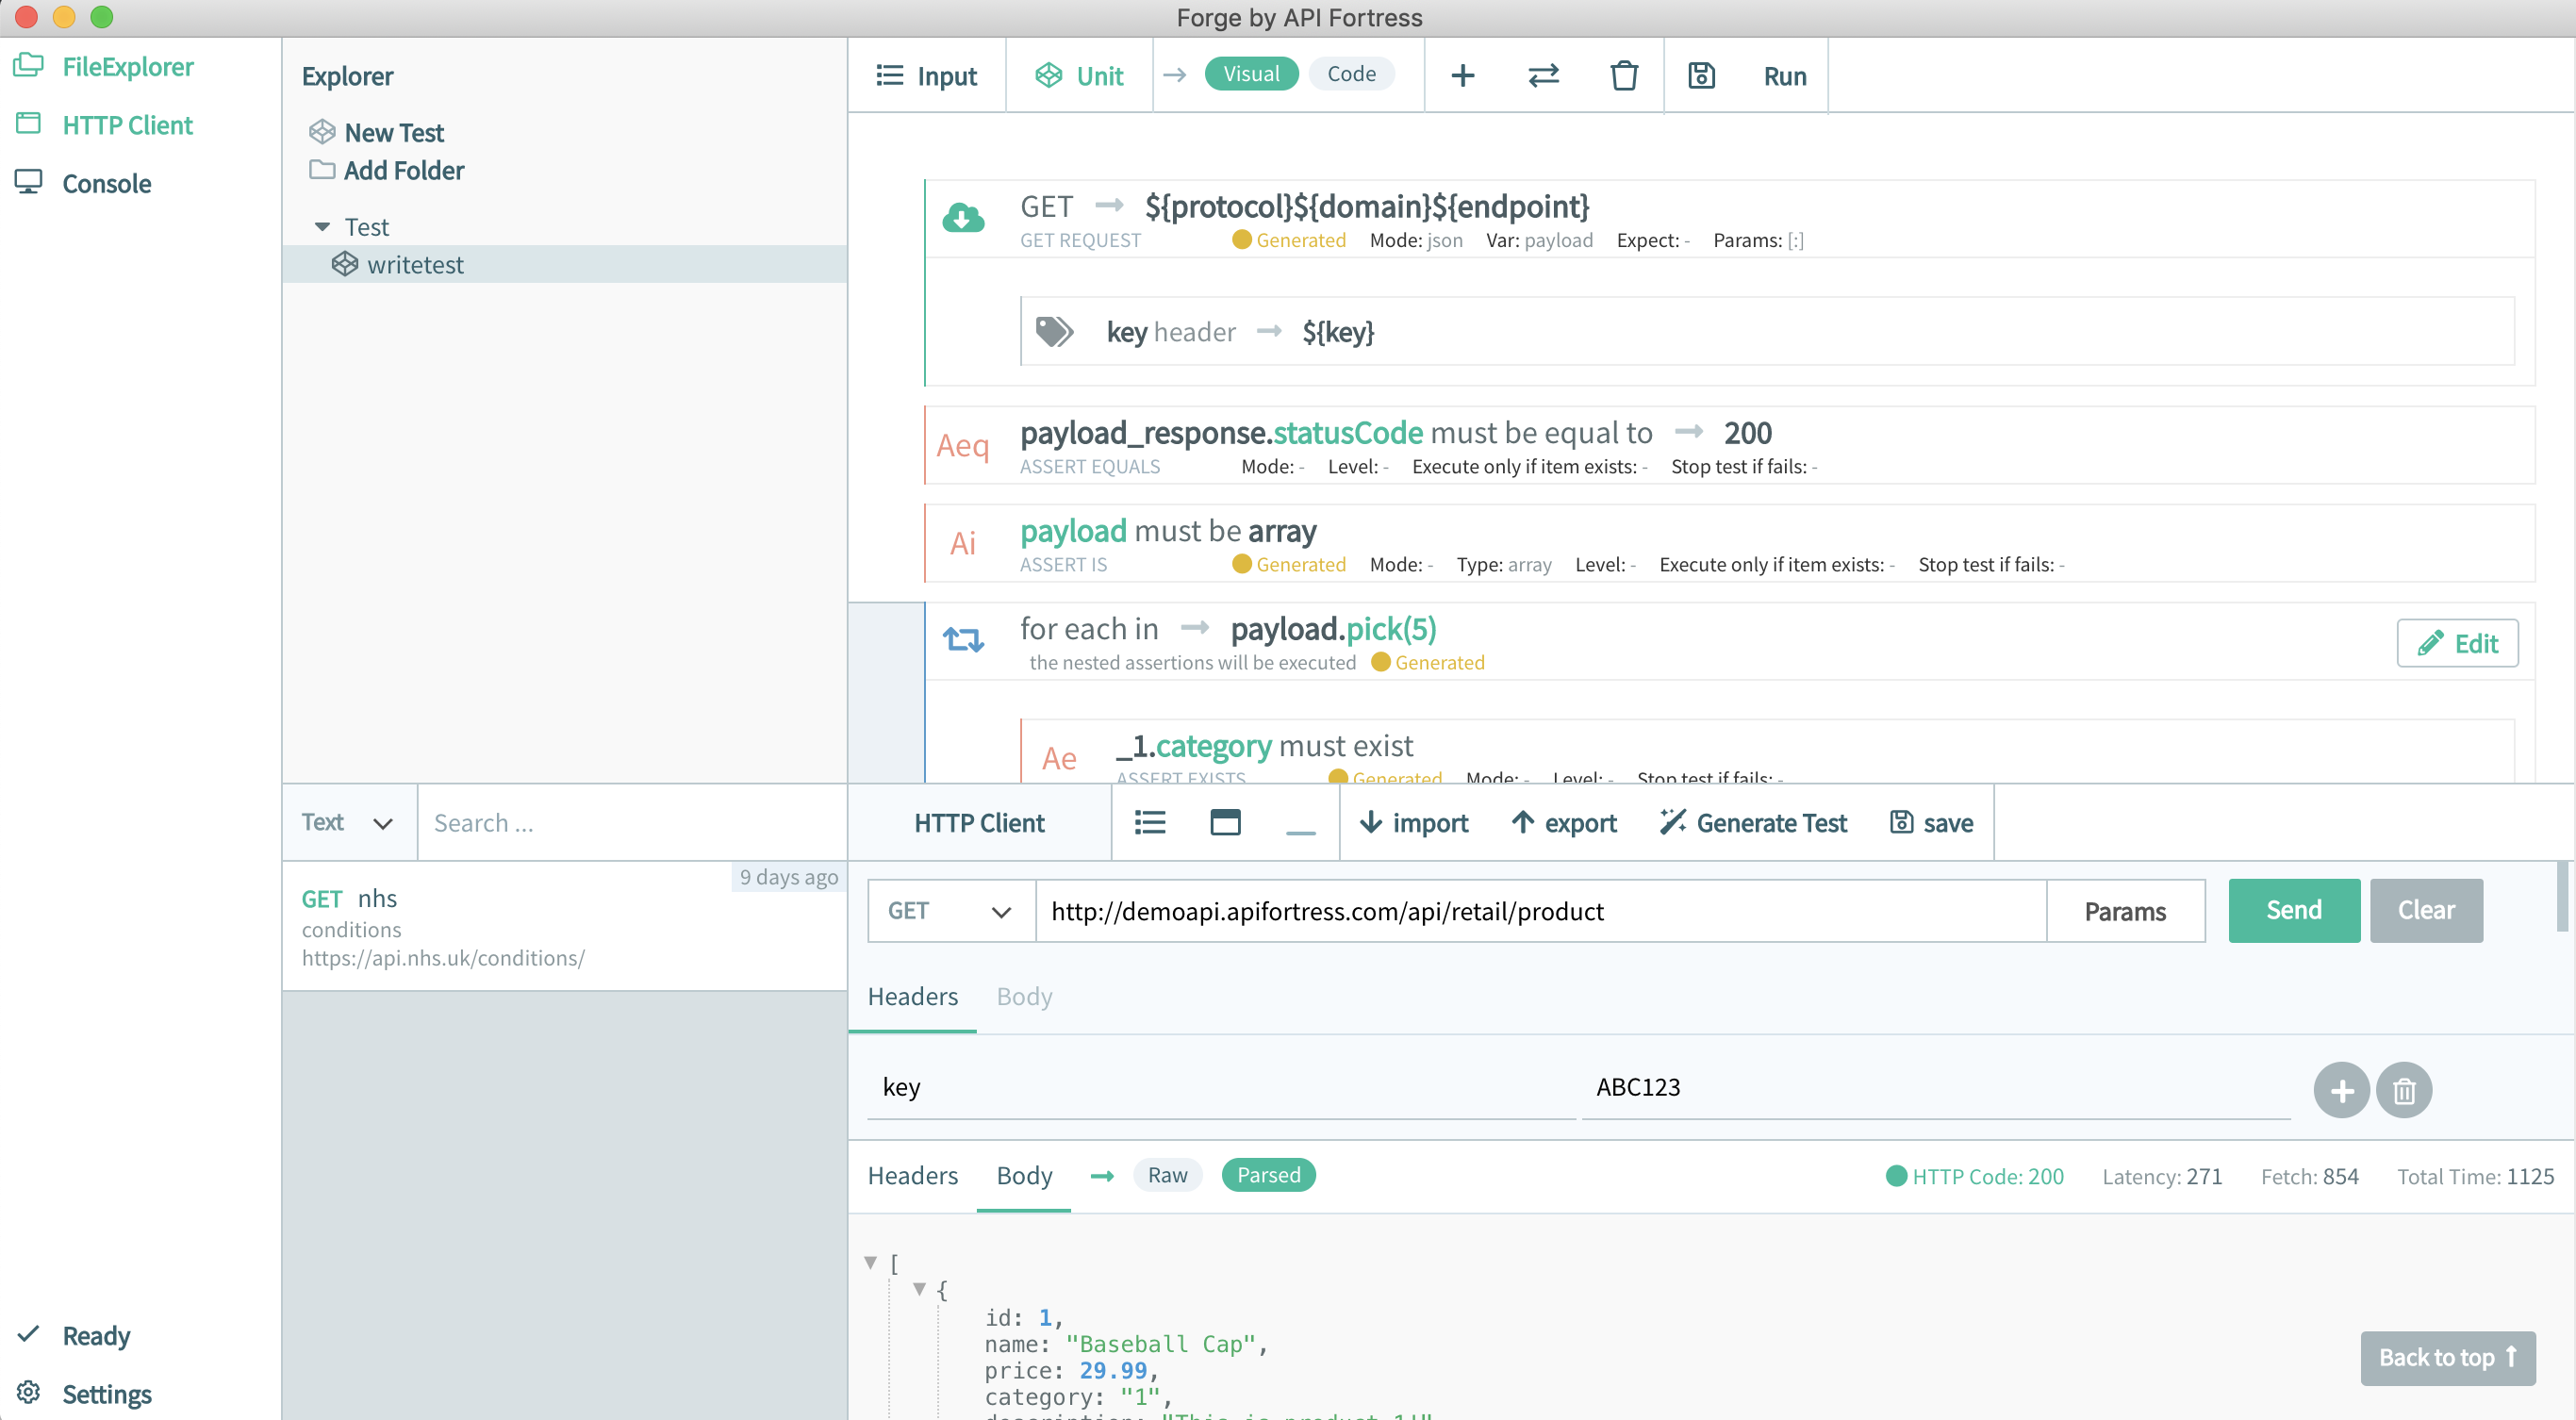
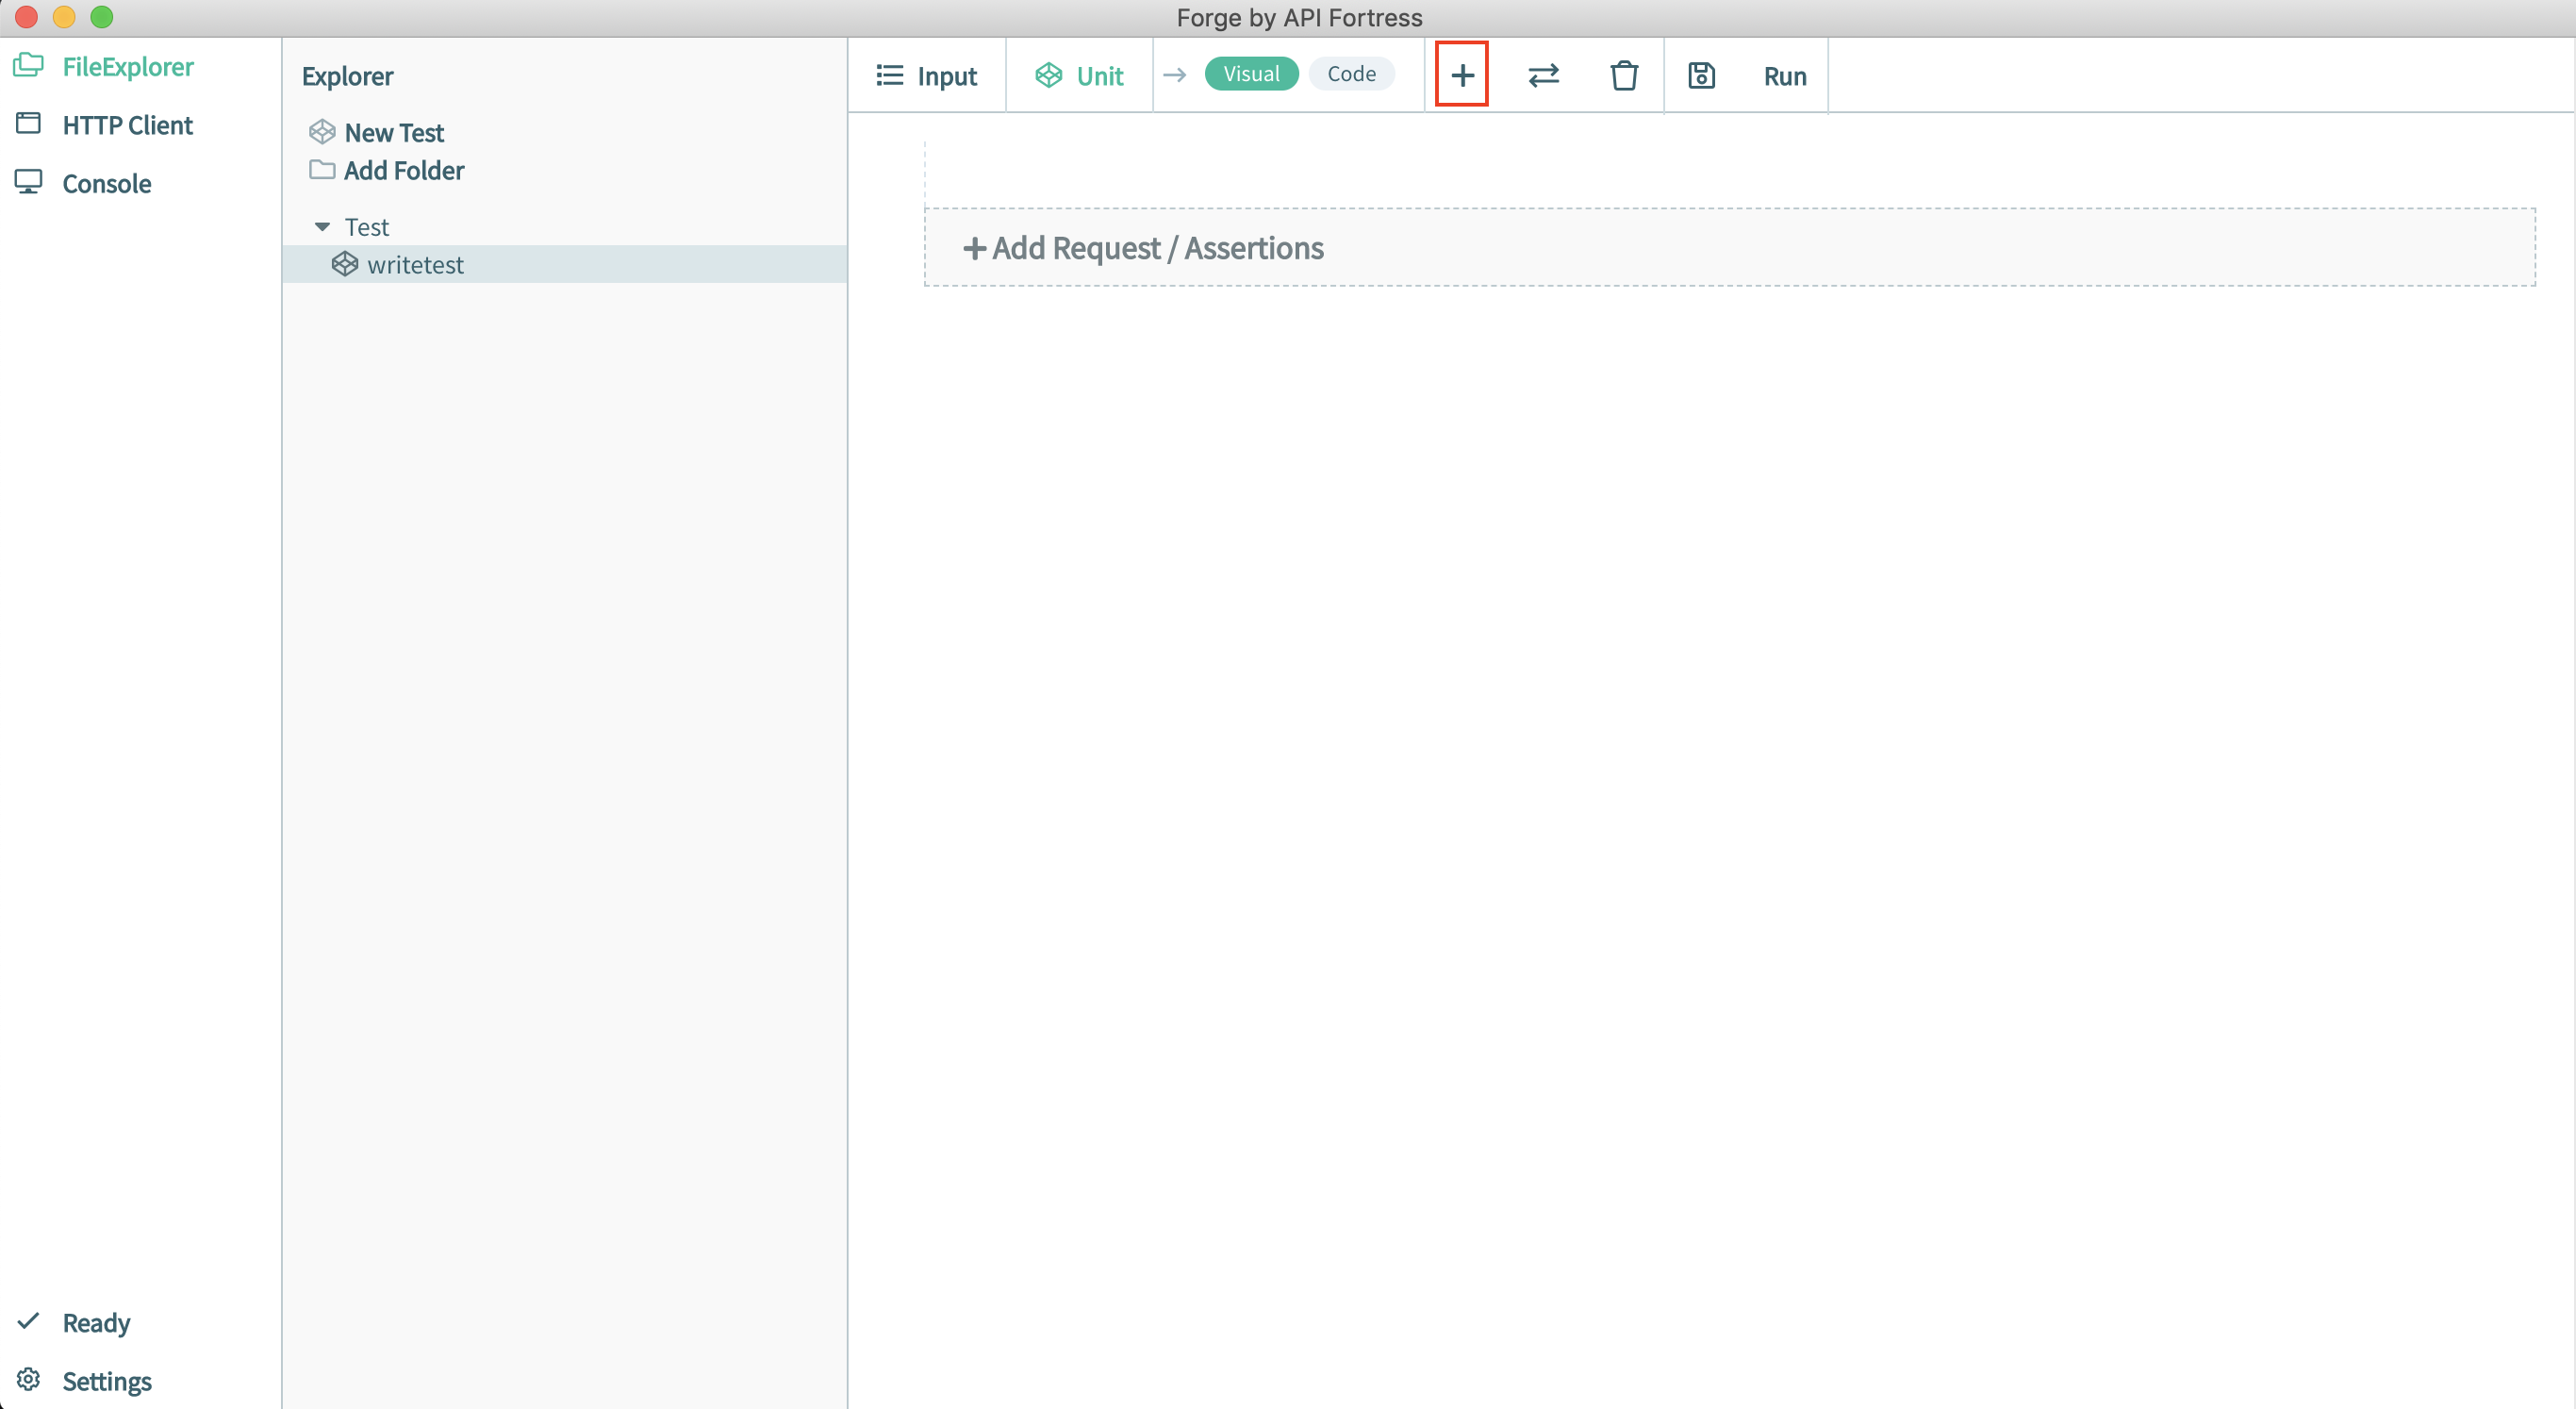
Now, click the “Generate Test” button at the top left corner of the Console to generate a test draft.

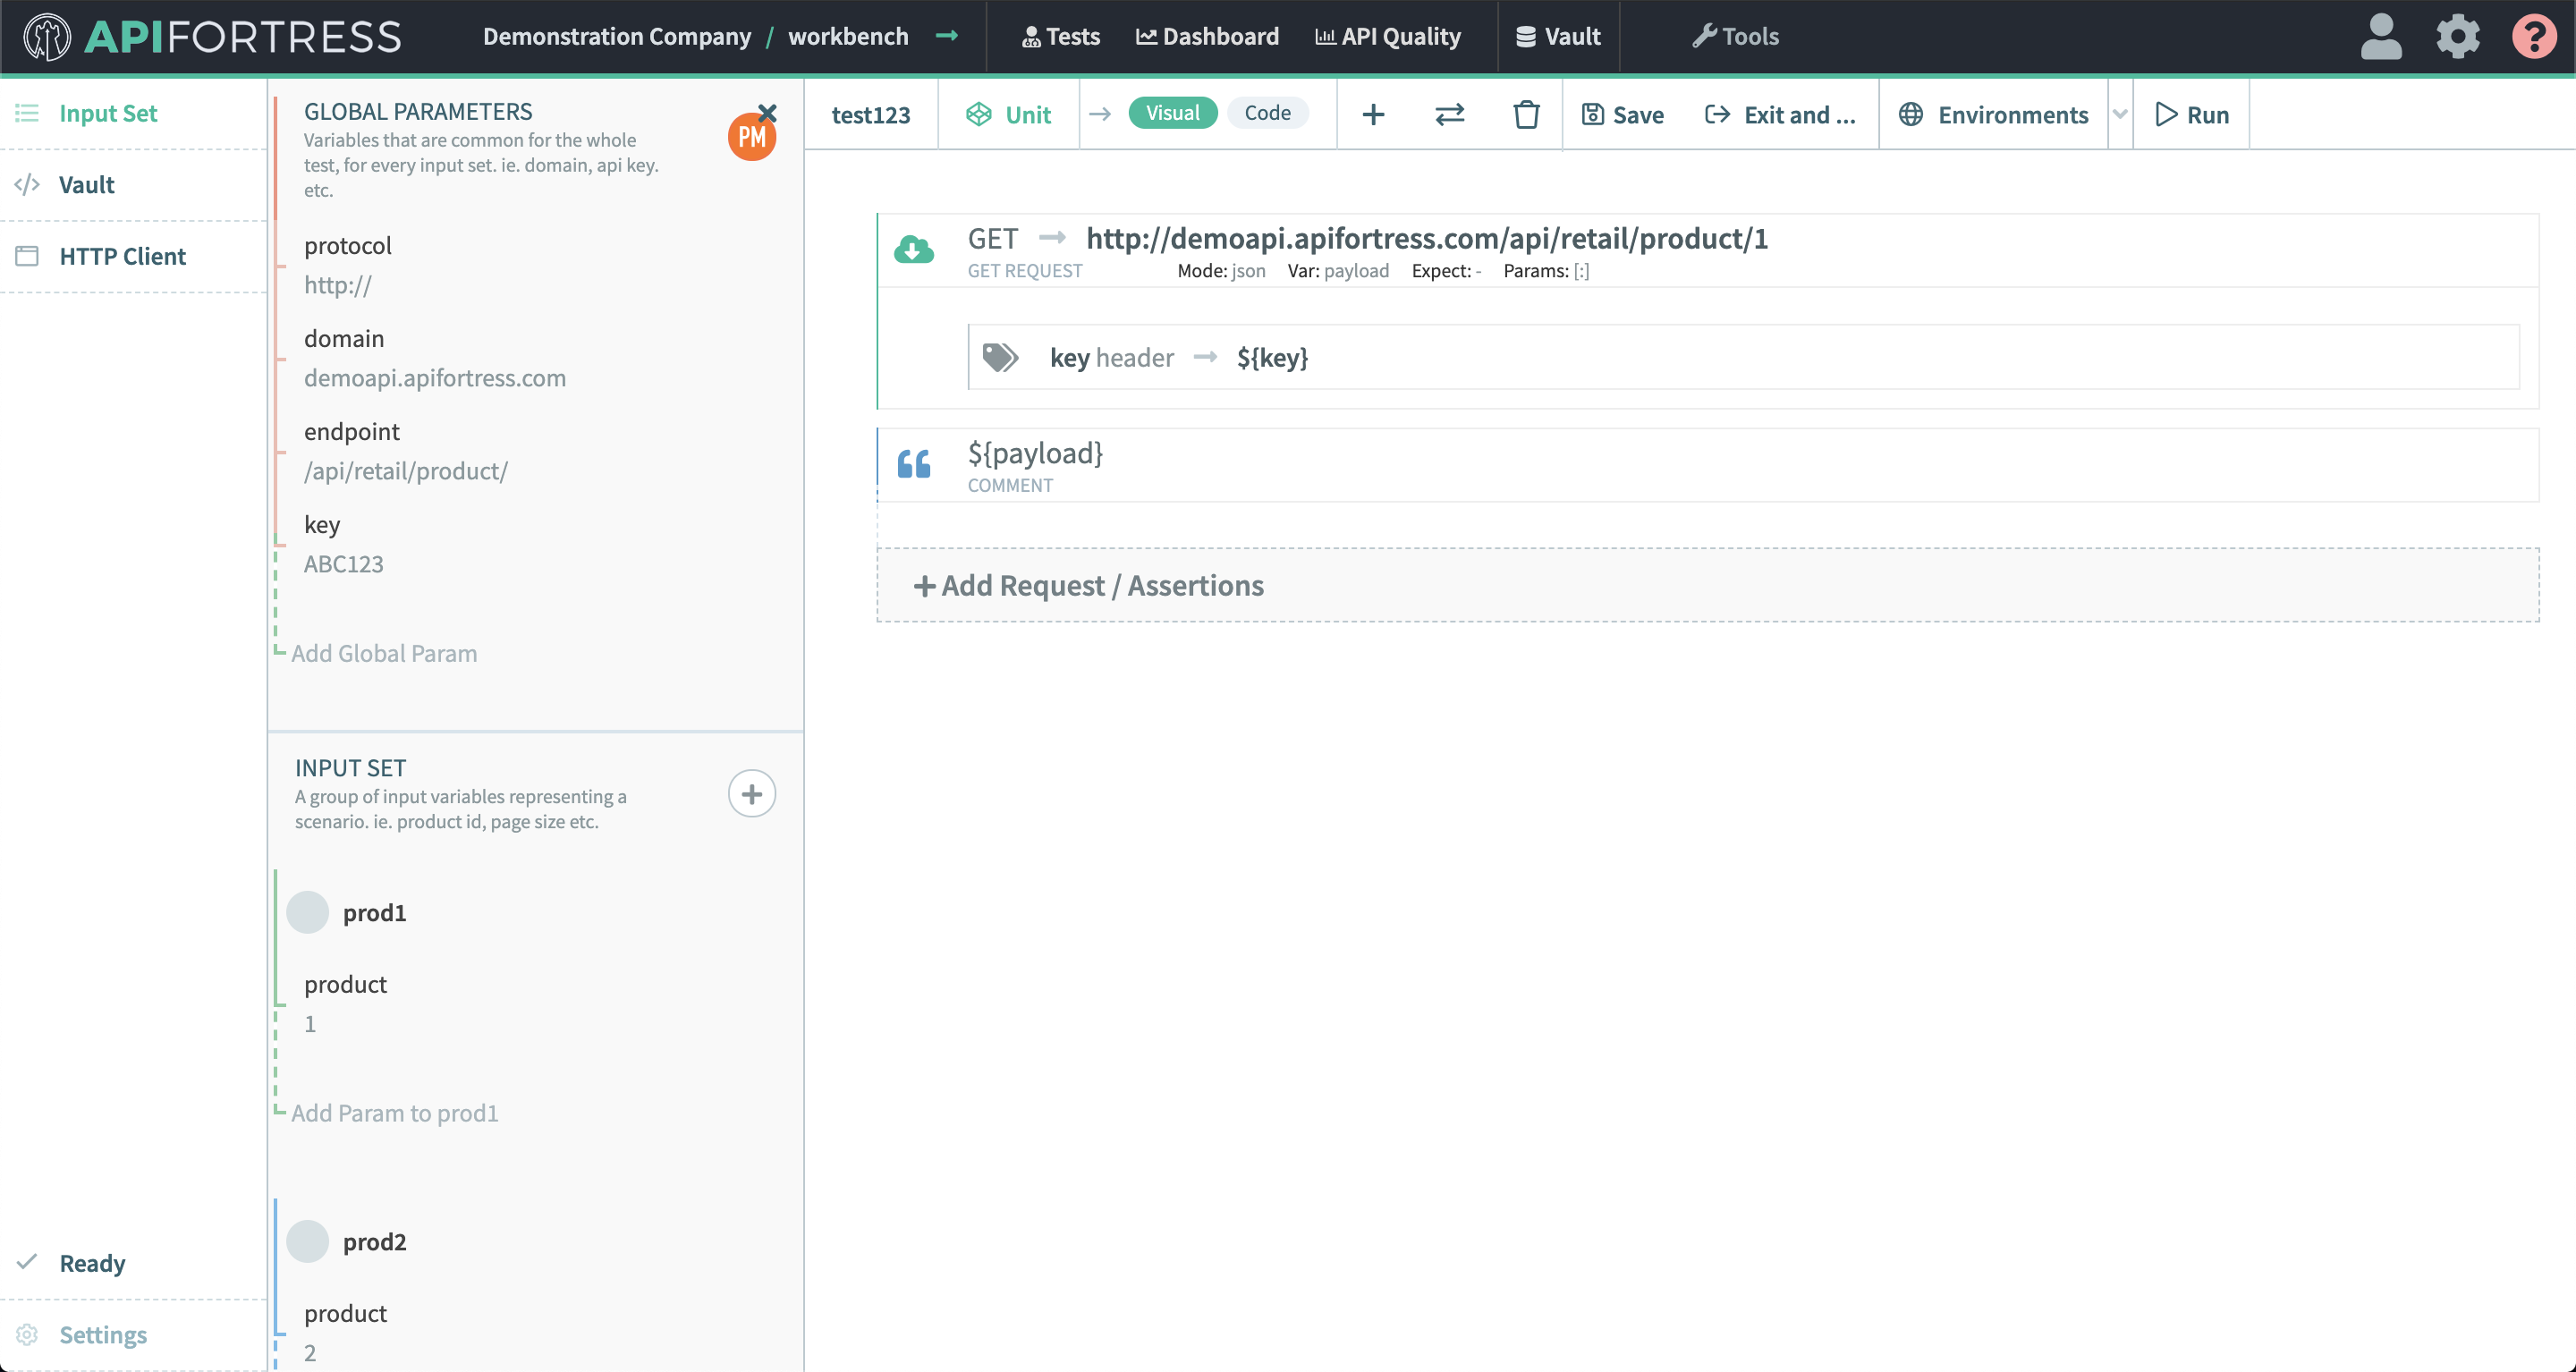
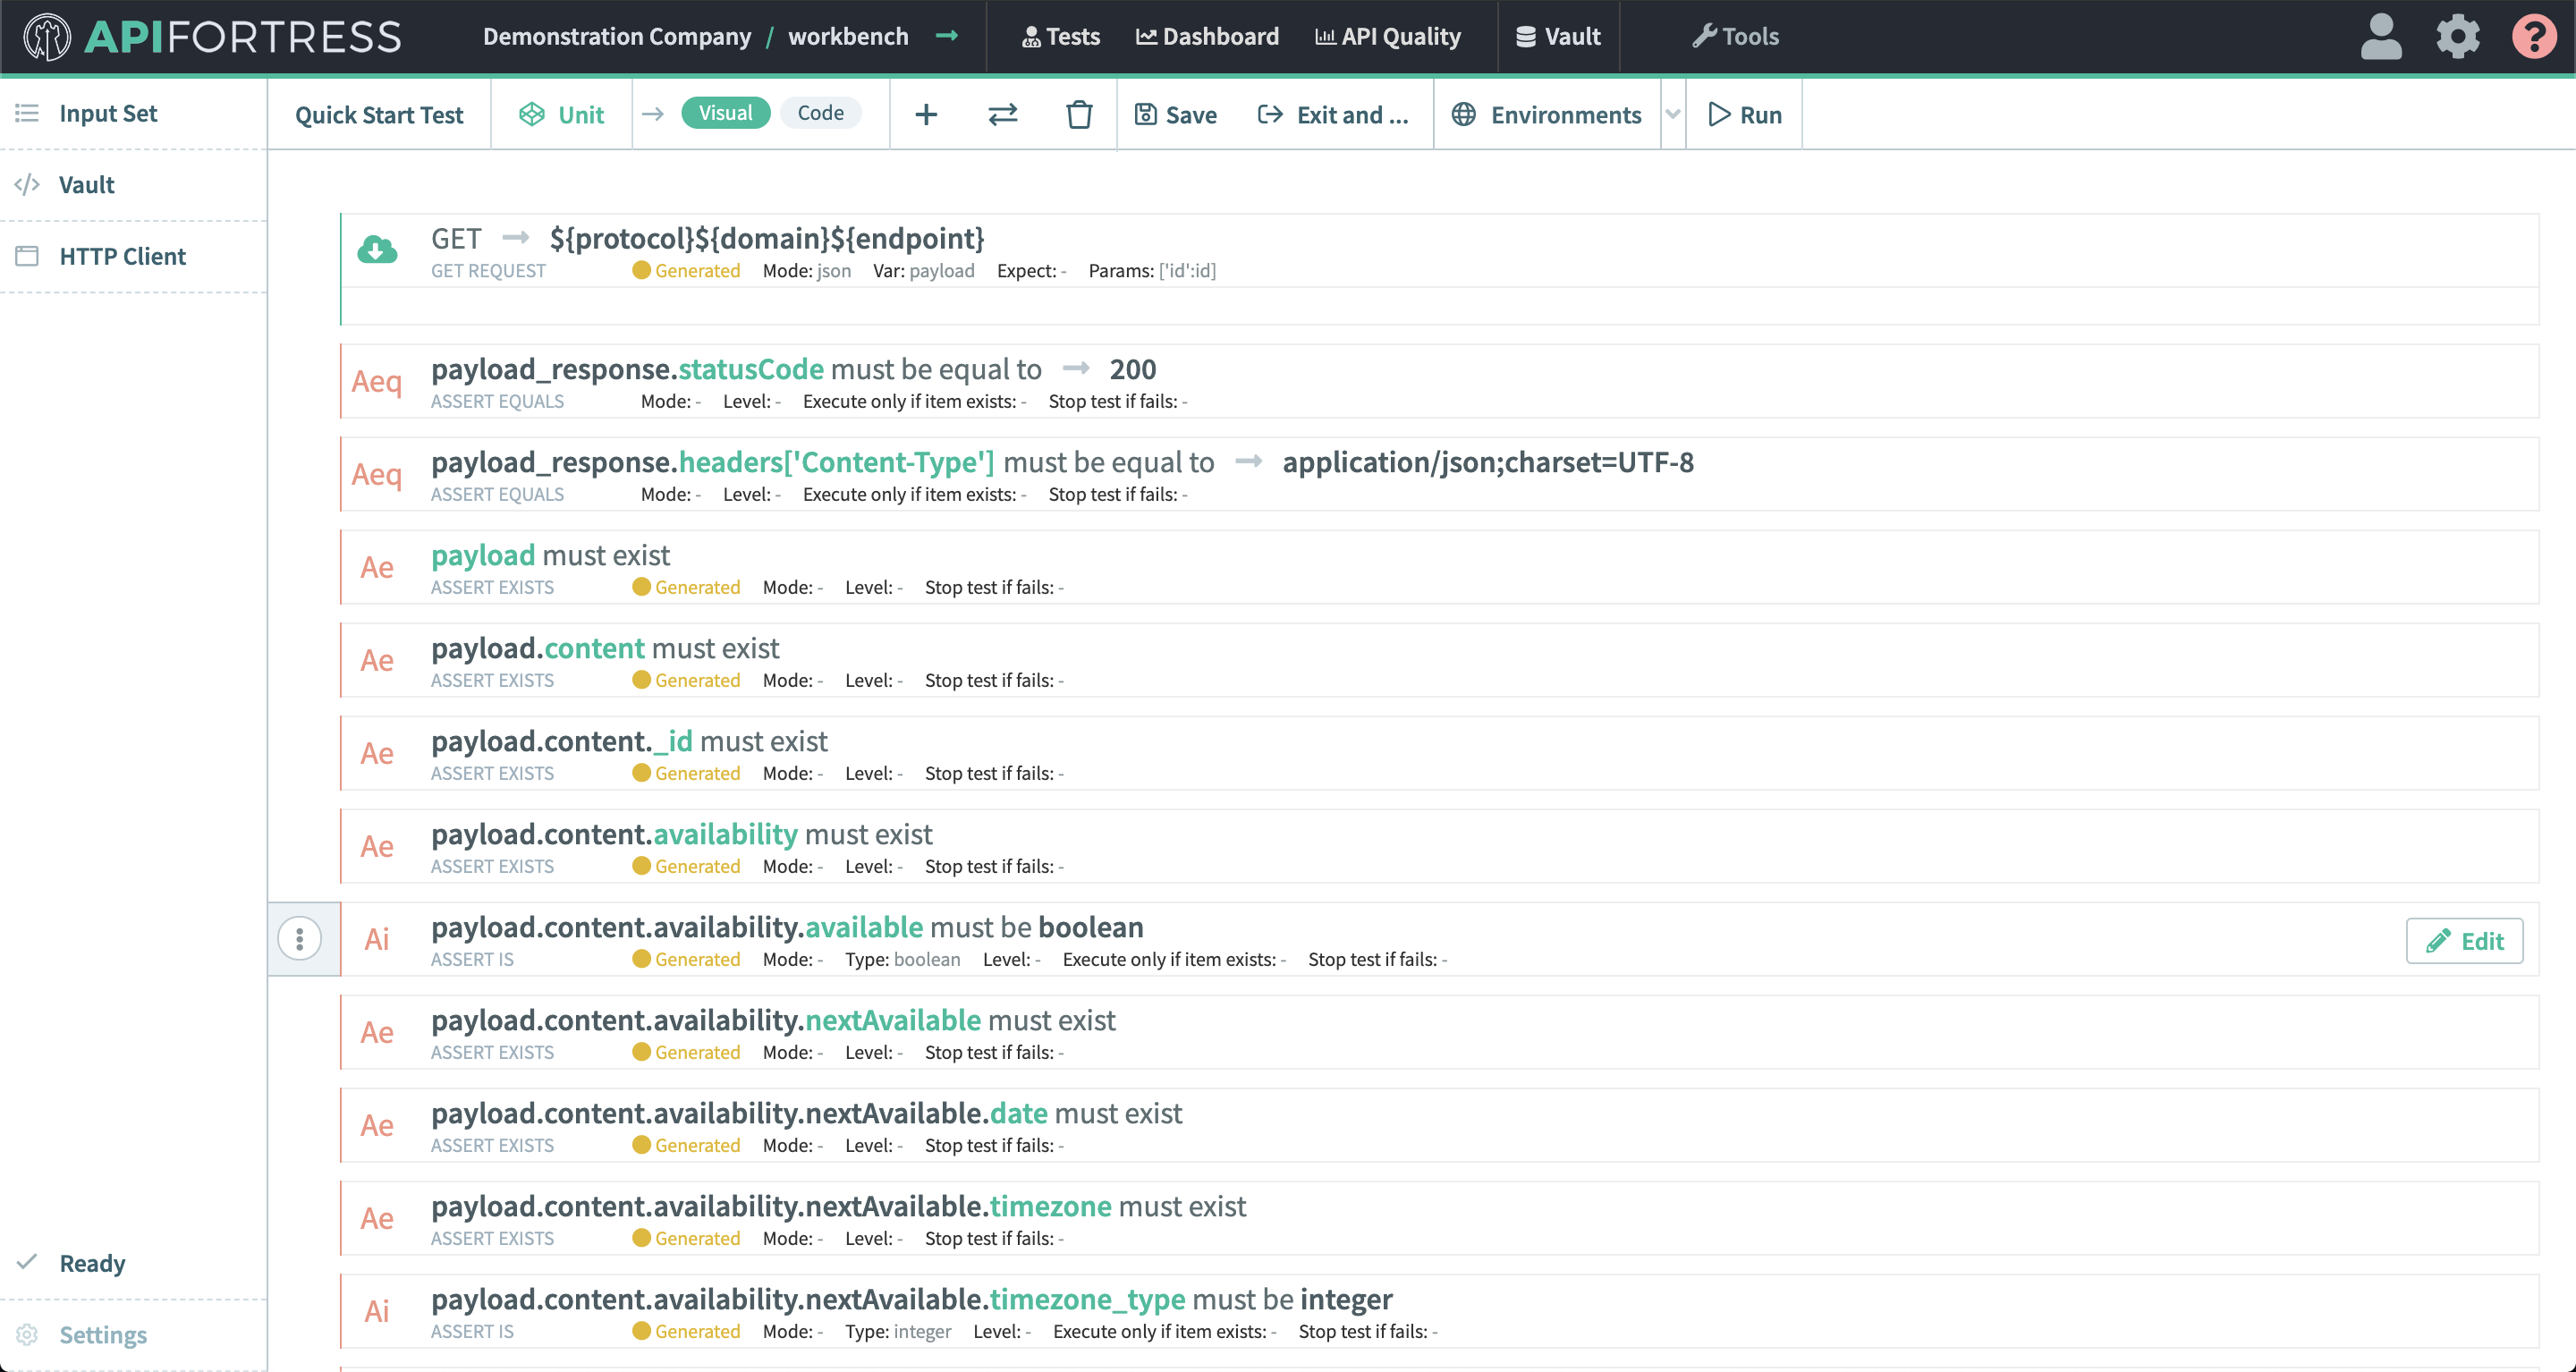
The following screens will allow you to choose whether you want to create the input set based on the data provided in the request, and if you want Magic to generate the assertions. The final screen summarizes what was done. Press Continue on each screen.

generationProcess

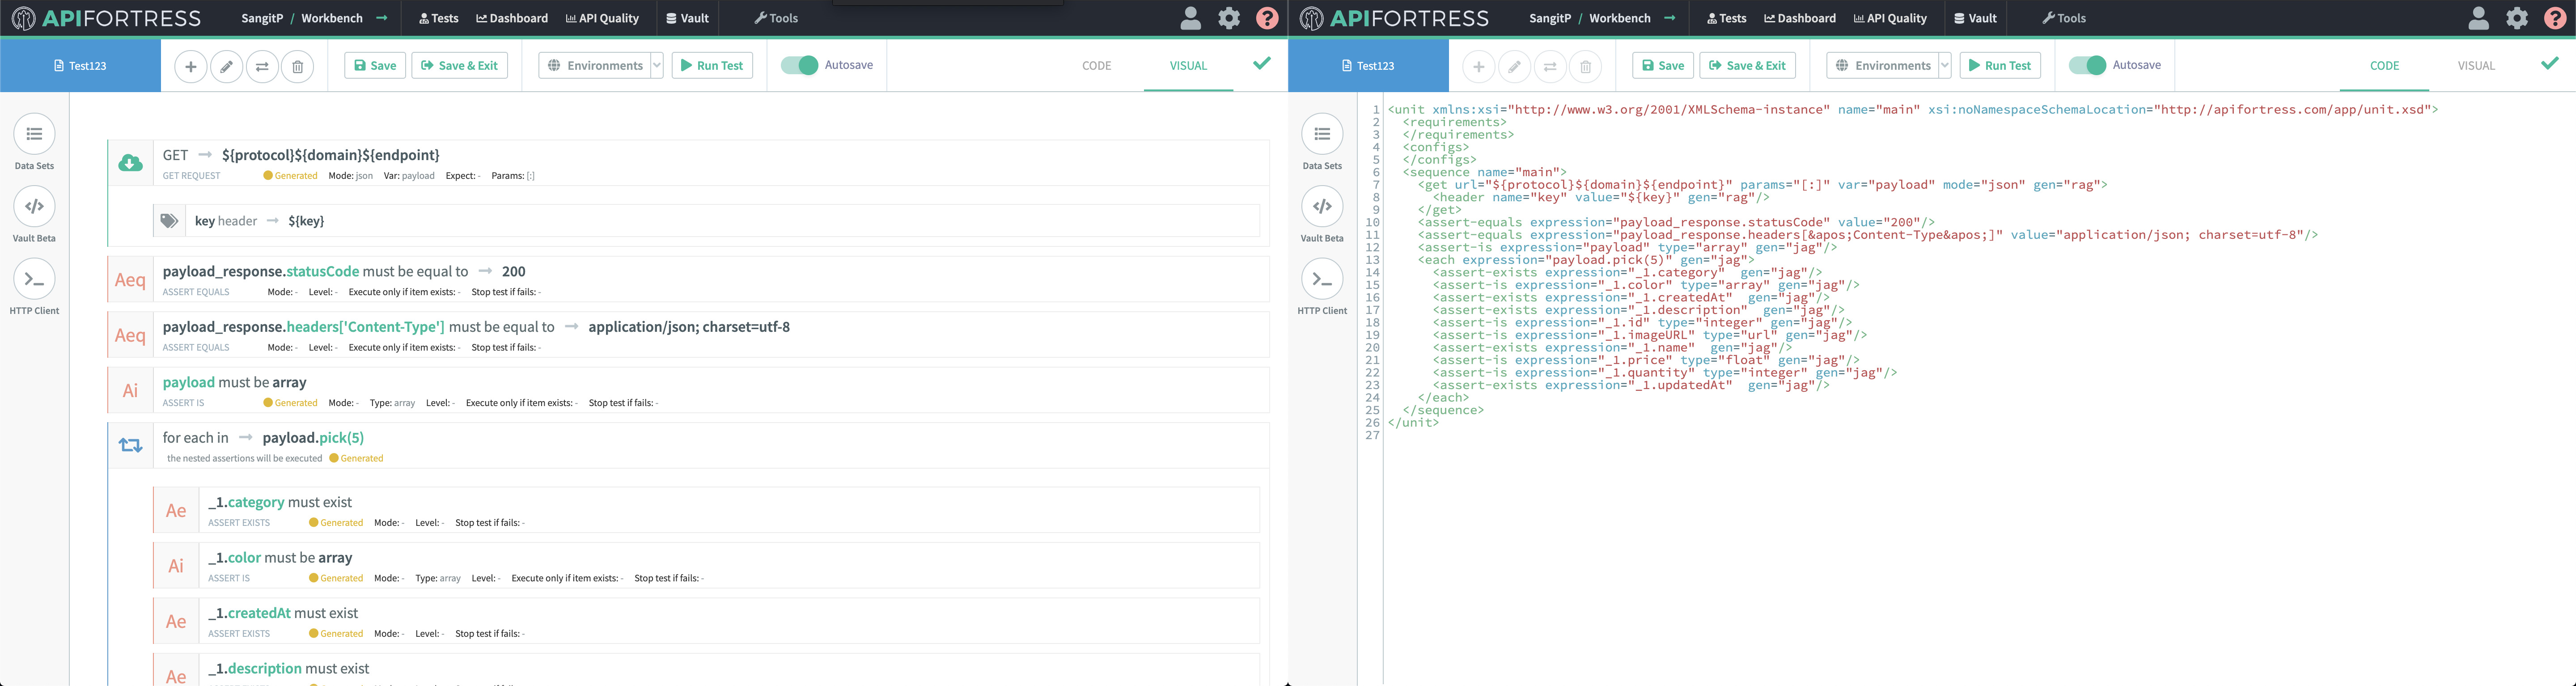
At this stage, the test should be considered a draft. You should take a moment to verify each object, and/or add more logic to it. API Fortress has a lot of tools that allow for comprehensive continuous integration testing. Magic Test Generation is great at understanding datatypes and structure, which is often 90% of the work. For an example of adding more intelligence to a test, please see the Appendix at the bottom.

All done!

Learn how to schedule a test here.
Learn about data and notifications connectors here. Simple solutions to plug APIF into the systems you use today (like DataDog or New Relic).

generate, how to, start

02. Test Composer Guide

The API Fortress Composer offers unparalleled flexibility and ease-of-use with everything at your fingertips to build tests in minutes and eliminate many duplicate tasks. Users of all skill levels may begin using the Composer with little or no training to quickly generate sophisticated functional tests. These tests may easily be reused as end-to-end integration tests and load (stress) tests. In turn, load tests may easily be reused as monitors for performance testing.

Special Note about End-to-End Tests / Integration Tests:
API Fortress has a different philosophy when it comes to creating multistep tests that reproduce user/consumer flows. Creating a series of independent tests that each hit one endpoint, and then running them in a specific order isn’t a proper testing methodology. It doesn’t allow for optimal testing of how each API interacts with each other. For that reason, the API Fortress composer is very flexible and allows you to create a single “test” that can handle a series of API calls. For example Search > Add to Cart > Checkout can and should all be inside of one smart test, and not three separate tests.
Read more about Integration / Multistep Testing:
https://apifortress.com/doc/introduction-to-integration-testing-new/

Begin using the Composer by selecting from two versions: Visual or Code view. The visual Composer does not require coding expertise, and provides real-time suggestions via predictive text to help you create ideal API tests for your needs. The Code view is intended for users who are more comfortable working in code rather than a visual UI. With either Visual or Code view, easily make calls and add assertions for testing your APIs, and insert variables wherever needed. For more information, visit our API Testing University to research best practices and find detailed guidance.

Visual vs. Code View

(1) All of the available components can be seen by clicking on Add Request / Assertions.

If a component is not valid for the operation you are conducting, it will not be made available to help avoid mistakes. For instance, if you don’t add a POST first, you can not add a POST Body or POST Param. NOTE: Free accounts do not give you access to all available components.

Read descriptions of each component in the Reference section of API Fortress Documentation.

(2) This button allows you to easily transform an existing component into another component of the same type.

(3) Global Parameters are variables that are available to be used throughout a test. Reference these variables simply by calling it within the test using the convention:  “${VARIABLE}”.

Input Sets are a group of input variables representing a scenario. The test will be executed once for each input set, overriding the variable values into your test.

(4) HTTP Client – the APIFortress http client is very similar to many other http clients out there. You can make GET/POST/PUT/PATCH/DELETE calls and see their responses.
A key difference in our HTTP client comes from your ability to generate a test for the API you are calling right from there. If you click the “Generate Test” button, API Fortress will create a test for you based on the API’s behavior and response.


Learn how to create a test quickly here.

composer, components, intro

20. APIF Forge (Local IDE)

Important: Forge requires the API Fortress local engine, which is for licensed API Fortress customers only. If you would like to set up a free trial, please reach out to support@apifortress.com.

Introduction

Forge is a downloadable IDE made for writing and running tests locally. The APIF Composer on Forge works exactly like the Composer on the hosted cloud or self-hosted/on-premises version of API Fortress. Click here to learn how the composer works.

Creating Tests

You can either create tests directly in Forge by writing it yourself or by calling the desired API within the included HTTP client in Forge then using our “Generate Test” button to create the test.

Tests can be automatically generated via an API payload:

Auto generate a high-level schema validation test by using our HTTP client to make an API call and our Generate Test button.

You can also write tests from scratch via the API Fortress visual composer or code view composer:

Visual Composer:

Code View Composer:

You can also write tests directly in our XML markup language that is so easy to use that anyone can learn how to use it:

Importing Tests

Import tests from your API Fortress instance. Learn how here.

Importing tests into Forge is as easy as opening the folder that contains the unit.xml and input.xml in the Forge IDE.

Running Tests

By combining Forge with APIF-Local (APIF – Local Engine), you can execute local tests directly from the IDE. Current customers can reach out to their sales contact (or sales@apifortress.com) to request the local engine files.

Find a step-by-step guide on how to set up APIF-Local here.

Once you have configured your local engine, integrating into Forge is very easy. See below:


In the settings section of Forge:

Load the local engine jar file here
Load the config.yml file here
forge, ide, local, engine

06. The Dashboard

The API Fortress platform offers a full-featured dashboard that centralizes testing management and simplifies collaboration and reporting. Key features of the dashboard allow you to:
  • View all test logs across teams
  • Share, download, or print test logs
  • View all performance metrics from tests (latency & fetch)
  • Set performance alerts
  • Filter logs and alerts by time, endpoint, and more
  The following links provide useful information about using the dashboard and its metrics:

04. Test Reports

Here’s a quick primer on API Fortress Test Reports:
An API Fortress Test Report Document
  1. Session Details – Metadata about the execution of the test; Timestamp, downloader, type of execution
  2. General Details – Test name, test status, company, project
  3. A Request Component – Click “See More” to reveal the Request Details pane
  4. An Assertion – A gray dot indicates a pass, a red dot indicates a fail, and a yellow dot indicates a warning.
  5. Request Details – REST method, URL, Request Headers
  6. Response Details – Response Headers, Status Code
  7. Response Body – The response payload itself

16. Importing Postman Collections

Note: The import Postman collection only supports exports in V2 and beyond. V1 has been deprecated by Postman and is not supported by API Fortress.

Importing a Collection

import_collection API Fortress has made it very easy to import Postman Collections with the click of a button.
  • First, open the HTTP Client via the Tools menu.
  • Click the gray Import button at the top of the client.
  • Select your Collection file in the popup window.
  • Click Open.
  • The routes from your collection are now available in the list of saved requests.

Importing Postman Environments

import_env Importing a Postman environment is just as simple as importing a Postman collection.
  • First, inside of a test, click on the Data Sets button on the left pane.
  • Click the orange Postman button.
  • Select your environments file from the popup.
  • Your environmental variables will now be available in the Data Sets pane.

Importing Postman Global Variables

import_globals The process for importing global variables from Postman is nearly identical to the process for importing environmental variables. The primary difference is where the import is executed.
  • First, access the Vault via the Tools menu at the top of any view.
  • Select the project that you want to access the variables through, or select the Global Vault if you want all of your projects to have access to the variable definitions.
  • Click the Variables button in the specific Vault that was chosen.
  • Click the Import Variables from Postman button.
  • Select your global variables file and click the Open button.
  • Your global variable definitions can now be accessed from the connected project(s).

09. Adding a User

Creating/Assigning a User

From any screen within the platform, click the “Add User” icon (in the upper right corner)


Fill out the user fields and press the “green check”:

e-mail: the user's email used for login
Full Name: the user's name that will appear in the system
Time Zone: *choose time zone*
Level: Manager, Developer, or Analyst

The user roles are defined as follow:
Analyst – Cannot view or modify tests, can only access the dashboards.
Developer – Can view and modify tests, schedules, and access the dashboards.
Manager – Can view and modify tests, schedules, and access the dashboards. As well as add users, notifications, and settings.


19. Easy Monitoring

We suggest creating comprehensive functional tests, and then scheduling those tests as monitors for two reasons. First, this method ensures that your monitors validate functional uptime rather than a simple 200 OK ping. Second, this approach makes it efficient to reuse existing tests. However, we understand that you may simply be looking for a simple monitor that validates that the 200 OK is returned, and performance is acceptable.

Follow these steps to quickly create a basic monitor:
  1. Login to API Fortress
  2. Click Create New Test
  3. Name the test
  4. Click Compose on the far left of the test interstitial page
  5. On the platform, close the tutorial wizard and then click the HTTP Console button on the left
  6. Enter the API call and click Send
  7. Click Generate Test
  8. Click OK on the first two options, but click Skip on the third (“Create Assertions”)
  9. The GET call should have been created for you. Now, click Code View at the top right.
  10. Paste this code below the GET call:
    <assert-is expression="payload_response.statusCode=&apos;200&apos;" type="integer"/>
    <assert-less expression="payload_response.metrics.latency" value="350"/> <assert-less expression="payload_response.metrics.fetch" value="300"/> <assert-less expression="payload_response.metrics.overall" value="650"/>
  11. Confirm that the status code is 200, and make sure the latency, fetch (download), and overall timing is below those numbers (in milliseconds). Those are numbers we suggest, but you should adjust as you see fit.
  12. Run the test to confirm it works.
  13. Save and Exit
  14. Click Publish
  15. Click Schedule
  16. Schedule as you see fit.
Thank you for learning how to use API Fortress in our Quick Start Guide. Please let us know if you have any questions or comments.

07. All – Integrate CI/CD Platforms (simple)

API Fortress is an API-first platform that was built from the ground up for deployment flexibility and non-disruption to existing workflows. Whether you are transitioning to a CI/CD pipeline or have already invested in a CI/CD pipeline, it is easy and seamless to integrate continuous API testing powered by API Fortress into your CI/CD pipeline. We offer a scheduler, APIs, and command-line tools to simplify integrations with your CI/CD pipeline.

APIs & Webhooks

Find APIs on the API Fortress platform for most features, including data and test execution. You can use that API to easily run a single test, all tests, tests with specific tags, and more. Learn more about this:

Command-line Tool (APIF-Auto)

We have also created a command-line tool that is easy to use, and exposes the execution of APIF tests in their local environment. It is also a great way to expose results during the build phase directly in the CI platform.

A General Guide to use the API

Step 1 – Install an HTTP Plugin

Depending on your CI/CD platform, you may need to install a plugin that allows for HTTP requests during the build process. API Fortress will need the plugin to execute the tests.

Step 2 – Generate an API Hook

The first step of integrating API Fortress into your CI/CD process is to grab the generated API hook for the project in question. To do so, go to the Settings panel in API Fortress. This view, seen below, can be accessed from anywhere in the application by clicking the gear icon in the top right corner. Please note that you need Manager access to generate a webhook. From Settings, click the API Hooks section to generate the hook for your project.

The next step depends on what you’re trying to test. The following directions are based on the assumption that you wish to run all of the tests in a project. You can also run a single test, or a series of tests with a certain tag. If you would like to learn more, please contact API Fortress.

As it stands, our API hook is as follows:
https://mastiff.apifortress.com/app/api/rest/v3/86f81b19-2d29-4879-91d9-6dbb2271fec0861

The normal command to run all of the tests in the project, per the API Fortress docs is /tests/run-all, so we append this onto the end of the API call. You may need to request a JUnit output. To do that, simply collect a few query parameters. First,  set sync to true so that we can set format to JUnit. In short, we need to append ?sync=true&format=junit to the webhook call. That gives us the final API call:
https://mastiff.apifortress.com/app/api/rest/v3/86f81b19-2d29-4879-91d9-6dbb2271fec0861/tests/run-all?sync=true&format=junit

Great! If we make this API call via a browser or a tool like Postman, we can see our results in JUnit. We’re almost there.

Step 3 – Execute HTTP Calls from Your Platform

From your CI/CD platform’s dashboard, you’ll need to paste the webhook call to the flow. We have more specific docs available, for instance, if you wish to use Jenkins.

The test results can then be passed along to platforms like qTest or Zephyr in your CI/CD pipeline.


18. Creating a Mocked API

Step 1 – Access the Mocking Tool

The Mocking Tool is accessed by clicking on the “Tools” menu in the top navigation bar and clicking “Mocking.” 0

Step 2 – Create a New Mock Endpoint

Click either the green “New Endpoint” button or the “+ New Endpoint” button highlighted in the image below to create a new endpoint. 1

Step 3 – Define the New Endpoint

Use the “Create Entry” modal to define the domain and path for the mock endpoint. 2 Click “Continue” and your new endpoint will be populated in the Domains List. 3

Step 4 –  Define the Response

Click “+Add Response Case” highlighted below. 4 Choose the method (REST verb), define any parameters, choose the content type, status code and enter an optional description. You can define any necessary key/value header pairs in the “Headers” section. Finally, define the response payload in the provided space. 5
To learn more about the Expressions field click here.

Step 6 – Test the Endpoint

Switch to the HTTP client of your choice and enter the address for the endpoint you just created. The response should match the response you set up when you created the mock endpoint. This endpoint is now prepared for use. 6