
Note
This feature is only available on-premises, as of API Fortress version 20.2.0.
This feature also requires that you update the “remotedownloadagent” to the latest version as well.
The following instructions are to show how to make a POST call with an entire file included in the data.
Mounting a Volume
For multipart, API Fortress will look for files in the /data directory, so you’ll have to mount a volume to the /data directory. For example, if you’re using docker-compose, it’s done like this:
- Navigate to the /core/ directory.
- Stop “apifortress” but issuing the following command:
sudo docker-compose stop apifortress - Open the “docker-compose.yml” file.
- There is a section labeled “#APIFORTRESS DASHBOARD”, at the bottom of this section there will be a “volumes” section.
- Here you will see “# – ./data:/data” you can uncomment this line by getting rid of the “#”
- This will create a folder called “data” in the “/core/” directory.
    volumes:

    - ./tomcat_conf/conf:/usr/local/tomcat/conf

    # - ./bin:/usr/local/tomcat/bin

    - ./data:/data
- Now start the “apifortress” service again by issuing the following command:
sudo docker-compose up -d apifortress
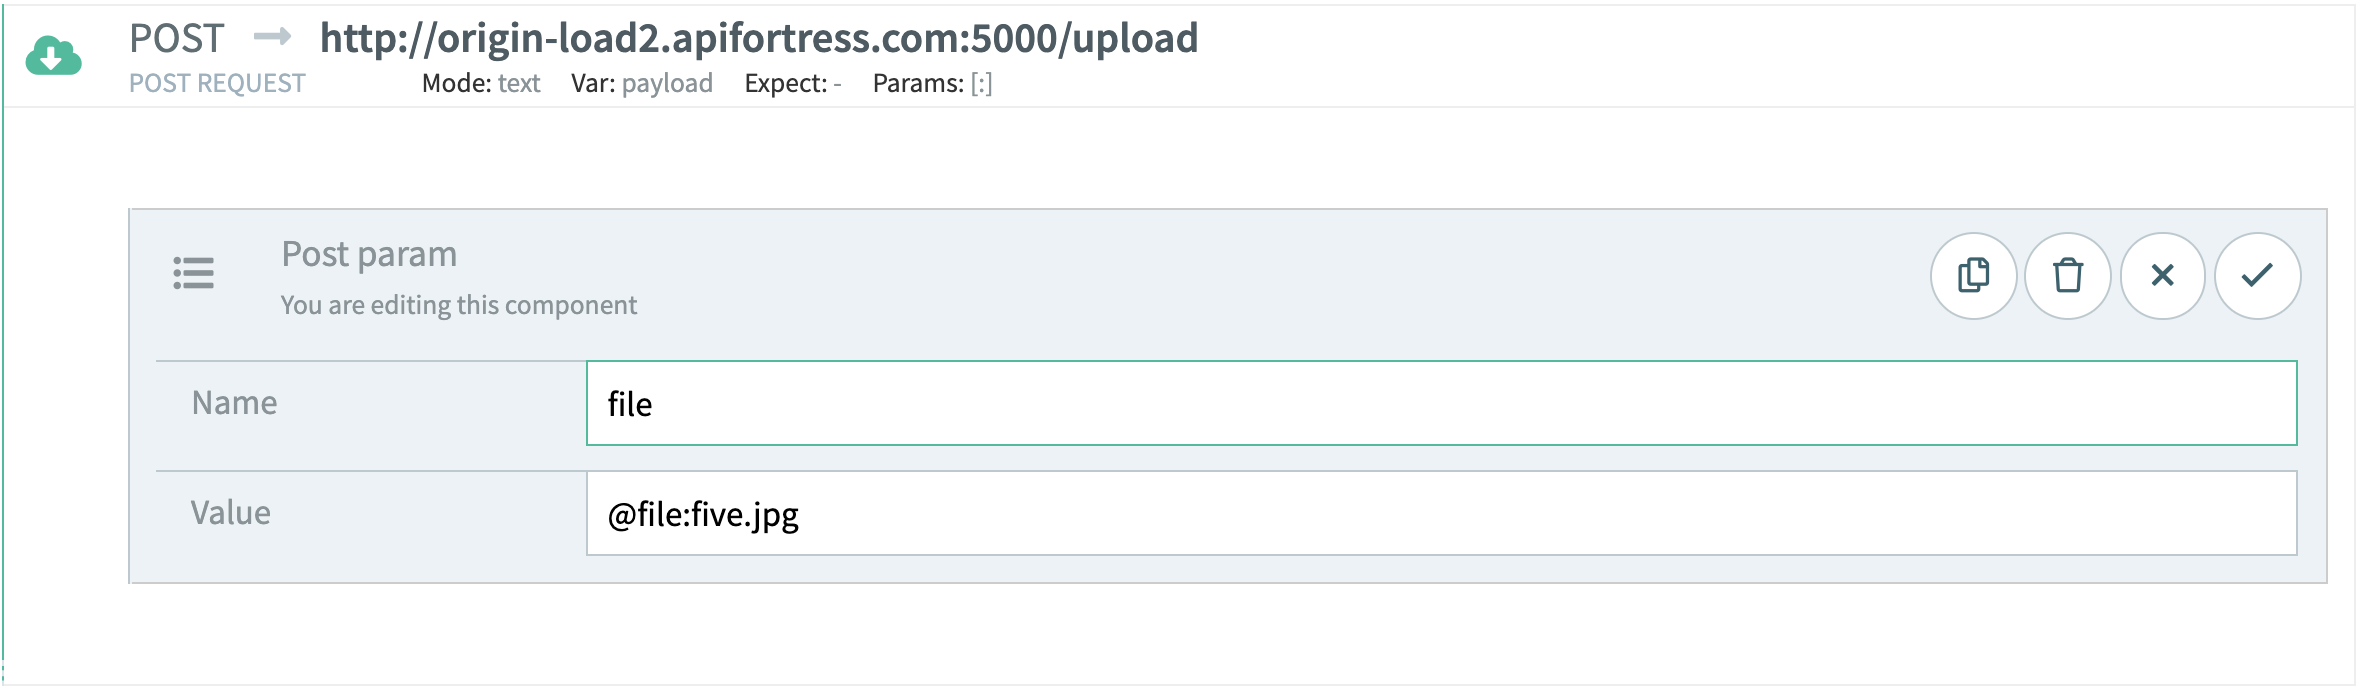
Make a Multipart POST Call
Now that we have a directory mounted we can make the POST call using a file from the “/data/” folder.
- You can add a “post parameter” to your POST call to load the file into.
- Give the post parameter a name and craft the value using the following notation: “@file:filename.extension”.
- If the name matches a file in the /data/ directory, then the whole form becomes a form-data type, and the file will be uploaded as a multipart.
 Usually, the component is used in conjunction with the set variable component. First, we set a variable. Then, we make it available outside of the current test with the update input component.
We pass the update input component the name of the variable that we need to persist outside of the test. The component will first try to update a variable of the same name in the current input set. If that doesn’t exist, it will search for a global variable of the same name. If there is no global variable of the same name, it will check the vault. If the variable doesn’t exist there, it will create one with the same name.
Important note: the update input component works only outside of the composer. That is to say, it will only function when a test is executed from the Test List, the Scheduler, or via the API.
Usually, the component is used in conjunction with the set variable component. First, we set a variable. Then, we make it available outside of the current test with the update input component.
We pass the update input component the name of the variable that we need to persist outside of the test. The component will first try to update a variable of the same name in the current input set. If that doesn’t exist, it will search for a global variable of the same name. If there is no global variable of the same name, it will check the vault. If the variable doesn’t exist there, it will create one with the same name.
Important note: the update input component works only outside of the composer. That is to say, it will only function when a test is executed from the Test List, the Scheduler, or via the API.
 In the image above, after calling the login endpoint, we have created a variable called access_token with the set var component. Then, we have updated the value with the update input component. In doing so, the value of the variable will persist throughout and the value can be used in follow-on tests.
 Once done, you will have a form to fill up:

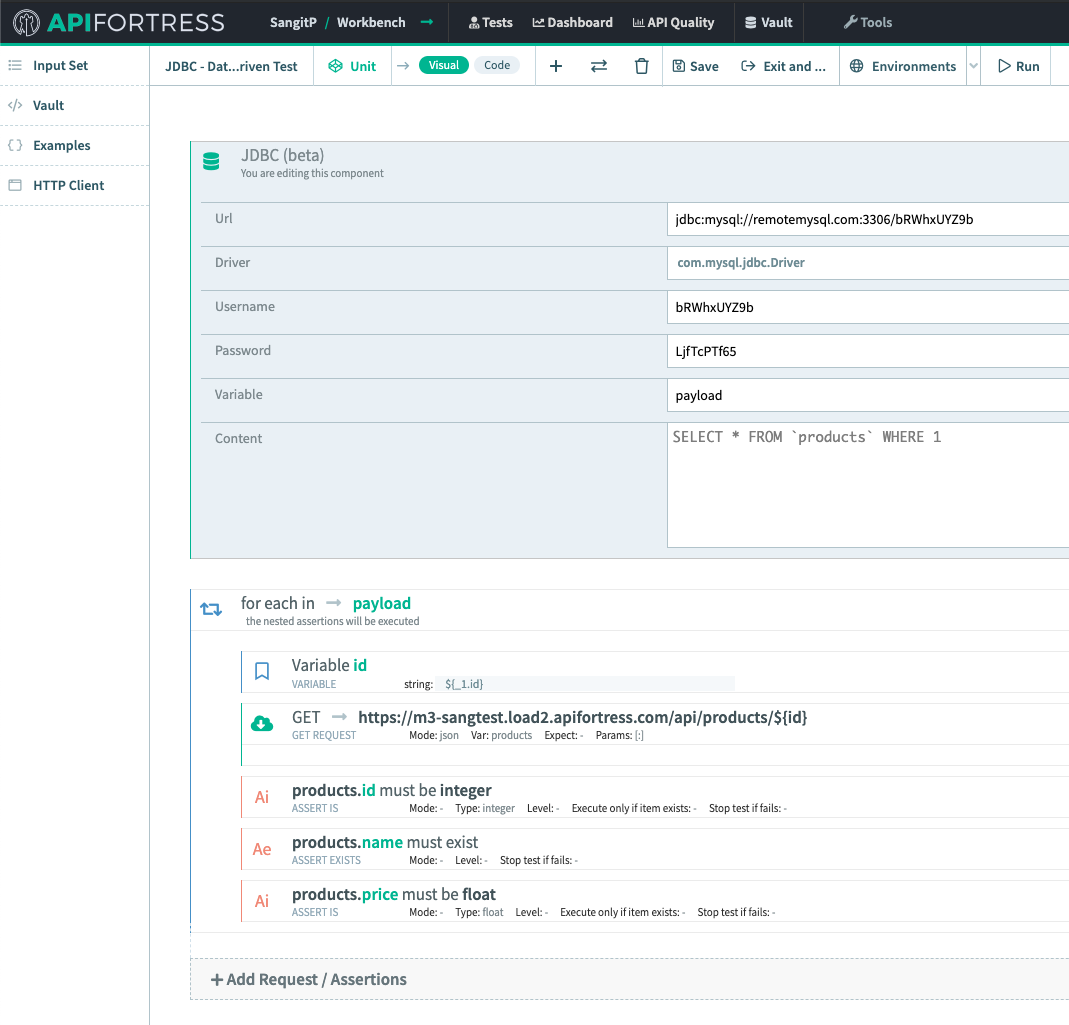
 Using the above example: let’s say that varName is defined as a boolean value so it can be either ‘true’ or ‘false’, in that case, there will be two requests; the first one will be a GET request to ‘https://mydomain/endpoint?firstParam=paramValue&secondParam=true’, parsing it as ‘json’ and saving it in the ‘payload’ variable; the second one, will be a GET request to ‘https://mydomain/endpoint?firstParam=paramValue&secondParam=false’, parsing it as ‘json’ and saving it in the ‘payload’ variable.
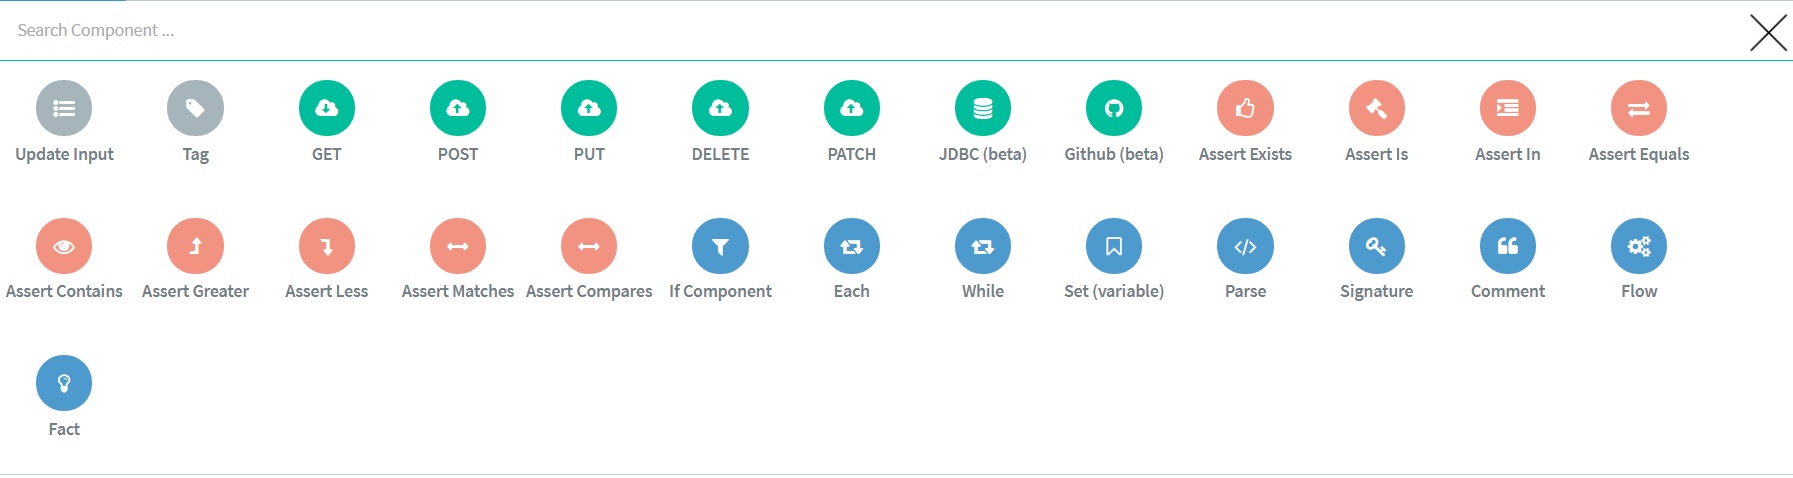
When all things are set up, you can confirm it by tapping on the ‘tick’ icon in the top right corner. After that, if you need to add headers, params or a body to the request you can do it by selecting the request and then tapping on the ‘Add component’: all the available components for each operation will be visible.
Using the above example: let’s say that varName is defined as a boolean value so it can be either ‘true’ or ‘false’, in that case, there will be two requests; the first one will be a GET request to ‘https://mydomain/endpoint?firstParam=paramValue&secondParam=true’, parsing it as ‘json’ and saving it in the ‘payload’ variable; the second one, will be a GET request to ‘https://mydomain/endpoint?firstParam=paramValue&secondParam=false’, parsing it as ‘json’ and saving it in the ‘payload’ variable.
When all things are set up, you can confirm it by tapping on the ‘tick’ icon in the top right corner. After that, if you need to add headers, params or a body to the request you can do it by selecting the request and then tapping on the ‘Add component’: all the available components for each operation will be visible.


